Buttermilk Fried Chicken
“If there’s a better fried chicken out there, I haven’t tasted it.”
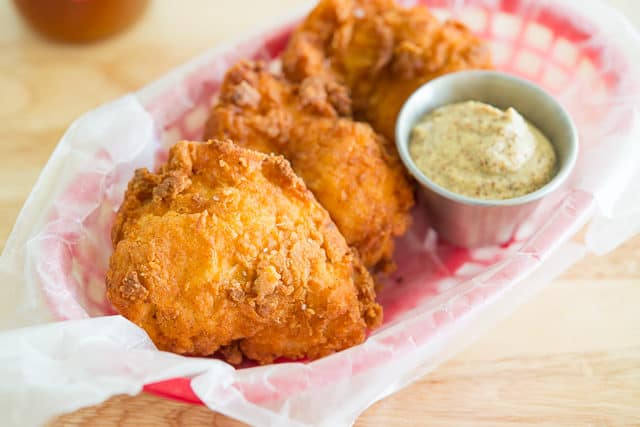
When world-renowned chef Thomas Keller makes a statement like that about a recipe, you know that it must be good. And indeed, this is the best Buttermilk Fried Chicken I’ve ever had. The meat is juicy and moist inside, with an extra crispy breading on the outside with a robust, feathered crunch.
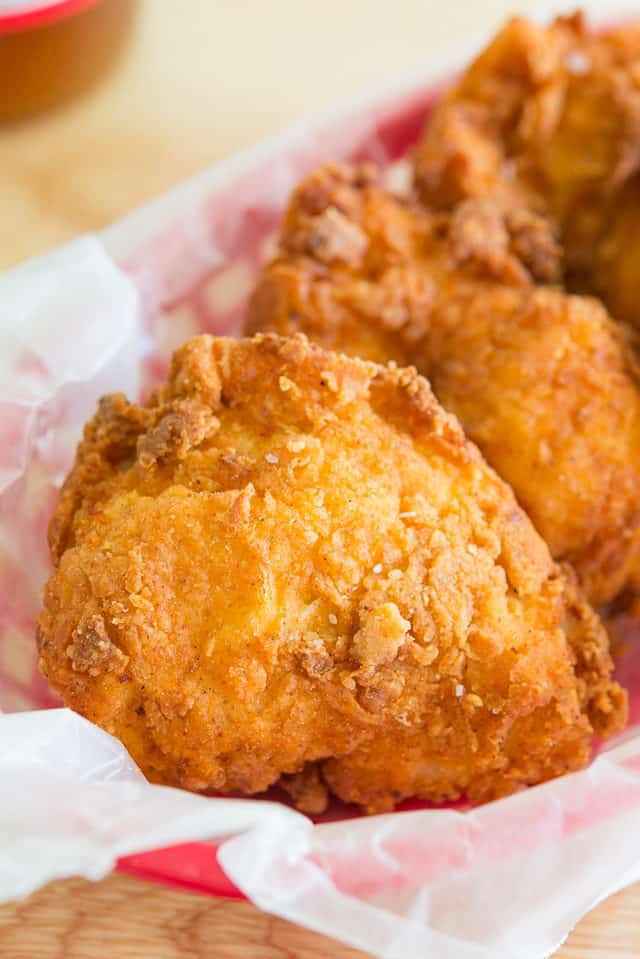
Several years back my brother bought me the cookbook Ad Hoc at Home (affiliate) for Christmas, and this recipe caught my eye immediately.
Fried chicken was not something I ate often, and I usually only had it at restaurants with sides of Potato Salad, Coleslaw, and Cornbread. But I’ve never eaten any version that’s better than this homemade fried chicken.
It’s incredibly juicy, crunchy, and flavorful, and it’s now become one of my go-to dishes for impressing guests and family who come to town for a visit.
Why This Recipe Is The Best
Guaranteed juicy inside – We’ll start with a brine, which will give us flavorful and juicy meat on the inside. It also gives us a little extra insurance against dry chicken in case the meat is overcooked.
Flavorful inside AND outside – Both the brine and the breading have flavors added to enhance the flavor of the chicken. The breading has spices like paprika and cayenne, and the brine has flavors of rosemary and peppercorn.
Extra crispy fried chicken breading – We will dip each piece of meat in the seasoned flour, then in buttermilk, then in seasoned flour again, which gives us a very feathered and crisp exterior after deep frying.
Use your favorite cuts of chicken – The recipe uses the whole bird cut into pieces, so there is an assortment of pieces to choose from (2 wings, 2 breasts, 2 thighs, 2 drumsticks). However, if you want to do just the breast, thighs, etc. you can certainly tweak it to use your favorite cut, or just do white meat or dark meat.
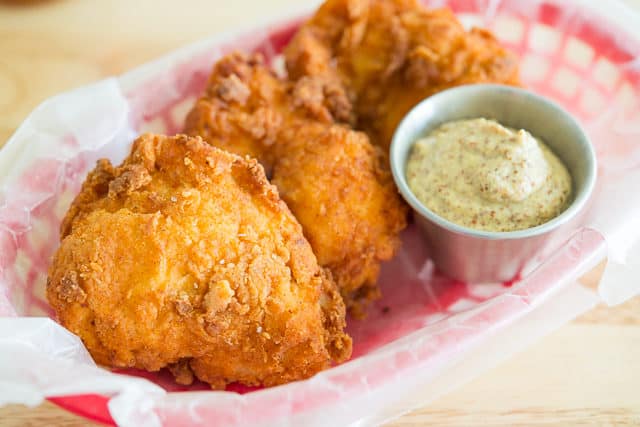
With all this said, this recipe is one that takes some planning and time to brine. But that’s what’s required to have the best end result, so don’t skip any steps!
Make the Brine:
To get started, make the fried chicken brine. This will make a HUGE difference in juiciness and flavor.
In a large pot, combine water, kosher salt, herbs, lemon, honey, peppercorns (black pepper, or tricolor mix), garlic and bay leaves:
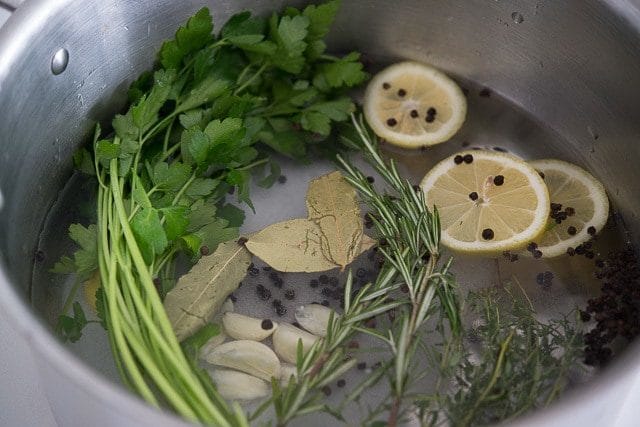
Bring to a boil for 1 minute, just to dissolve the salt, then chill the brine. I share notes in the recipe box on how to expedite this process if needed, but do not place cold chicken in a hot brine. This is not food safe.
Place the chicken pieces of your choice in the brine for 8 hours, covering with a lid or plastic wrap, then remove the meat from the liquid and pat dry.
Make the Breading:
For the fried chicken breading, mix together all purpose flour, garlic powder, onion powder, paprika, and cayenne pepper:
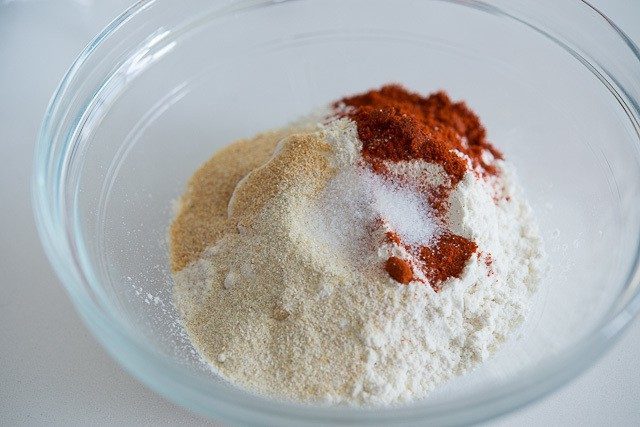
Feel free to play with the seasoning here in the flour mixture.
If you’ve got it, use smoked paprika instead of regular for an extra smokiness. You can also try adding some Sazon Seasoning or Cajun Seasoning instead.
Split the seasoned flour between two bowls, then place buttermilk in a third bowl.
Bread the Meat:
To batter each piece of chicken, first coat the meat in the seasoned flour:
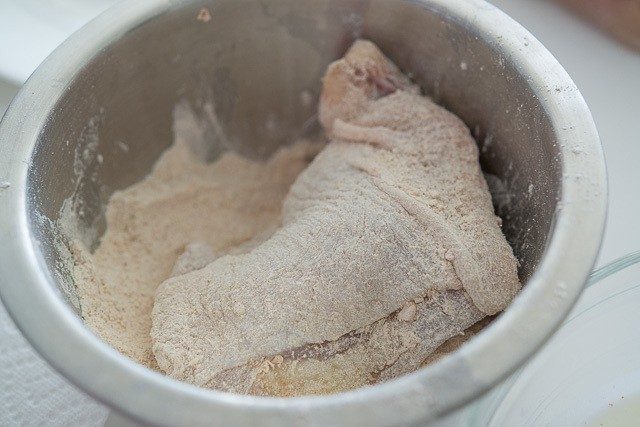
Shake off any excess, which will prevent the breading from falling off later, then dip it into the buttermilk:
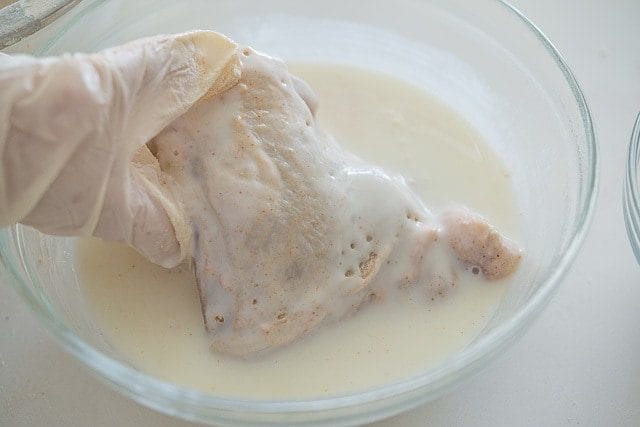
Again, let the excess drip off, then dip each coated chicken piece back into the seasoned flour for a second time.
The chicken is now ready to be deep fried in batches, until cooked through and golden brown (see this Oven “Fried” Chicken if you don’t want to deep fry).
I used to own a dedicated deep fryer but found it too difficult to clean, so I now simply use a heavy-bottomed pot and check the temperature using a thermometer. You could also use a deep cast-iron skillet.
How Long to Fry Each Piece
The cook time will vary slightly depending on what cut you’re cooking from the whole chicken. Always check the internal temperature using an instant-read thermometer
- Drumsticks – Fry at 320F for 10 minutes, until golden brown and at least 170F inside.
- Thighs – Fry at 320F for 10 minutes, until golden brown and at least 170F inside.
- Breasts – Fry at 340F for 6 to 7 minutes, until golden brown and at least 160F inside.
- Wings – Fry at 340F for 6 to 7 minutes, until golden brown and at least 160F inside.
Because I do all the cuts, I deep fry the drumsticks and chicken thighs together first, then raise the temperature and do the chicken breasts and wings next. Drain each cooked piece on paper towels to absorb excess oil.
What’s the Best Oil to Use?
As I discuss in my Homemade French Fries post, the absolute best fat to use is tallow. Tallow is beef fat, and it’s naturally a very stable fat that can tolerate high heat frying with the least amount of oxidation (I discuss this at length in my podcast).
It also has the best flavor and will keep the breading crispier for longer. The typical vegetable oils that are used for frying like soybean oil or canola oil do have a high smoke point as well, but they get soggy very quickly, which ruins the crispy exterior you want for the outside. With the tallow, I can pull leftovers out of the fridge the next day and the breading is still crisp.
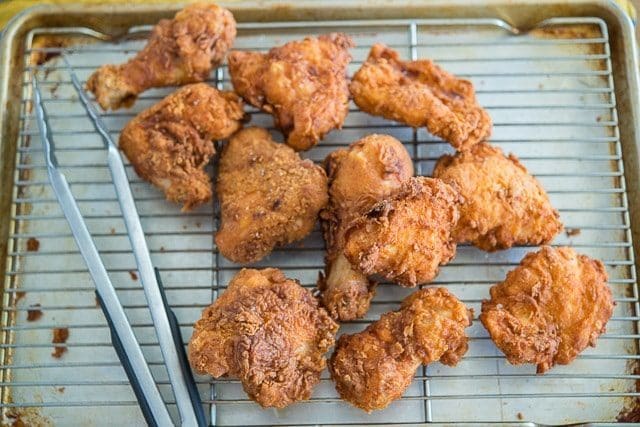
That’s some good fried chicken!
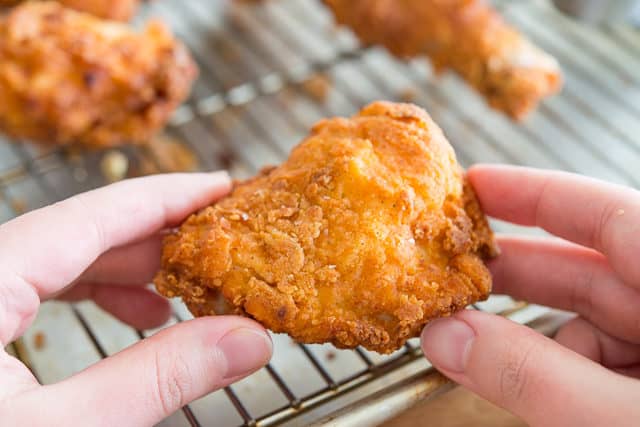
Regardless of the type of fat you use, let the fried chicken cool on a wire rack set over a baking sheet while you’re in between batches, to keep the outside breading crisp for as long as possible.
Also make sure to watch the hot oil and keep the oil temperature consistent for best results.
The chicken is absolutely flavorful enough to be eaten on its own, and I like to eat it without condiments so I can fully appreciate those flavors in the crispy crust.
But you can also serve it with your favorite condiments or sauces like BBQ Sauce, Aioli, Cilantro Jalapeño Sauce, or hot sauce.
Sides that Pair Well
For fried chicken sides, I recommend any of the following:
Other classic pairings are collard greens and mashed potatoes.
What to do with the used cooking oil?
One benefit of using a tallow instead of fats like soybean oil or peanut oil, is it’s stable enough that it can be reused again and again. I simply filter it to remove any crumbs or sediment, then use it for another deep fried recipe, such as Homemade Mozzarella Sticks, Fried Calamari or Homemade Corn Dogs.
Note: do not attempt to fry in olive oil for this recipe. It has a low smoke point and is not suitable.
Recipe FAQ and Expert Tips
Store in the refrigerator in an airtight container, for up to 3 days. Do not leave fried chicken out at room temperature for more than a couple hours.
First, know that the leftovers will never be as good as when it’s freshly made. However, the best method is to re-warm it in the oven, as the microwave will make the breading soggy. Try 300F for 10-15 minutes, and check if it’s warmed through. You can also reheat fried chicken in an air fryer, if you have one, using the same settings.
Yes, in an airtight container for up to 2 months. Let thaw in the fridge overnight before reheating.
More Favorite Meat Recipes:
Did you enjoy the recipe? Please leave a 5-star rating in the recipe card below and/or a review in the comments section further down the page. Or, follow me on Facebook, Instagram or Pinterest!

Buttermilk Fried Chicken
Ingredients
For the Brine:
- 8 cups water
- 1/3 cup kosher salt
- 1 lemon sliced
- 3 bay leaves
- 1 tbsp black peppercorns
- 1/4 bunch flat leaf parsley
- 2 sprigs fresh rosemary
- 2 tbsp honey
- 4 cloves garlic smashed
For the Fried Chicken:
- 3 lb whole chicken* cut into 10 pieces (breast cut in half)
- 2 cups all-purpose flour
- 1.5 tbsp garlic powder
- 1.5 tbsp onion powder
- 1.5 tsp paprika
- 1.5 tsp cayenne pepper
- 1 tsp salt
- 1 tsp pepper
- 2 cups buttermilk
- tallow, for frying**
Suggested Side Dishes for Pairing:
- red potato salad
- coleslaw
- homemade cornbread
Instructions
- Place all the chicken brine ingredients in a pot and bring to a boil.
- Boil the brine for 1 minute, until the salt dissolves, then chill it completely. If you’re in a hurry, you can place the mixture in a bowl and set that in an ice bath. Otherwise, let it chill to room temperature, then place it in the fridge.
- Once the mixture is chilled, place the chicken in the brine for 8 hours. Try not to go beyond 8 hours or the chicken will get too salty.
- Discard the brine and pat the chicken very dry with paper towels. Let the chicken sit at room temperature for 1 hour while you prep the other ingredients.
- Mix the flour with the garlic powder, onion powder, paprika, cayenne, salt, and pepper. Split this between two bowls. Place the buttermilk in a third bowl, and set it in between the two spiced flour bowls.
- Using either a dedicated deep fryer or a heavy-bottomed pot at least 10" wide and checking the temperature with a thermometer, add enough tallow to come a few inches up the pot. Preheat the temperature to 320F.
- In the meantime, bread the drumsticks and thighs by dipping each piece into the flour mixture, shaking off the excess, then the buttermilk, shaking off the excess, then the flour mixture again.
- Fry the drumsticks and thighs for 10 minutes, until golden brown and 170F inside, then drain on paper towels.
- Raise the fryer heat to 340F. Dip the wings and breasts into the flour, shake off the excess, then the buttermilk, shake off the excess, then the flour again.
- Fry the wings and breasts for 6 to 7 minutes, until golden brown and cooked to 160F, then drain on paper towels. Enjoy!
Notes
Nutrition
Nutrition is estimated using a food database and is only intended to be used as a guideline for informational purposes.

44 Comments on “Buttermilk Fried Chicken”
Made this for the first time tonight . In case anyone is wondering if the 12 hour brine is worth it, it is. Absolutely the best fried chicken I’ve ever eaten . Great recipe, I wouldn’t change a thing.
Thank you!! Cheers!
Where do you get that tallow oil?
Whole Foods carries some made by Epic, and a lot of Mexican grocers have tallow as well. Personally I order boxes from Fatworks and it’s shipped to me.
Where do you get Tallow? I have used Lard before, but don’t know where to get tallow
Whole Foods has it, but you can also order it. I order my favorite from a company called Fatworks.
this should have been Thomas Keller’s “Killer” Fried Chicken because it’s THAT good
So happy you made it. It’s really a treat!
Como conseguir tradução???
PLEASE!!!!!
I made this from the book (Ad Hoc At Home) and it says 12 hours in the brine. I wish i had found your variation first because it was really salty. But the crust was perfect and the meat juicy and delicious overall.
This reminds me of my mother’s fried chicken although she never brined hers. Then again she wasn’t a Thomas Keller either. Thank you for sharing the recipe…I can’t wait to give it a try.
Can you bake and still get the same crispiness? Thanks! (also a vegetarian who cooks meat for my family! lol)
When I was really young I worked at Popeyes fried chicken then with oil – you can do what my family does and not use oil often and make sure you fry your onion rings french fries zucchini maybe some mushrooms also while you have the oil out – but in my professional and personal experience I could tell you that there is no way to get chicken crispier than using the oil so at least my family we only do it like once a month so that we are eating healthy most of the month… But then having a wonderful fried food extravaganza!
I am a vegetarian, but occasionally cook meat for my husband. Does this work well with an air fryer?
I’ve never cooked with an air fryer so I can’t say one way or another. My suggestion would be to find a recipe specific for the air fryer since it’s a specialized appliance.
A lot of work but SO SO SO Good
I can’t wait to try this. Fried chicken is my daughter’s favorite food and my husband could eat chicken at every meal so I’m always on the prowl for good chicken recipes. I bet they’ll love this.
Yummm. really good.
What kind of oil are you using to fry?
Hi Tamera, thanks for asking this, I have updated the recipe. TK uses canola or peanut, I use canola personally. Peanut is the best if you feel like splurging but I think canola is fine. I have done vegetable before too.
I’ve never followed a recipe that turned out beyond expectations like this did. What great fried chicken – tastes great outta the fridge the next day. I might play around with the spice mix by adding some herbs to the flour, not that it needs it.
I recommend putting chicken pieces on a rack instead of paper towel once cooked to keep them crunchy.
Hi David, I missed this comment somehow! SO glad you loved the fried chicken. I agree, it still tastes good the next day!! Glad you enjoyed =)