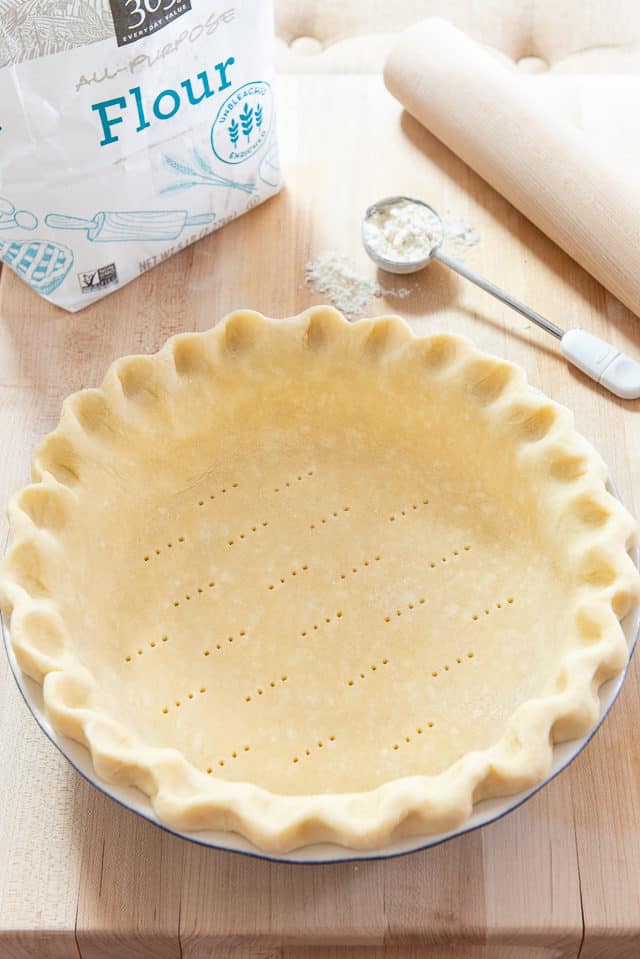
Butter Pie Crust
If you’re looking for the absolute best pie crust with superior flavor and flakiness, this is it! This All Butter Pie Crust is way better than anything you can buy at the store, because it uses real butter, and more than the standard recipe, for extra richness. I share my tips below for keeping the pie dough cold and easy to work with.
I know flaky homemade pie crust has a scary reputation, but it tastes SO much better than any store-bought rendition I’ve ever encountered, and it’s really not so bad to make yourself. I actually think half of its difficult reputation is just the hype around how hard it is to make.
I will show you how setting yourself up for success by moving quickly and having everything at the right temperature from the start will get you most of the way there. If you take a few minutes to plan, you will have success. And you’ll be rewarded with a crust that’s much more delicious than anything you can get from the store.
Why This Recipe Is The Best
Superior flavor – Hands down, if you want the best flavor, you must use butter. No other fat comes close in terms of deliciousness.
Extra flaky – We’re not using shortening here, so how do we get this butter crust extra flaky? By using more butter than what’s considered standard for pie crust. It’s extra buttery and flaky!
Minimal handling – Several techniques in the method minimize handling, which keeps the pie crust dough tender and also keeps the butter cold.
Customizable – I share below the three types of pie crust: Pate Brisée , Pate Sucrée, and Nut or Cheese Pie Dough. I give instructions for how to customize this recipe into these three types for different baking preparations.
A good homemade pie crust will take your recipes to the next level, whether you’re making a savory Chicken Pot Pie for dinner or a Lemon Buttermilk Pie for dessert.
The Best Dough Is Made with All Butter
Some people like to add other fats like shortening to make the crust “easier to work with.” This is not necessary, and shortening is gross.
So long as you have all your ingredients and equipment ready to go when it’s time to make the crust, it doesn’t take more than a few minutes to bring the pie dough together, and it will be cold and easy to handle.
Also, nothing compares to the flavor of butter, and butter gives the pie dough plenty of flakiness. Plus, shortening leaves a gross film on your teeth when you eat it.
The 4 Ingredients You’ll Need
Flour, salt, butter, and water are the four simple ingredients you need to make this easy pie crust recipe.
The Most Important Tips for Best Results
The MOST important: do not let your pie dough get warm. If you only focus on one thing, this is the one. Have your ice water ready in a jar, have your plastic wrap sitting out on the counter, and move through everything quickly, without interruptions. You want to keep the butter from melting, because if it does, you won’t get the flaky pie crust you’re working for.
Do not overwork the dough. In my experience, it is always better to have to patch little parts of the pie dough together a little bit rather than have a tough pastry. Pie dough can almost always be patched together by hand, even if it’s annoying.
The brands you use matters – Flours in various parts of the country have different protein/gluten contents, so you will always have to make adjustments to suit the characteristics of your flour, butter, and humidity. I’ve been making my own homemade pie crust for 15 years in many different climates, and there’s always a bit of fine tuning depending on the conditions. Follow the method closely, but if something looks like it needs more liquid, more mixing, etc, trust your intuition about how it looks and feels.
The Best Flour to Use
While they may all be labeled “all-purpose flour,” different brands have different protein contents.
I like using a moderate protein all-purpose flour, and prefer Gold Medal or Hodgson Mills flour. You can check this list for protein contents of major brands. You’ll see that King Arthur Flour has one of the highest, so my recommendation is to avoid that here, to minimize gluten development and toughness in your crust.
The Best Butter to Use
It’s incredible how different brands make wildly different tasting butters. Some don’t taste like much of anything, while others have incredibly rich flavor, that slightly sweet dairy fat flavor all humans love. For the best crust, buy one that has delicious flavor. My favorite is Kerrygold. Plugra and Vermont Creamery also make great butter. If you look up butter taste tests online, you’ll see that they are definitely not all equal.
The Three Major Types of Pie Crust
There are three variations for types of pie crust, and each one is good for different preparations.
- Pate Brisée-This is the standard pie dough, used mostly for savory tarts or quiches. It’s what we’re making here.
- Pate Sucrée-This is a sweet dough, and you add sugar to sweeten the crust slightly. I suggest 1 tablespoon of sugar per cup of flour.
- Nut or Cheese Dough-You can add a couple tablespoons of grated Parmigiano Reggiano cheese or finely ground nuts to replace a small amount of the flour in either a Pate Brisée or Pate Sucrée.
Is the Dough Best Made by Hand or With a Machine?
After years of testing the different methods for making homemade pie crust, my favorite way is to use the food processor.
I find using the food processor to be superior to making the crust by hand or in the stand mixer. So long as you’re really careful not to overwork the dough, it is the quickest method, and prevents the butter from warming up too much. It also makes everything really even and consistent.
If you want to make this by hand, then you can use a pastry cutter (sometimes called a pastry blender) to quickly cut the butter into the dry ingredients. Make sure to do this as quickly as possible so you keep the butter cold. Cold butter gives you flaky layers.
How to Make the Dough Step-by-Step:
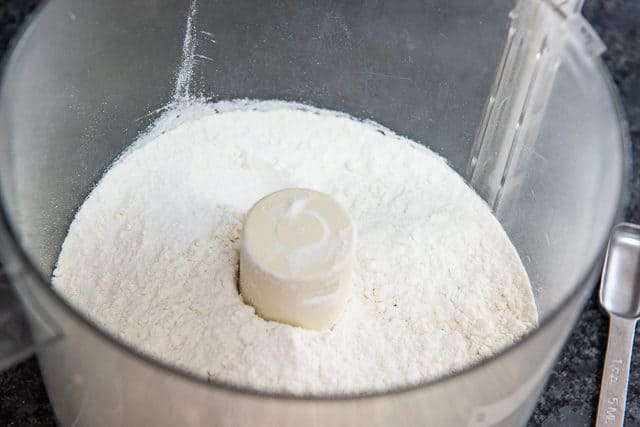
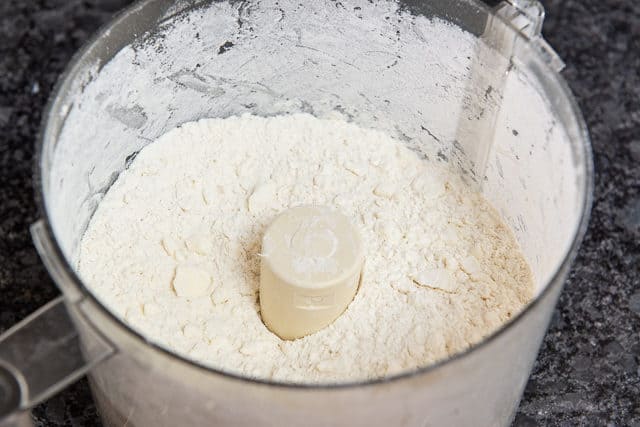
In a food processor, combine all-purpose flour and salt, and pulse a few times to combine:
If you were adding sugar for a sweet crust (pate sucrée), you’d pulse it here with the flour mixture. I recommend adding 1 tablespoon of sugar per cup of flour. However, even for sweet pies like Lemon Buttermilk Pie, I tend not to add extra sugar.
Next cut two and a half sticks of unsalted butter into cubes:
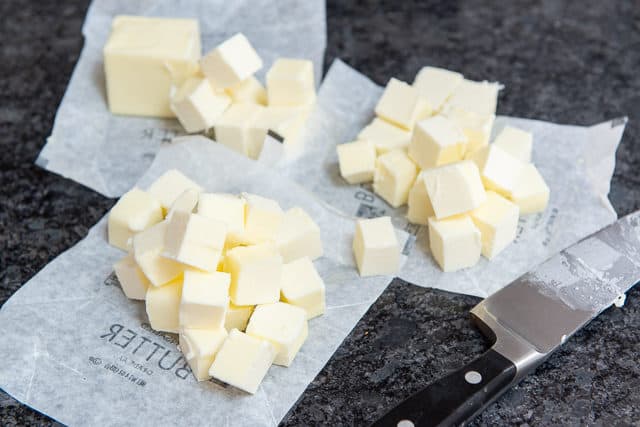
The butter should be cold straight from the fridge, and if you want, you can even cut the cubes ahead of time and keep them in the fridge, ready to go.
This is intentionally more butter than what’s standard for pie crust. The dough holds it well, and it gives extra flakiness.
Add the cold butter cubes to the food processor:
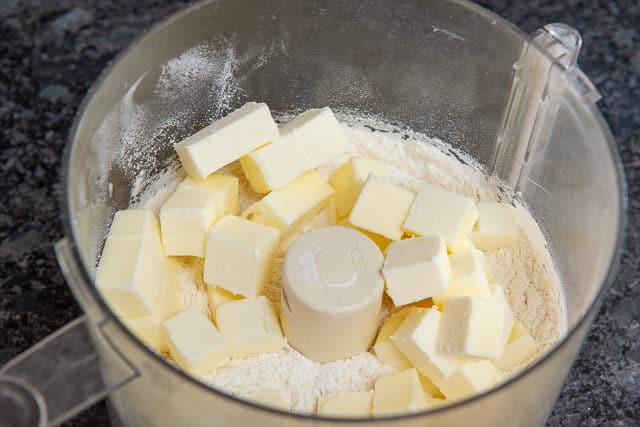
Pulse about 10-15 times (this number really depends on how long your “pulse” is), until the butter is broken down into pieces that are somewhere between the size of a chickpea and a green pea.
You’ll see below that I have some bigger and smaller pieces here. That’s perfect:
Now it’s time to add the liquid. I like to have a “master ice container” nearby, from which I can pour ice cold water into a small measuring cup.
Otherwise it’s hard to know exactly how much ice water you’re adding with the ice cubes displacing things.
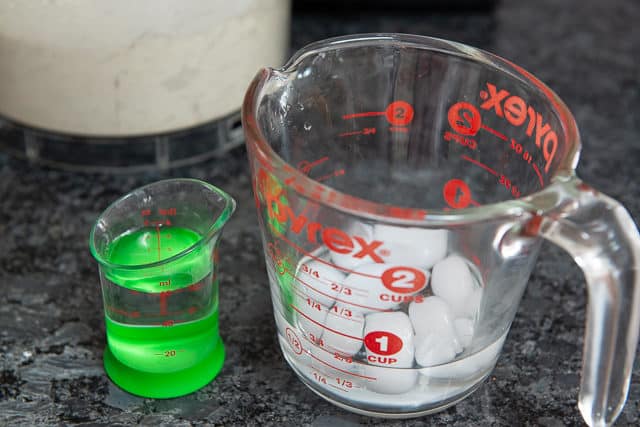
I’ve tried a lot of “liquid pie hacks” like adding vodka or vinegar, and I’ve never been able to detect much difference in the end results. Save the vodka for your cocktails and just use regular ice water.
Drizzle in the ice water to mix, and pulse until the dough starts pushing up the sides and has a clumpy texture:

You’ll get to know what this looks like just by eye, but you can also test to make sure that if you gently squeeze a clump together, it holds together beautifully:
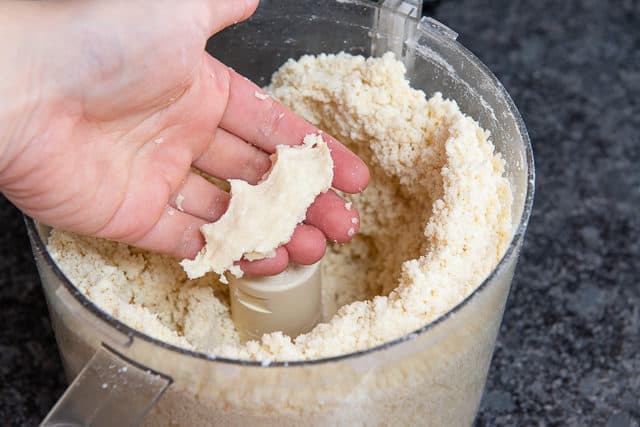
You really don’t want to use much water here, and it’s always better to start with less, because once you add it, you can’t take it away. You need just enough water so that the crumbs hold together when squeezed. I usually end up using a total of a 1/2 cup plus a few tablespoons of ice water.
Always Err On The Side of Caution
Knowing when to stop pulsing the dough is probably the hardest part to get right, but remember that you can never “unmix” the dough, so err on the side of caution.
If you don’t mix the pie dough together enough, it will be too crumbly and won’t hold together. And if you mix too much, you may overwork the dough and develop excess gluten (which will make the pie crust tough).
So try to nail that point where the dough still looks a little crumbly, but is easy to shape into a smooth, cohesive dough with your hands.
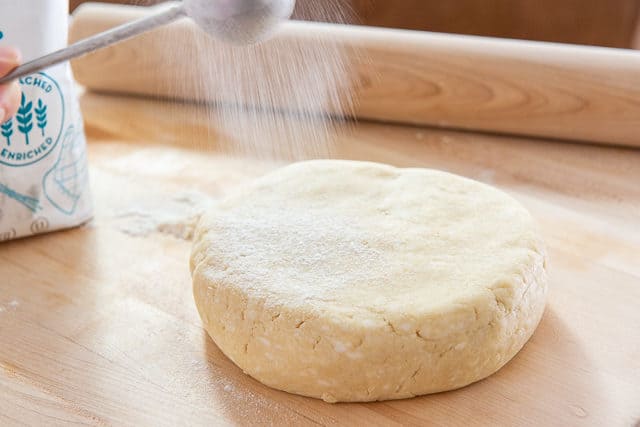
Shape the dough into a somewhat flat circle, or in preparation for whatever shape you need for later (so, if you’re making a slab pie for instance, you should probably shape it into a rectangle instead of a circle).
Note how the dough is marbled with butter:
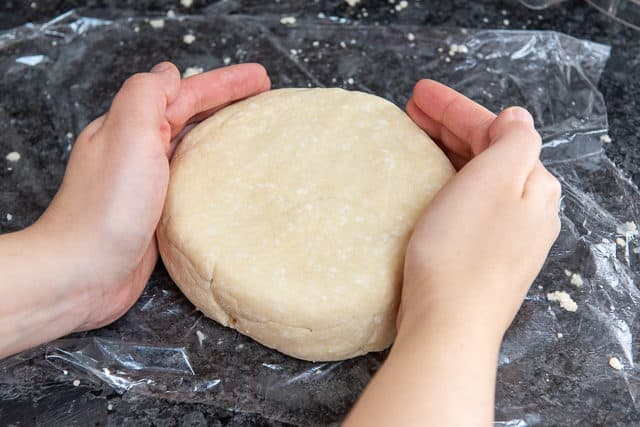
That means flaky, delicate, and delicious pie crust!
Wrap the pie dough well with a piece of plastic wrap, so it doesn’t dry out:
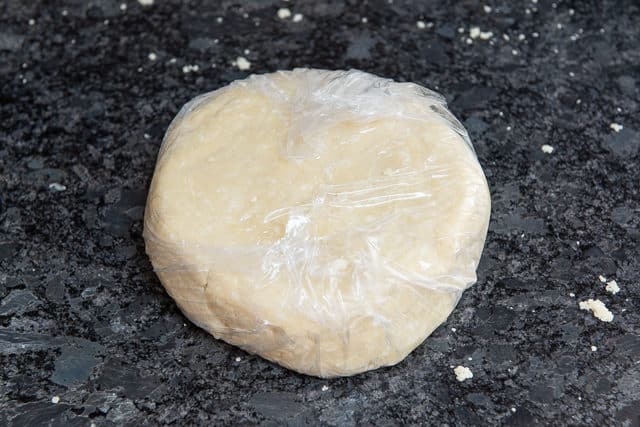
And now, chill the dough for at least one hour. Do not use the dough right away, or you’ll have major shrinking problems when you go to bake it. The chill time is essential, and you’ll learn to plan ahead for any pie recipe you make.
After the dough is cold, you can use it for any recipe you’d like. Place the dough on a lightly floured surface, and use a rolling pin to quickly roll it out to your required dimensions. Remember that this is a double crust pie dough recipe, so if you’re using a classic 9″ pie pan, split the dough into two sections, first. You will have one top crust and one bottom crust, or enough dough for two single pies.
Make sure to roll out the dough relatively quickly on your clean work surface, as you do not want it to come to room temperature. Cold dough into the oven means a flaky crust.
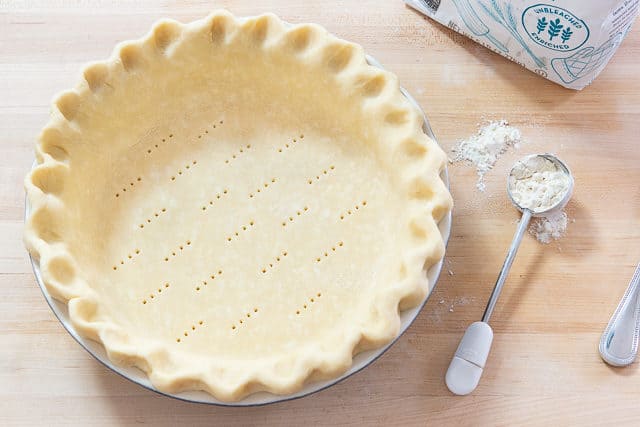
The recipe you’re following should specify the following parameters, but for most pie recipes, I generally recommend considering a blind bake. Blind baking simply means you pre-bake the bottom layer partially before filling it, and this ensures that the bottom of the crust isn’t underdone in your end results. Make sure to weigh the crust down with pie weights, and if you don’t have some, you can simply use dry rice or beans on top of parchment paper or aluminum foil to keep the crust anchored down.
No matter what kind of pie filling you’re using, I always recommend brushing the exposed pie crust with egg wash, which gives the crust an amazing golden color and sheen.
Suggested Uses
For savory pies, this Tomato Tart, Potato Tart with Bacon, Gruyere, and Rosemary, and Broccoli Cheddar Quiche are some great recipes to make with homemade crust.
There are also many great sweet recipe uses like Berry Cobblers, Apple Pie Pops, Peach Crostata, Pumpkin Pie, and Apple Tarte Tatin.
You can even make your own homemade Poptarts like these Strawberry Toaster Tarts!
Recipe Tips and FAQ
Yes, pie dough freezes beautifully. Wrap it so it doesn’t dry out or get freezer burned, and store for up to 2 months.
Do not store pie crust in the fridge for more than one day in the fridge, or it will get moldy. You will notice black specks all over the dough, and in that case, you should throw it out. If you want to keep pie crust longer than a day, it’s best to store it in the freezer.
Absolutely! Keep it in the freezer for up to 2 months, or keep in the fridge for 1 day.
Tried this recipe? Leave a rating and comment below — I’d love to hear how it turned out! Or, follow me on Facebook, Instagram or Pinterest!
Butter Pie Crust
Ingredients
- 12.5 oz all purpose flour, by weight (2.5 cups, if measuring)
- 1/2 tsp kosher salt
- 20 tbsp unsalted butter, diced into cubes, cold (2.5 sticks)
- ice cold water (I usually need at least 1/2 cup, plus a few tbsp more)
Instructions
- Combine the flour and salt in a food processor and pulse a couple times to aerate and mix together.
- Add the butter and pulse about 10-15 times, until the butter is broken down into pieces somewhere between the size of a chickpea and a sweet pea. If you have some bigger and some smaller pieces, that’s great. Just be careful not to overpulse and break down the butter too much.
- Add 1/2 cup of ice water through the feed tube, pulsing occasionally to mix, to distribute the liquid and moisten the dough. You’re looking for the dough to form into moist crumbles that build up on the sides of the food processor (see photo in blog post), and combine into a smooth clump when gently squeezed with your hand. If the dough is too dry, add an additional tablespoon of ice water, and pulse, until the dough is sufficiently moistened. Repeat as needed, but you shouldn’t need to add more than a few tablespoons of extra water at most.
- Remove the dough from the food processor to a piece of plastic wrap, and shape the dough into a flat disk or rectangle using your hands. If the dough is a bit crumbly, you may knead it gently a few times to make it smooth. Wrap the dough in plastic wrap, and chill in the fridge for at least one hour, preferably two.
- After the dough is thoroughly chilled (it should be firm to the touch), it is ready to be rolled and used for whatever recipe you’d like. Enjoy!
Notes
Nutrition
Nutrition is estimated using a food database and is only intended to be used as a guideline for informational purposes.
54 Comments on “Butter Pie Crust”
Can you make this with only 6 tbsp. of butter? Let me know if anyone has reduced the butter amount. Interested in the results. Thanks
Hi Peg, I would not recommend reducing the butter that much, it wouldn’t combine properly and really would not turn into any kind of pie crust
Easy and well informative recipe to follow. Thanks so much for the advice
Worked for me.
Variation on the second time I used
1 cup all purpose flour
1/4 cup unsalted butter
Optional – a small pinch baking powder
About 1.5 tablespoons half and half, the kind with just milk and cream, nothing else
This is basically the same basis for pie crust, scones, biscuits, shortbread and lots of cookies
For breadsticks, roll flat one cm thick, cut into strips 1.5 cm wide, bake on their side so that the smaller dimension is on the bottom.
With practice I only need to measure the flour and eyeball measure the rest. Under fifteen minutes from start to in the oven, bake 15 minutes at 385 Fahrenheit.
Jadore!!! thanks for sharing. question ? can i freeze it
great pie crust~ the best recipe I’ve tried over the years
Thanks So Much for sharing this Recipe! It’s consistently great – and, like others here, after years of trying and missing I think I’ve got it down. So interesting about the quality of flour and butter – it made a huge difference. My Mom made the best apple pie crusts and I think I’ve finally caught up!
Great instructions
I don’t use a food processor as many people don’t and writing the directions with that in mind would be appreciated by them all, I believe.
It does sound like a delicious crust recipe with all that butter and I’m going to try it out.
Thanks for writing it.
Best pie crust I have made in my life. Nice and flaky.
I used a pastry cutter when I made the dough. Super easy.
This makes me so happy to hear! Glad it went well for you.
We absolutelt LOVE how Easy and Delicious this crust is!! The first time we used it for a rusticpeach tart, second for banana cream pie. Thank ypu for sharing !!!
Best pie crust I have ever made and I have tried to make them a lot! Printing this recipe for my file- thank you!
That is awesome!! So glad to hear. Happy baking!
I have a much easier recipe where you put the ingredients (flour, oil with a bit of water mixed in, and a little sugar and salt) all in the pie plate, and mix it there with a fork. Then press it out and shape with your fingers…and you’re done. It’s very, very good and so darned easy. You’ve given me an idea, tho…I’m going to try melted butter in place of the oil, leaving the other ingredients the same (except maybe won’t need the salt anymore), and see how that works. I use butter in other recipes when oil is called for, and it’s always been an improvement.
That’s a press-in pie crust. I agree, it’s very easy and good, but it’s definitely a very different texture than this method. So all what you prefer! Happy cooking.
I use this recipe for making all sorts of pies. I make spinach pies, pepperoni,cheese,sauce pies as well as dessert pies for my sister. I should mention that I substitute GLUTEN free flour(cup 4 cup) as she has Celiac disease. This is by far the ABSOLUTE BEST crust recipe. The flavor is beyond compare, and flaky, WOW. And if you have ever worked with gluten free flour it can be a monster to say the least.
That’s wonderful, and thanks for sharing that you used gluten free flour!
How would you defrost it?
Hi, Donna– I am guessing you either put in the fridge to slowly defrost the day before, or I put it out on the counter in the morning, but keep checking with my finger as time passes, and pop it back into the fridge when it’s soft, but still very cold…. until I am ready to roll it out later that day.
do you have to use a food processor or can you use your hands?
Hi. One question, if I am making it for a chicken pot pie, then I’ll need to double up the recipe to get two crusts, correct?
This yields 2 standard pie crusts, so you need one full batch of this.
What type of pie pan is best? Ceramic, glass or Stainless?