

How to Make Homemade Aioli
Learn how to make aioli in just 10 minutes with 5 simple ingredients, no special equipment required! This versatile sauce is mayonnaise’s richer, garlicky cousin and can be spread on sandwiches, used as a dip, served with fish, and more.
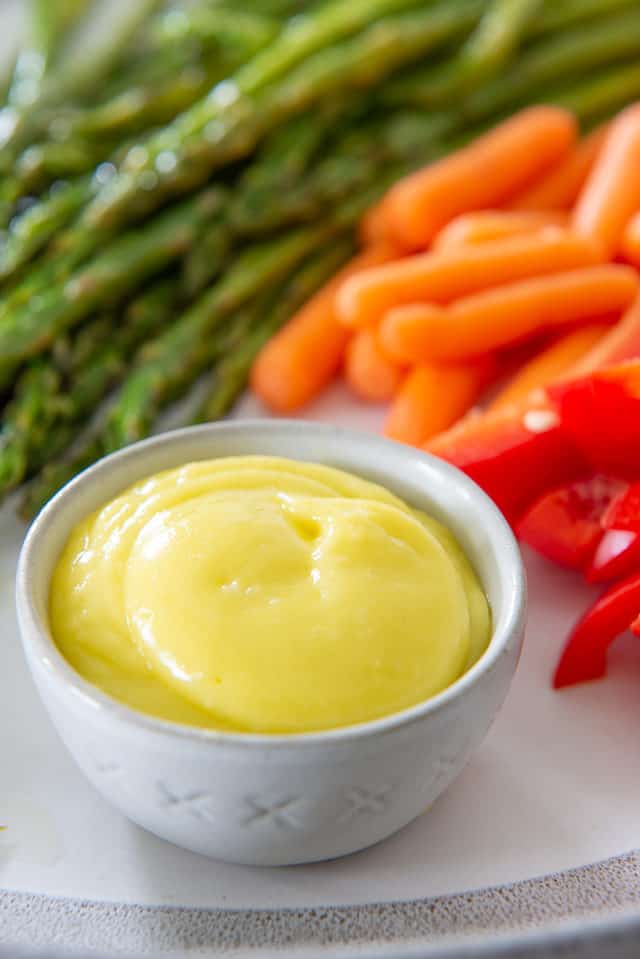
Table of contents
I used to think of aioli as a “restaurant food” — something complicated enough that you could only get it at upscale restaurants.
But the truth is that aioli is outrageously easy to make at home. You only need 10 minutes, 5 ingredients, and zero special equipment.
Now, just like homemade mayonnaise, I make it all of the time. I’ve made it so many times that I’ve perfected this recipe so you get just the right amount of garlic flavor in a perfectly thick, easy-to-make sauce.
What Readers are Saying
“Great basic aioli recipe, thanks! I used a microplane to grate the garlic and it all came out perfectly.” -Bobs
“So good! Tasted just like the aioli I get with fries at my favorite restaurant.” -Shelly
What is Aioli?
Aioli (sometimes also called “allioli”) is a cold condiment made by emulsifying garlic and olive oil. While there are different styles of aioli, the most common in America is a French-style aioli, which includes an egg yolk, making it similar to mayonnaise. This is the method I use in this recipe.
While mayonnaise and aioli are made with similar techniques, the two condiments have slightly different ingredient lists and flavor profiles. Mayonnaise is often made using a whole egg and has a more subtle flavor. Aioli is made with just the egg yolk and has a distinct garlic flavor.
Some flavored aioli recipes incorporate other ingredients, such as fresh herbs, pesto, anchovies, and more. The term “garlic aioli” is sometimes used to differentiate between the classic aioli flavor profile and other flavors of aioli.
Why Make Your Own Aioli?
If you’ve only ever had store-bought aioli, you truly don’t know how good this stuff can be.
Just like mass-produced mayo is less flavorful and more gloopy than homemade mayo, shelf-stable aioli is less flavorful and has a less desirable texture than the homemade stuff.
Since this recipe only requires a few staple ingredients and takes 10 minutes to make by hand, it’s quick and easy to whip up at a moment’s notice. The flavor is fresher, the texture is creamier, and you can control the quality of the ingredients and just how much seasoning goes into it.
Recipe Testing Notes and Tips
- Buy fresh garlic in the bulb, not pre-peeled garlic – I know it’s tempting to buy those big plastic tubs of peeled garlic for convenience, and that’s totally justifiable for recipes like Chicken with Forty Cloves of Garlic where you’re using tons of garlic. But for this recipe, buy fresh garlic in the bulb and peel it fresh for the recipe.
- Whisk the oil in slowly – Adding the oil slowly, especially at first, makes for the creamiest aioli with a perfect, thick texture. Take your time with this step!
- Season well – You’ll notice that the recipe calls for salt and fresh lemon juice to balance out the flavors of the aioli. Feel free to add more salt and fresh lemon juice per your taste. The acidity of the lemon is especially important for balancing out the richness of this condiment.
Ingredient Notes
For the full recipe, including ingredient amounts, scroll down to the printable recipe card below.
- Egg yolk: Since this is a cold, uncooked sauce, the egg yolk does not get cooked in this recipe. If you have concerns about raw egg, you can use pasteurized eggs.
- Garlic: Instead of mincing the garlic for this recipe, I prefer to press it with a garlic press. You could also grate it using a microplane. I find that this gives the sauce a smoother texture and a more consistent flavor in every bite.
- Lemon juice: This adds acidity to balance the richness of the aioli. Use freshly squeezed lemon juice for the best flavor.
- Salt: I prefer to use kosher salt in this recipe.
- Olive oil: Keep in mind that the oil you use can impact the flavor of the final aioli. For that reason, I recommend using a more neutral-flavored olive oil, rather than something with a stronger, fruity flavor like extra virgin olive oil. You can also use any other neutral oil you prefer, such as avocado oil.
You can also add black pepper to the aioli if you like. Keep in mind that it will show up in the aioli, so I often leave it out for appearance.
How to Make Aioli (Step-by-Step Overview)
If this is your first time making homemade aioli, don’t worry—it’s a really simple process. I’ll walk you through each step so you can know what to watch for as you whisk the sauce together.
In a large bowl, whisk together all of the ingredients except for the oil. Use a larger bowl than you think you’ll need so you have plenty of space for whisking.
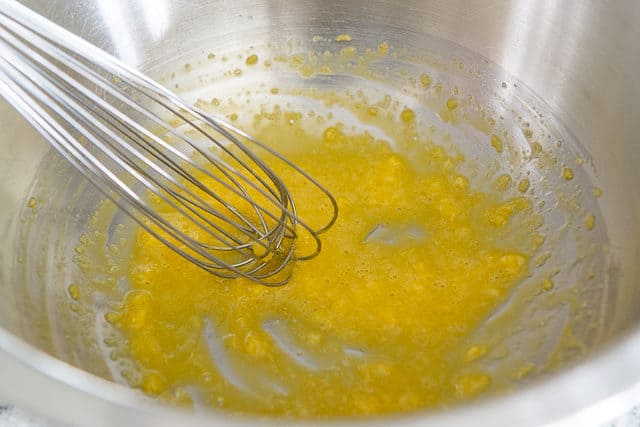
Now slowly start to add the oil, whisking as you add it. I like to pour the oil from a measuring cup with a spout. You could also add it to a squeeze bottle so you can easily control the flow of the oil.
Start by adding just a few drops of the oil at a time, increasing the stream as the aioli starts to thicken. In general, the slower you stream in the oil, the thicker the aioli will be. I usually take about 60-90 seconds total to incorporate the oil, which ensures a properly emulsified sauce.

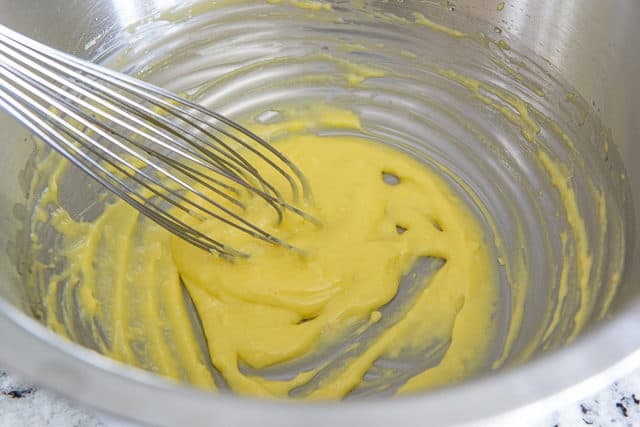
Continue to add the oil in a steady stream, whisking vigorously until all of the oil is incorporated and the aioli is thick and creamy.
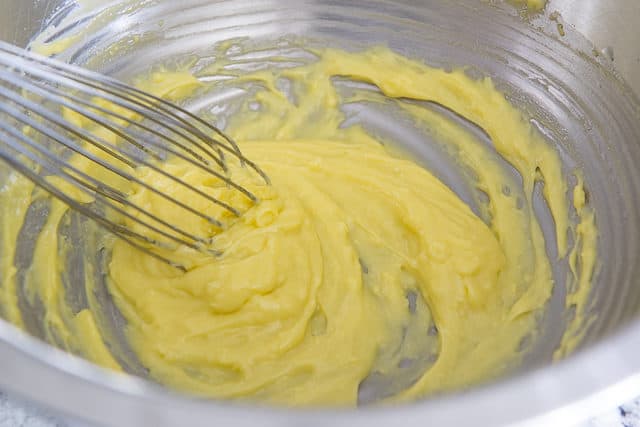
Now taste the aioli and adjust the seasoning if needed. Add more salt, lemon juice, or pepper as desired before serving or storing for later.
Storage
I find that homemade aioli tastes best within the first 24 hours, but it will keep well in an airtight container in the fridge for up to 5 days. Do not freeze, as this will cause the emulsion to break.
Be sure to store it in a sterile container and only spoon it out with clean utensils (and never stick your fingers in it) so it stays fresh as long as possible.
Flavor Variations
A traditional aioli is flavored very simply with garlic, salt, and a bit of lemon as we’ve done here. But there are many different variations you can make if you’d like to add other flavors. This can really take the experience to a whole new level!
- Fresh herbs – Whisk in your favorite fresh, finely minced herbs at the end. I love fresh thyme, rosemary, or even fresh dill when serving this with fish entrees like Baked Salmon or Crab Cakes.
- Black garlic – Use black garlic paste in place of fresh garlic for a rich umami flavor.
- Dijon mustard – Whisk in your favorite Dijon mustard (smooth or grainy) at the end.
- Combine sauces – Mix other sauces such as roasted red pepper sauce or homemade basil pesto in with your aioli for a custom sauce.
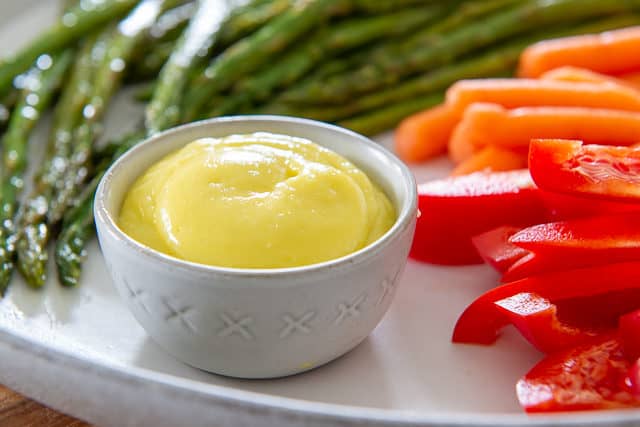
Uses and Serving Suggestions
Serve your homemade aioli cold or at room temperature with foods like Potato Croquettes, Steak Fries, and Crispy Smashed Potatoes. Potatoes and aioli are a match made in heaven, and homemade french fries are always better with a dipping sauce!
Aioli also pairs really well with fish. Try it on top of salmon cakes or even use it in place of the mayo when making my lobster roll recipe.
Recipe Tips and FAQ
For a thinner aioli, whisk the oil in more quickly overall. Still start slowly at the beginning with only a few drops, and proceed with a thin stream as the egg incorporates the oil. Generally speaking, adding the oil more slowly makes a thicker aioli. Incorporating it in a faster stream makes for a thinner sauce.
Yes. Because eggs are not dairy, this aioli recipe is dairy free. It is also keto friendly, paleo, and Whole30 compliant.
Yes, although since this recipe uses only an egg yolk instead of a full egg, I don’t typically find it necessary and find that hand-whisking offers the best control. If you want to use a machine, be sure to drizzle the oil in slowly and stop as soon as the sauce is thick.
Note that the motors on blenders and food processors can heat the food inside of the machines if they run for too long, and this heat can cause your aioli to break. If you want to use a machine, a stick blender may be a more reliable route since it will not risk heating the sauce.
A couple of things can cause your aioli to break, either while whisking or after you stop whisking.
Adding the oil too quickly, adding too much oil, or heating the mixture can all cause it to break. To prevent this, be sure to stream the oil in very slowly, only add the amount of oil listed in the recipe, and mix by hand rather than using a blender or food processor, which can heat the sauce.
If your emulsion does break, you can try vigorously whisking in a small amount of water, which will sometimes bring it back together. Another option is to add a fresh egg yolk to a clean bowl, then slowly add the broken aioli, whisking constantly. If all else fails, use an immersion blender to blend in a pinch of xanthan gum.
Tried this recipe? Leave a rating and comment below — I’d love to hear how it turned out! Or, follow me on Facebook, Instagram or Pinterest!
Homemade Aioli
Ingredients
- 1 large egg yolk
- 1 teaspoon pressed or finely grated garlic (3 to 4 small cloves)
- 1 teaspoon fresh lemon juice
- 1/2 teaspoon kosher salt
- 1/2 cup olive oil see notes
Equipment
Instructions
- In a large, very clean mixing bowl, combine the egg yolk, garlic, lemon juice, and salt. Whisk for about 30 seconds by hand, until combined.1 large egg yolk, 1 teaspoon pressed or finely grated garlic, 1 teaspoon fresh lemon juice, 1/2 teaspoon kosher salt
- While whisking, drizzle in a few drops of olive oil. After a few seconds of whisking, the olive oil should be incorporated, so start drizzling in a little bit more. Generally speaking, the slower you add the oil, the thicker the aioli will be. After the first few drops, I start adding the oil in a light stream. It should take about 60-90 seconds total to incorporate the olive oil.1/2 cup olive oil
- Once the aioli is thick and creamy, taste it and make any necessary seasoning adjustments.
Notes
Ingredients
- I recommend using pasteurized eggs since the yolk is not cooked in this recipe.
- Any neutral-flavored oil will work in this recipe.
Storage
- The aioli is at its best when served within 24 hours, but can be stored in an airtight container in the refrigerator for up to 5 days. Do not freeze.
Yield
- Makes about 1 cup of aioli.
Nutrition
Nutrition is estimated using a food database and is only intended to be used as a guideline for informational purposes.
6 Comments on “How to Make Homemade Aioli”
Can you use vegetable oil instead of olive oil
You can! vegetable oil tends just be lower quality than olive oil but thats not always the case
Great basic aioli recipe, thanks! I used a microplane to grate the garlic and it all came out perfectly.
I guess there is as many ways to do an aioli as there are chefs or wannabees.
My way of doing a really chunky aioli is to soak two slices of white bread (cut off the brown sides) in some full cream milk. After soaking then squeeze out all, yes I mean all the moisture from the milk and put the remaining bread in a mortar, it is a bit chunky already by now. I find that it is important as opposed of the recipe above, to use the mortar to squeeze, bang, mash, hit, hammer… the garlic cloves together with the moistend white bread. Using a garlic press doesn’t give the same nice and smooth taste of the garlic as you get when you gently smash it in the mortar.
Once done with this most important part mentioned above you can continue with the rest as described in the recipe above.
So good! Tasted just like the aioli I get with fries at my favorite restaurant.
This is really nice Blog for me. I am your regular blog reader.
your blog is always good.
thank you for sharing this.