No Chill Chocolate Chip Cookies
This is my go-to Chocolate Chip Cookie, with a soft and gooey middle, crisp edges, and a generous helping of chocolate chips. No chilling or wait time required.
Having tried a zillion chocolate chip cookie recipes over the past 10 years, this one has solidified its place as the most satisfying for what I want in a cookie.
I know this is quite subjective.
Frankly, there are many different styles, sizes, and textures for chocolate chip cookies and I enjoy many of them.
But there are a few qualities that are most important to me, which I’ll share below.
For me, these conveniently fast no chill chocolate chip cookies also happen to be the very best chocolate chip cookies!
Demand #1: I don’t want to wait for chilled dough – I want cookies NOW
I’ve played around with “aging” chocolate chip cookie dough after reading articles about how much better it makes the cookies.
Is it better?
Maybe a little, but truthfully, I care most about how fast a recipe is. I hate waiting for doughs to chill. I am impatient. Me want cookie NOW.
So this recipe is quick. There’s zero chill time whatsoever, and you don’t even have to set out butter ahead of time to soften, as this recipe uses melted butter.
And the flavor is still plenty delicious without “aging.”
Demand #2: I want multiple textures in one cookie, not just soft, or just crispy
Sure, every once in a while I’ll crave those crispy Tate’s-style cookies that are completely crunchy the whole way through, but my ideal cookie has crispness, softness, and gooeyness.
I want it all.
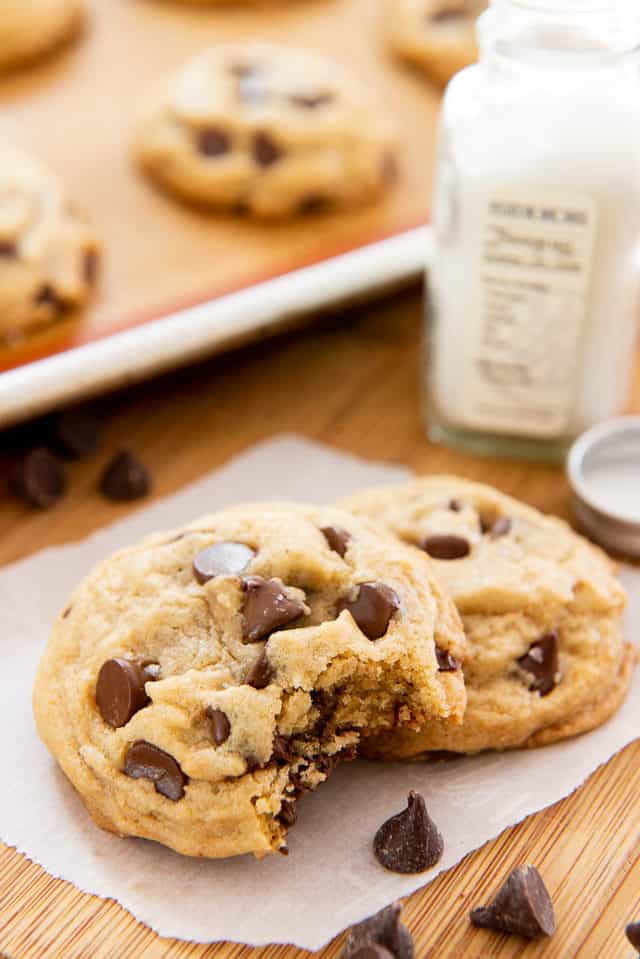
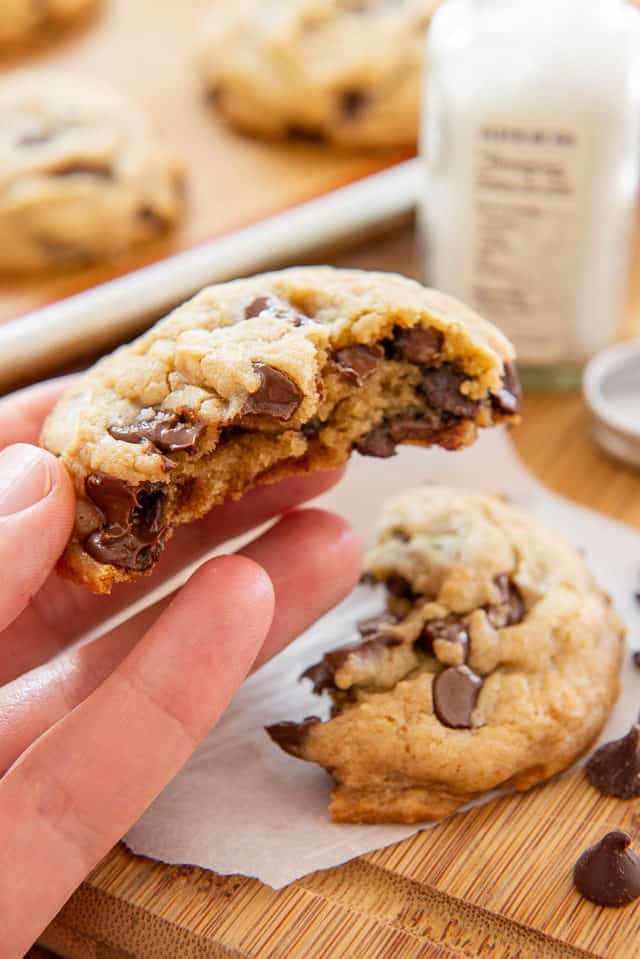
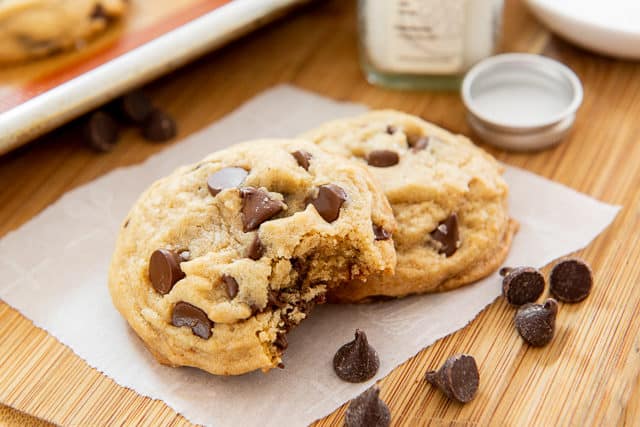
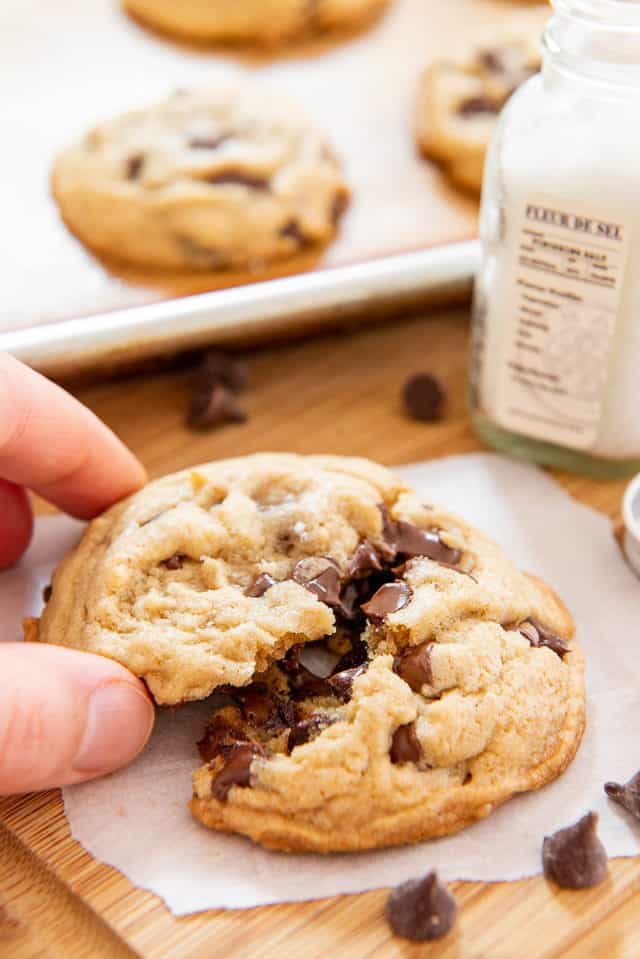
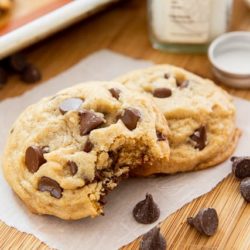
These cookies have a crunchy edge, with a soft, melty, gooey interior.
You can also bake a little less or a little more to get it even closer to your preference, if you like it one way over the other.
Demand #3. No weird ingredients or equipment, please
I’ve seen various “secret ingredients” and little tricks claiming to make chocolate chip cookies different, but none that I’ve tried have proved to be worthwhile.
This cookie has only the classic ingredients: unsalted butter, sugar, all purpose flour, egg, vanilla extract, baking soda, salt, and chocolate chips.
No cornstarch, no cream cheese, no boiling water, no cinnamon (?!), no cream of tartar, no lemon (why?!?!), and so on.
For equipment, you really just need the simple things, like bowls, a whisk, and a spatula.
I whip the cookies up with a hand mixer, but you can totally do this by hand too. No stand mixer required. although if you want to use one, use the paddle attachment for mixing.
This is a recipe I’ve been playing with since 2010, and it has been tweaked bit by bit from where it started, which was probably something close to the 1930s Tollhouse recipe. Here are the noteworthy features:
- Melted butter instead of softened makes these slightly chewy chocolate chip cookies, with crisp edges. It’s my favorite texture.
- A 2:1 ratio of brown sugar to granulated sugar also gives it a chewier, softer texture. Don’t worry, these aren’t crazy chewy like Molasses Cookies, it’s subtle. Feel free to use either light brown sugar or dark brown sugar.
- Scooped mounds of cookie dough gives the cookies ridges, an awesome texture, and somehow, a more even bake. Don’t roll the cookies.
- After testing these cookies on multiple cooking surfaces, I find that they brown best and spread the least on a Silpat. You may use parchment paper or bake directly on the pan though, if you’d like, but there will be slight variations with each surface.
Step by Step Overview:
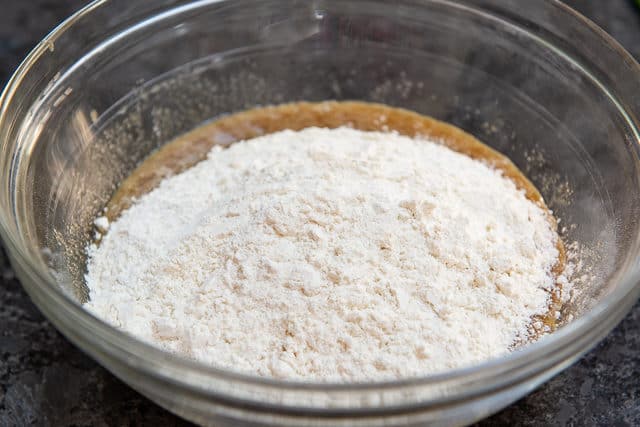
Combine melted butter, brown sugar, and granulated white sugar in a large bowl:
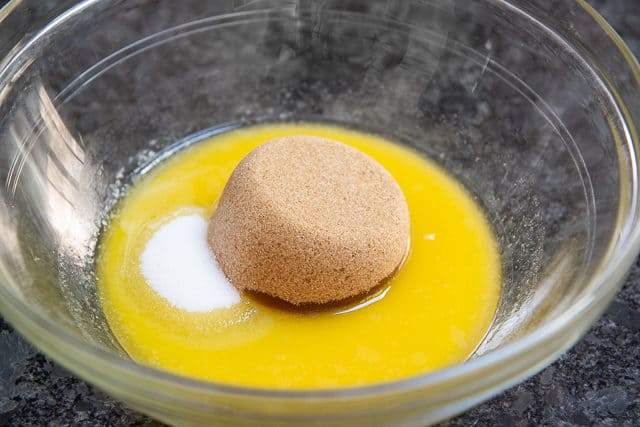
Mix that together just enough so that the three ingredients are smooth and combined, then add a room temperature egg and vanilla extract:

I quickly warm the egg by putting it in warm water for a few minutes. Otherwise, a cold egg straight from the fridge will solidify the melted butter and make it uneven.
Mix together until smooth, then add the dry ingredients (flour, baking soda, and salt):
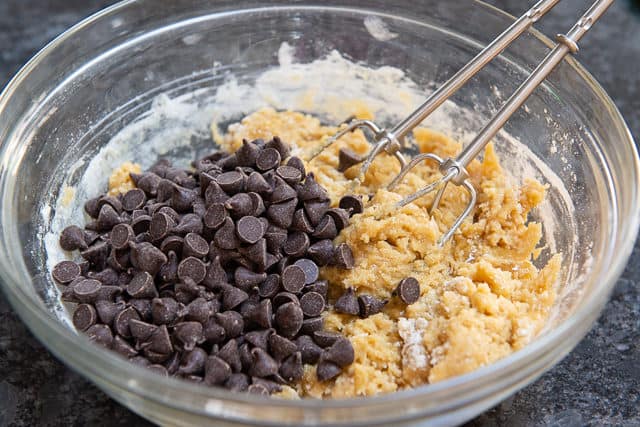
When the flour mixture has *almost* disappeared into the dough, add some semisweet chocolate chips:
Mix a little more, until the streaks of flour have been absorbed:
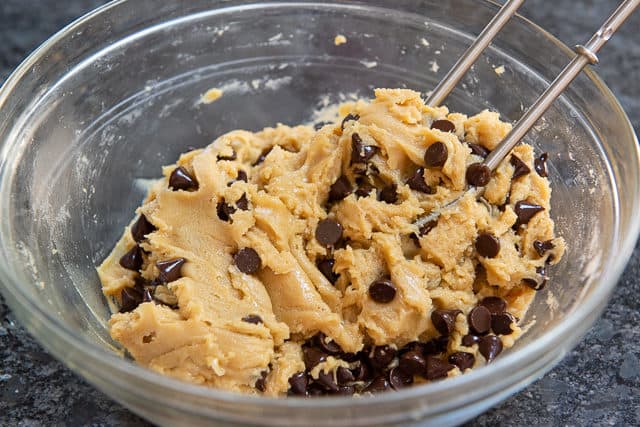
And that’s it for the dough! Required chilling time is…zero minutes. Let’s scoop!
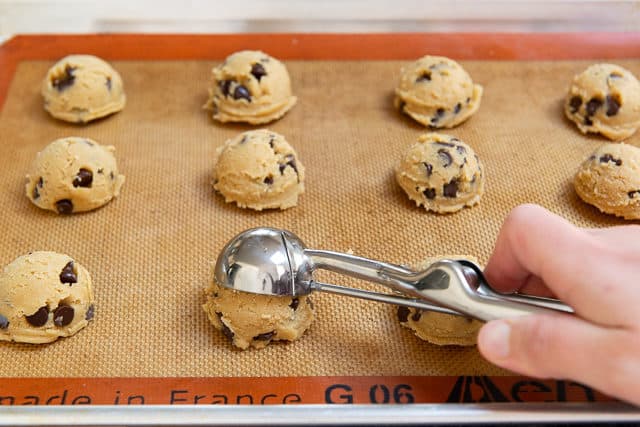
Use a medium cookie scoop (#40/1.5 tbsp) (affiliate) to scoop mounds of cookie dough onto a Silpat lined baking sheet:
Don’t have a silicone mat?
You can use parchment paper instead for your prepared baking sheet.
If you don’t have that either, you can put the dough directly on the baking sheet, but your baked cookies may be a lot more brown on the bottom. Start checking for doneness a few minutes early.
By the way, I tested rolling the scoops into smooth cookie dough balls in the palms of my hands, and it is MUCH better scooped.
The little ridges and unevenness here somehow gives it a more even, desirable bake in the oven.
Finally, this is optional, but for best results, I prefer to sprinkle the top of each cookie with fleur de sel.

This gives you really stellar cookies. The salt is so lovely as a contrast to the sweetness.
Bake the cookies for about 11-12 minutes at an oven temperature of 350 degrees F.
You can see that the edges are golden brown, but they look pretty colorless on top:
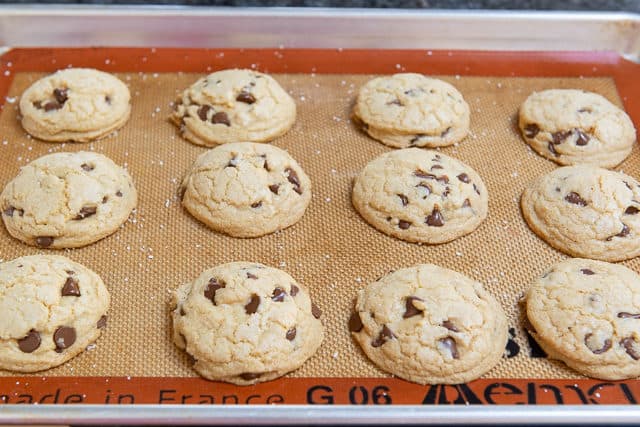
Even though it may look too soon to pull from the oven, that is the perfect time to pull them.
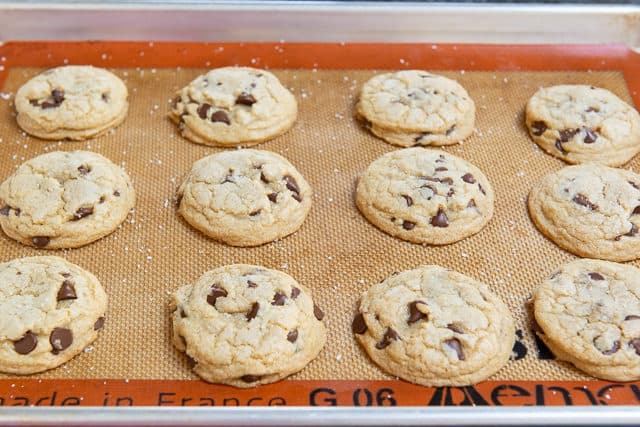
The cookies will cook a little bit more outside the oven, and after a few minutes of resting on the cookie sheet, the domed shape will fall a little bit (no need to move the cookies to a cooling rack).
You can see here, if you look closely and compare it to the photo above, that they’ve flattened a little bit:
I think they are best when enjoyed warm, so dig in!
Note: I have also tested these as larger cookies, scooped using a large #60 3T scoop (affiliate). They need a few more minutes of bake time, but they are also delicious (but I like the #40 size better). The large cookie scoop cookies tend to brown more on the edges, if that’s your thing:
Peanut Butter Cookies, Monster Cookies, and Snickerdoodles are some of my other favorite cookies to bake, fresh out of the oven. Enjoy!
Tips and FAQ
You can keep these at room temperature, in an airtight container, for several days, and they’ll still be soft and delicious. They are best fresh out of the oven, but leftovers are easily devoured too.
Like other chocolate chip cookie recipes, dough scoops can be frozen and baked later, with a few more minutes of bake time added at the end. I find that they don’t spread as evenly as freshly baked though.
If you don’t have an oven thermometer, please get one. I’ve used a lot of different ovens over the years, and it’s incredible how inaccurate they can be. Often times overbaked cookies are just the result of an oven that is too hot. Also, do not add convection, which changes baking time pretty dramatically.
Tried this recipe? Leave a rating and comment below — I’d love to hear how it turned out! Or, follow me on Facebook, Instagram or Pinterest!
No Chill Chocolate Chip Cookies
Ingredients
- 1/2 cup unsalted butter
- 1/2 cup brown sugar (light or dark)
- 1/4 cup granulated sugar
- 1 tsp vanilla extract
- 1 large egg at room temperature*
- 7.5 ounces all purpose flour, by weight (1.5 cups, if measuring)
- 1/2 tsp baking soda
- 1/2 tsp kosher salt
- 1 cup semi-sweet chocolate chips
- fleur de sel for sprinkling on top, optional
Instructions
- Preheat the oven to 350 degrees F. Line a baking sheet with a silicone mat.**
- In a large heatproof bowl, melt the butter in the microwave until it’s just barely melted, watching closely that it doesn’t come to a boil or get too hot. If the butter becomes overheated, make sure you let it cool down before proceeding.
- Add the brown sugar and granulated sugar to the bowl, and mix to combine, either with a hand mixer or by hand with a whisk. Only mix it just enough so that it’s relatively smooth.
- Add the vanilla extract and egg, and mix again until just combined.
- In a separate bowl, whisk to combine the flour, baking soda, and salt, then add this to the wet ingredients. Stir until the flour has almost disappeared, then add the chocolate chips, and continue stirring until the dry ingredients have been absorbed.
- Use a medium scoop (#40/1.5T) to portion the cookie dough onto the prepared baking sheet. You should get around 18 cookies, so you can either bake two batches one after another (my preference) or add another baking tray.
- Sprinkle the tops of the cookies with fleur de sel, if using, then bake for 11-12 minutes, until the cookies look slightly golden on the edges, and soft in the middle, but with no visible glistening rawness in the center.
- Remove the cookies from the oven, and allow them to cool for a few minutes, during which time they’ll flatten a bit and cook a little more. Then enjoy while warm!
Notes
Nutrition
Nutrition is estimated using a food database and is only intended to be used as a guideline for informational purposes.
Post updated in March 2019. Originally published December 2010.
132 Comments on “No Chill Chocolate Chip Cookies”
Doubled the recipe and used a big scoop! It made 15 big cookies! I needed to make cookies in a pinch for unexpected company. Loved that these were no chill. I also had no time to warm up the eggs… and they turned out lovely! I wish I could post a photo, they look as amazing as the advertised cookies!!
Yay! Thanks Kimberly!
Gemini said
I love your recipe; there is no cornstarch crap, no waiting for chilled dough—also known as real chocolate chip cookies! I love your writing, as well! Xoxo
I’m not even good at baking and these came out perfect and delicious.
So glad you tried them!
Made them the first time with my toddler and they came out spectacular! Then did it again a few days later and in a hurry didn’t cool down butter sufficiently, leading to sugar melting too much. I’d like to emphasise that sugar must be only combined and remain crunchy – these were nowhere near as good as the first time. Will be using the recipe again but more carefully next time!
Cookies turned out perfectly!! I baked them for 13-14 mins instead just because I prefer a slightly less chewy texture but super delicious and easy to make. Followed directions to a T other than slightly longer bake time.
Yay thanks Brianna! So glad you loved them
I tried this recipe they turned out Amazing thnku for making us love choc chip cookies even more me and my hubby luv them so much way to go it will be my to go to recipe from now on
Thanks Cheryl! Im making another batch tonight