Pan Seared Steak
The way a steak is prepared makes all the difference in the flavor and tenderness of the meat. After making thousands of steaks at home, here are my top tips for a pan seared steak that is caramelized on the outside, and juicy in the middle. Searing steak is so easy to do, I never order it at restaurants anymore!
We make a lot of steak in our house, as we usually eat some kind of steak every single day and have done so for years.
Ribeyes and New York strip steak are my favorites, but since I like to follow the sale patterns at the grocery store, I have learned to cook and enjoy all cuts of beef.
Until three years ago, I lived in the Northeast, which made grilling a nonstarter for much of the year. My beloved Grilled Ribeye, Grilled Flank Steak, and other grilled meats were only enjoyed during the summer months, so I learned how to make steak indoors and how to do it well.
Searing steak on the stove is a fantastic method so long as you follow the guidance below, and the best part is you can make pan seared steak any time of year.
If you happen to have any leftovers, you can also slice the meat cold and use it for Steak Salad. It’s hearty and delicious!
This post was originally published in January 2011, and since then I’ve seen many different methods for pan seared steak on the internet and in cookbooks. I recently experimented with a few of them to see if I liked new methods better.
The verdict? I still like this method the best.
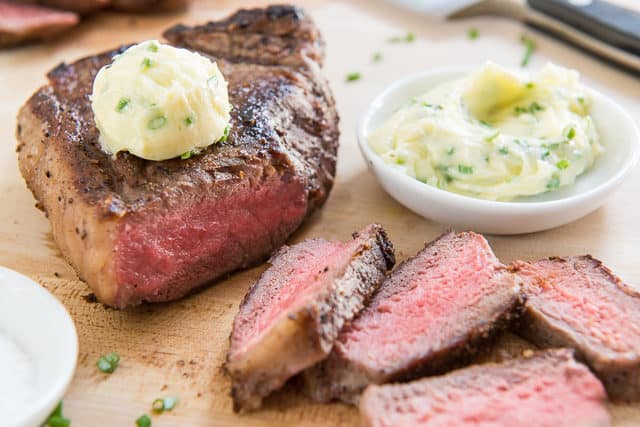
It’s very simple and gives the results I want for perfect steak, browned outside with a rare interior.
And of course, you can cook it more if you prefer a more well done steak. A steak can truly taste incredible with just a good seasoning of salt and pepper, paired with proper searing technique.
Tips for Best Results
Take the steak out of the fridge at least an hour before cooking – This makes such a big difference that if I know I can’t take the beef out of the fridge in advance, I won’t bother making it. I have tested this many, many times and it makes a huge difference in juiciness and tenderness. This is because letting the beef warm up at room temperature means you don’t have to cook the meat as long. Your starting point is a lot higher.
Dry the steak well – Always pat the meat dry with a paper towel before searing. Before the beef can brown, any moisture on the surface must first cook off. Patting dry with a paper towel gives you a good head start on browning.
Rest the meat on a wire rack – Always rest beef for a few minutes after cooking to allow the juices to redistribute before slicing, but ideally rest it on a wire rack, which will allow the meat to retain the highest proportion of its juices. I learned this trick from Chef Rob Magee of Q39 restaurant in Kansas City, and as someone who used to put my steak on a plate that inevitably pooled with juices, it’s a great trick.
Traditional vs Grass fed Beef
I’ve cooked and eaten many different types of beef, and my preference for marbling, juiciness, and flavor is definitely traditional (aka conventional) beef. I recommend Choice grade, or even Prime, if you can afford it.
If you prefer grass fed steak, you can absolutely use this recipe. Just make sure you keep an eye on doneness, as grass fed beef cooks faster and is less forgiving if you overcook it.
Step by Step Overview:
The first thing you want to do is take your steaks out of the fridge at least one hour before cooking, and a maximum of two hours. This makes a big difference both with how evenly your steak cooks and how juicy it turns out.
If it’s cold straight out of the fridge, you have to cook the heck out of the outside in order to get the center up to rare.
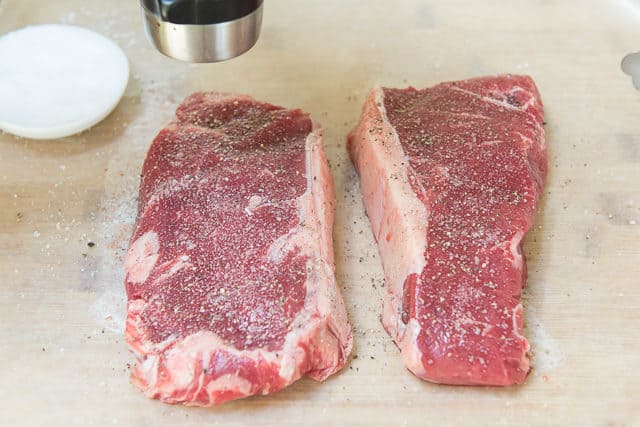
Next, lay your steaks out on a board and blot them dry with a paper towel:

It may not seem like there’s much moisture on the outside of the steaks, but look how a few dabs really wets the paper towel:
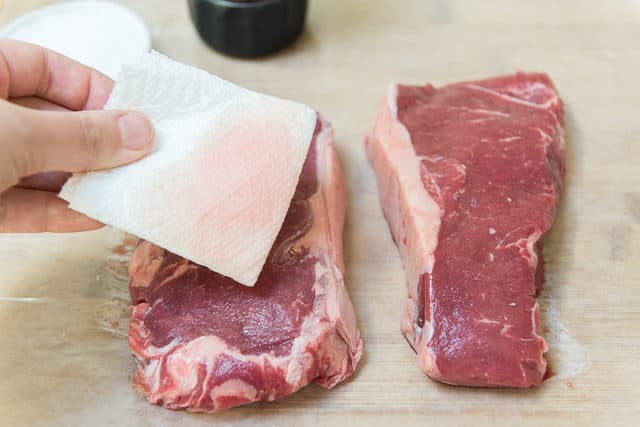
Excess moisture on the outside of your steak is the enemy of a caramelized and browned steak. This is because the moisture must first evaporate before the browning can happen, so you want to get rid of as much as possible from the start.
Now that the meat is dry, start heating up a skillet over medium-high heat.
What Kind of Pan to Use
I find cast iron to be the best for pan seared steaks because it’s naturally nonstick, it retains heat wonderfully, and the material gives a better sear than a stainless steel pan.
If you don’t have a cast iron skillet, well, you should buy one (it’s $15 and will last you a lifetime), but if you don’t have one right now, you can use any uncoated pan with good heat retention (heavy bottomed, copper core, etc). Do NOT use nonstick cookware, as the heat will be too high.
Additionally, pick a skillet that is close in size to your steak. If you use gigantic pan for a small steak, the uncovered areas will soon be covered in burned steak juices.
When the skillet is very hot, it’s time to season the steaks, just before cooking.
This is because once you add salt, it will start pulling out moisture from the meat (and interfere with the sear). I add a generous sprinkle of salt:
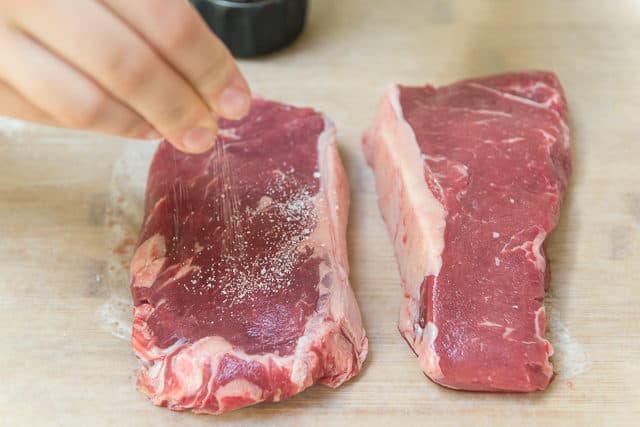
And a generous amount of black pepper:
3/4 tsp of salt per pound of beef is a good guideline if you’re using kosher salt, but know that “saltiness” varies by type.
Next, add about a teaspoon of oil to the hot skillet, and spread it out all over the cast iron pan with a brush:
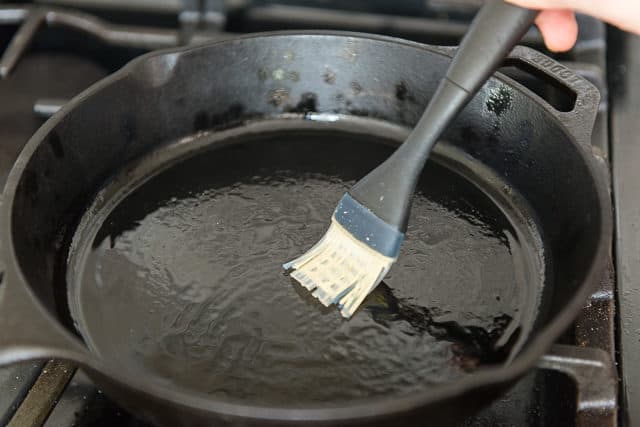
The reason I like to use a small amount of oil and brush it out, is then I don’t have any issues with oil splattering.
Make sure to use a high smoke point oil for this. If you can use tallow, that is best, as it’s the same fat that’s in the actual steak. Olive oil doesn’t have a high enough smoke point.
Add your steaks to the pan, making sure that you hear a loud sizzling noise when you do. If you don’t hear a loud sear, the pan is not hot enough, and you should take the steaks out immediately and heat the pan higher and longer.
(Also, make sure the overhead fan is on while you cook since the high heat produces more smoke than low heat cooking).
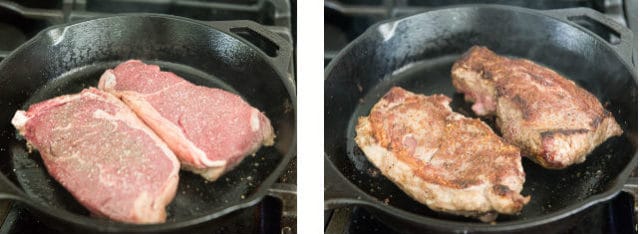
While the steak is cooking, don’t touch it or move it at all. This will develop a nice crust on that first side.
The steak should only be flipped one time, after that first 3-4 minute period when you check that the bottom is a beautiful golden brown color.
How Long to Sear
For a 1-inch thick steak, the beef should cook for about 3-4 minutes on each side for medium rare on a relatively high heat gas stove.
Because of variations in the strength of different stoves, it is helpful to have a thermometer, at least until you develop the ability to press a steak with your finger and know how done it is. If you press on the steak and it yields to your finger and feels soft, then it’s still rare inside. Once the meat pushes back and it feels firm, it’s cooked well done. Overall, I recommend using an instant read thermometer so you can get the internal doneness exactly to your liking.
Use the chart below to check internal temperature, and keep in mind that if you’re using grass fed beef, you should cook the meat less. Grass fed beef is much leaner and less marbled than traditional beef, and is less forgiving.
Temperature Guides for Doneness:
Keep in mind that the steaks will “cook” another 5 degrees F from carryover cooking after you remove them from the heat, so always pull them a little early.
- Rare – 125°, very red inside, cool interior
- Medium rare – 135°, red inside and warm
- Medium – 145°, pink inside and warm
- Medium well – 150°, slightly pink inside and warm
- Well – 160°, no pink inside
Make sure to use an instant-read thermometer for accuracy, inserting into the thickest part of the steak. My favorite meat thermometer is made by Meater, but Thermoworks is great too.
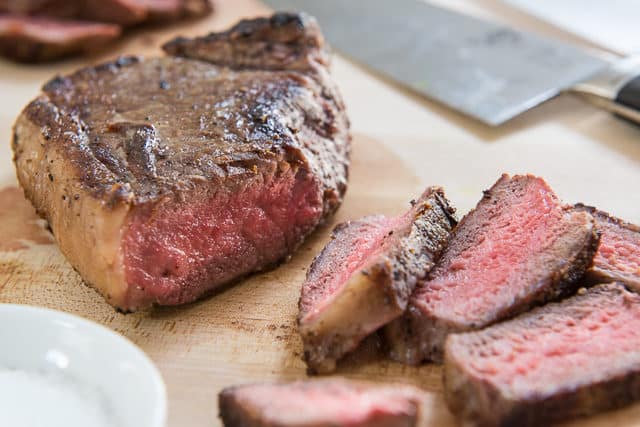
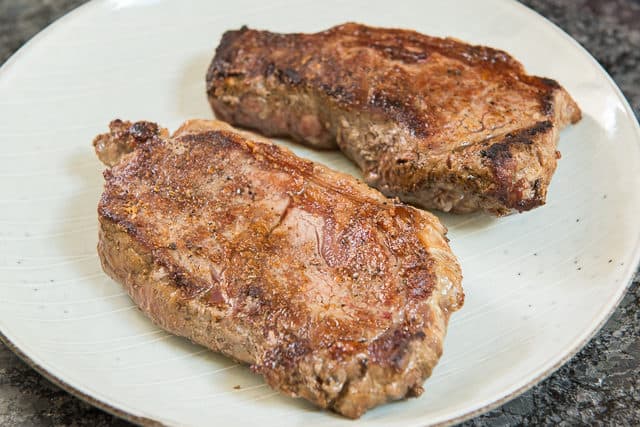
After you take your steak out of the pan, let it rest on a wire rack or plate for 5 minutes.
If you cut into it right away, all the tasty juices will run out onto your plate. Resting the steak gives it time for the juices to redistribute throughout, so your meat is nice and juicy.
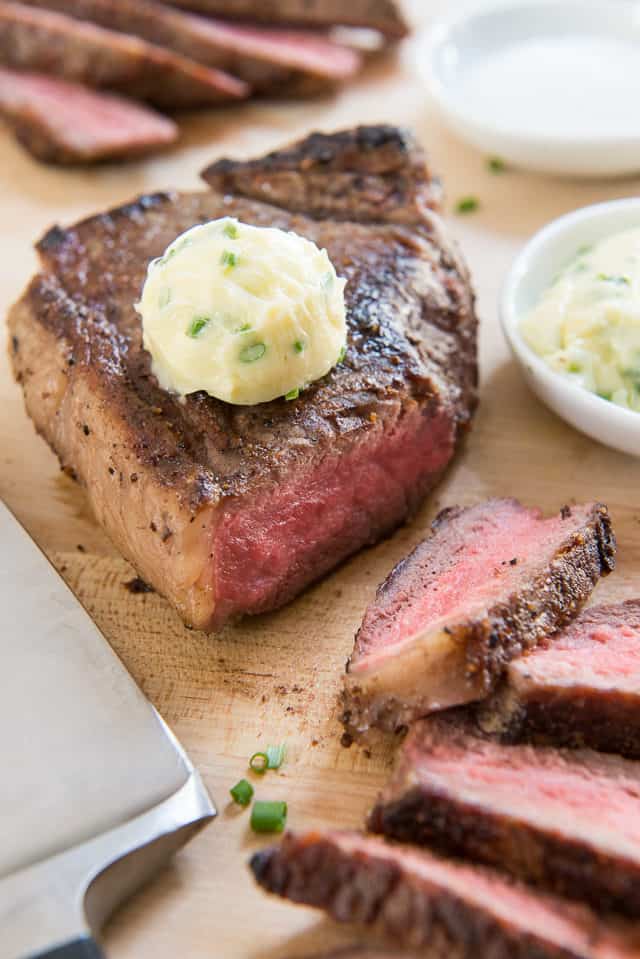
Because we purchase such good quality steaks, we often eat steak plain, just seasoned with salt and pepper before cooking. This to me is the best steak, because I can taste the nuances of the beef. But sometimes I add a pat of butter, or I make a compound butter.
All you have to do is soften salted butter and mix it with herbs, like chopped chives. Or you can make a garlic butter by adding minced garlic cloves to fresh butter.
You can also consider making a quick pan sauce by adding a little bit of butter, chopped onion and garlic, and deglazing the pan with a couple tablespoons of worcestershire sauce.
Suggested Side Dish Pairings
Beef goes well with a wide array of side dishes, but here are my favorites on the blog.
- Potato Gratin – This is a classic side for beef and it’s really hearty
- Crispy Smashed Potatoes – Potatoes are the perfect pairing for steak, and these have a nice crispiness
- Steak Fries – These are really easy to make and cook in the oven, and have a nice “heft” to them
- Roasted Parsnips – A vegetable side that has a really nice flavor with the steak
- Maple Glazed Carrots – So classic with red meat, and has a lovely sweetness
- Roasted Brussel Sprouts – A healthy side option
What about thicker steaks?
If you want to prepare a thicker steak like filet mignon, then the best way to cook is to start with pan searing, then finish in the oven. If you’re doing really thick ribeyes or other cuts that are much more than 1.5″ thick, follow this rule as well.
Sear the steak as directed in the recipe below, then pop into a 400F oven to continue cooking. Timing will vary depending on the thickness and desired interior doneness, but a typical filet mignon usually needs at least 5 minutes of extra cooking in the oven.
Recipe Tips and FAQ:
Keep in an airtight container in the fridge for up to 3 days.
No, always thaw the beef first. If you’re in a hurry, you can thaw the steaks in water.
Every cut has its merits, but I tend to prefer boneless cuts here. Sometimes the bone can lift the meat away from making direct contact with the pan on the entire exterior, so it’s better suited for grilling. I love boneless ribeyes and strips best here.
Technically yes, tightly wrapped for up to 2 months, but the meat is pretty gnarly upon thawing. I recommend trying to use leftovers in something like a Steak Salad.
I recommend doing it in the pan, for a couple minutes on each side over medium heat, just enough to rewarm it. You can do it in the microwave too, but you have to watch it more closely. Cook only at 50% power in 30-second intervals.
Did you enjoy the recipe? Please leave a 5-star rating in the recipe card below and/or a review in the comments section further down the page. Or, follow me on Facebook, Instagram or Pinterest!
Pan Seared Steak
Ingredients
For the Steak:
- 1 ribeye steak or porterhouse, strip, etc*
- salt to taste
- black pepper to taste
- 1 teaspoon oil (tallow recommended, but any high smoke point oil, like vegetable, avocado, etc)
Ideas for What to Serve with Steak (optional):
Instructions
- 60 minutes before cooking, and a maximum of 120 minutes, remove the steak from the fridge and let sit at room temperature.
- Pat your steak as dry as you can with a paper towel.
- Heat a cast iron skillet over medium high heat for several minutes, until the pan almost begins to smoke.
- Season the steak all over with salt and pepper. I know how much salt to put on by eye, but 3/4 tsp per pound of meat using kosher salt is a good starting point.
- Use a brush to spread the oil out on the preheated skillet, then add the steak. The meat should sizzle loudly.
- Sear for 3-4 minutes on each side, until browned on the outside and medium rare on the inside.
- Let the meat rest on a wire rack or plate for at least 5 minutes after cooking. Enjoy!
Notes
Nutrition
Nutrition is estimated using a food database and is only intended to be used as a guideline for informational purposes.
This post contains affiliate links.
85 Comments on “Pan Seared Steak”
Just took it off the cast iron and it’s resting, stay tuned.
The best way to get a juicy steak! Great tips!
I love these directions so much and I completely agree with you on using cast iron!
Great tips! I love to use a cast iron skillet.
Great tips and steak, yummy
SO many great tips that we all need!
Ahhhh such a helpful article. This is exactly how I do it. Thanks for all the tips.
Hi Joanne. I have an electric stove. What setting should I set the burner on to sear the steak in a cast iron skillet? High or medium high? I like my steak medium rare.
Hi Lynne, can your electric stove hold a big stockpot of water at a vigorous boil? I’m trying to gauge how hot it is. I had a stove one time when we were renting (we were military so we moved a lot) that literally could not boil a big pot of water all the way on high, so they can be kind of wimpy sometimes! My inclination is to do high, so you get as much caramelization as possible. The pan should just start to smoke. Good luck!
Yes, I can boil water vigorously in a huge pot of water. I will sear on high as I like a lot of caramelization. Thank you for your feedback.
This is really helpful information since my husband always messes up steak!!!
Hi Joanne, great post! This is how we grill steaks at home in Argentina (turning a steak more than once? Never, ever). If the steak has some fat on the sides, I use that instead of oil to grease the pan. We never use butter on top though and always a simple salad on the side or mashed potatos. Thanks again for another great recipe.
Thanks Joanne,
Used you tips and grilled two perfect rib eye steaks tonight.
Hi Susan, that’s wonderful!! Ribeye is my favorite, what a delicious dinner!
Oh thanks for this post! I’m not very good at cooking meat but this will help me. Thanks
Let me know if you have questions, and good luck!
thanks I will
You make a good argument for doing steaks at home. I have one more: Sous Vide. I bought a sous vide pod after Christmas and have been cooking some great food, especially steaks. After cooking for 1 hour @ 135*, pull your steak out and finish by your method above (pat dry, season, & sear in a cast iron pan with some EVO or butter and fresh herbs, one minute on each side). Your tastebuds will think they are in heaven.
Hi Craig, what do you use to seal the steaks and food? I had a sous vide contraption for a while but ended up selling it eventually, because I found the sealing to be a bit of a pain. Maybe it takes some practice. I certainly love the idea of perfectly temperatured food.
95% of the time I use a (Ziplock) gallon freezer bag. Put some EVO in (just a little to keep the food from sticking), add your food and herbs or spices, then lower the open top bag into the water. Allow the water to push all the air away from the food and clip the bag on the side of the cooking “pot”. Last weekend I smoked (for 3 hours), then put a 12 pound whole brisket in a Food Saver “bag”, vacuumed it closed (actually double bagged it, just in case) and dropped it into the pot and let it cook for 36 hours. It was moist, tender, and smoky. You might check these (competing) websites: http://www.chefsteps.com/sous-vide ; http://www.seriouseats.com (food lab guide to sous vide); YouTube/Facebook for SousVide Everthing.
Oh interesting, I didn’t know you could use Ziploc bags. You sound like a pro at this! I’ve heard a lot about Chef Steps (raves from friends), and will take a look now.
Hi,
actually I have small query, if I don’t put oil on steak, will it burn or it will stick to the pan?
Hi Donna, yes it will be more likely to stick, and probably won’t brown as well either.
It cooks so perfectly!
Hi, I came across your website while looking up on how to cook steak! Just a question though, if you don’t put oil, will the steak burn or stick to the pan?