Easy Peel Hard Boiled Eggs
I have made thousands of Hard Boiled Eggs in my life, and these always come out easy to peel and perfectly cooked, with no gray ring around the yolk. This method takes less than 15 minutes, and delivers the most fuss-free eggs, whether you’re eating them for breakfast or using them in a recipe like Egg Salad.
There are usually at least a dozen hard boiled eggs in my refrigerator at any given time.
I have made so many thousands of these eggs at this point in my life that I could qualify as an expert, if there were such a thing.
I’ve always relied on them as a healthy snack to keep in the fridge, and my family and I love Egg Salad so much that mega batches are frequently in demand.
After lots of experimentation and repetition, this is what I have found to be the best method for making perfect hard-boiled eggs.
Believe me, I understand how annoying it is when the peel comes off in a million pieces, as years ago I worked at a restaurant and was in charge of peeling and cutting them for salads. If the peeling process is a hassle, cooking these isn’t much fun.
Why This Method Is The Best
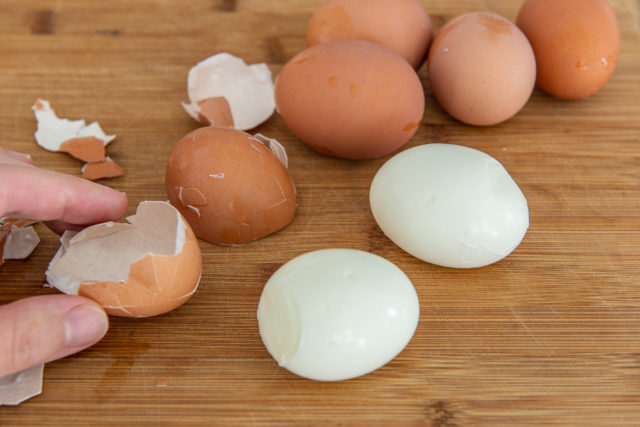
Truly easy peeling – We will do a hot start and cold finish which consistently delivers the best results for ease in peeling, again and again. The shell comes off in large pieces.
The peel doesn’t rip off chunks of egg white – Shocking the egg in an ice bath at the end helps separate the white from the peel so you don’t rip away any precious egg.
Make as many or as few as you want – Because you start with boiling water, you don’t need to worry about too many eggs cooling the water and affecting total cook time. Just make sure you use a pan big enough for a single layer.
Conveniently cook straight from the fridge – No need to bring the eggs up to room temperature.
Look at the big chunks of shell that come right off:
I shared an older version of this method on the Pioneer Woman’s blog back in 2015, and there are lots of comments raving about how well the method works.
I’ve tweaked and improved a couple of minor things and wanted to share an updated version. So if you’re looking to switch things up from your usual omelette, let’s go through the process of making this.
Tips for Best Results
Use older eggs – This method will work for any “age” of egg you have in the fridge, but older ones will always peel a little bit easier because the pH of the white albumen increases with time, and the inner membrane bonds less with the albumen. Harold McGee discusses this in his book On Food and Cooking (affiliate). Save your farm-fresh eggs for Poached Eggs.
Boil in a single layer – If you want to make more hard boiled eggs at one time, I recommend you use a wider pan than a deeper one. It is best to keep them in a single layer. There have been times when I’ve used a high-sided skillet instead of a pot.
Peel right away – If you don’t peel the hard boiled eggs right away after cooking and the ice bath, you will lose your magical window for easy peeling. There have been times when I forgot and walked away, and peeling was more challenging than usual. Finish the job after cooking.
Let’s go through the cooking process!
Step by Step Overview:
Because we start with boiling water, you’ll need to use some sort of tool to get the eggs gently into the hot water.
Previously I used a wire basket to lower them all gently into the water, but occasionally I’d get some breakage if one of them fell too hard.
Now, I find the best way is to “load” them into a pair of tongs with my fingers:
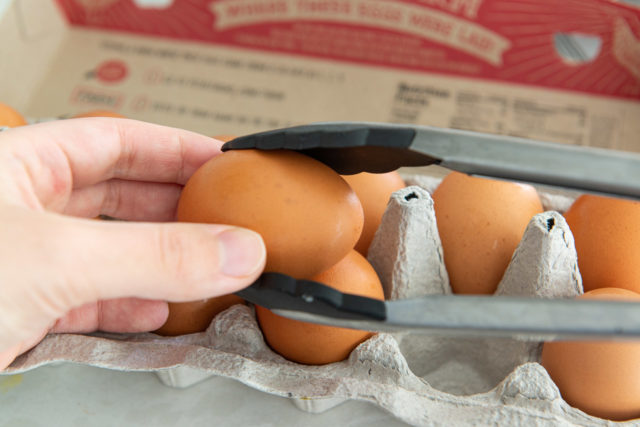
A slotted spoon also works.
Then place eggs down into the pot of water, one by one:
It only takes 30 seconds to quickly load and place a dozen down in the water, and this way you don’t get issues with cracking. I find I can use less water this way too.
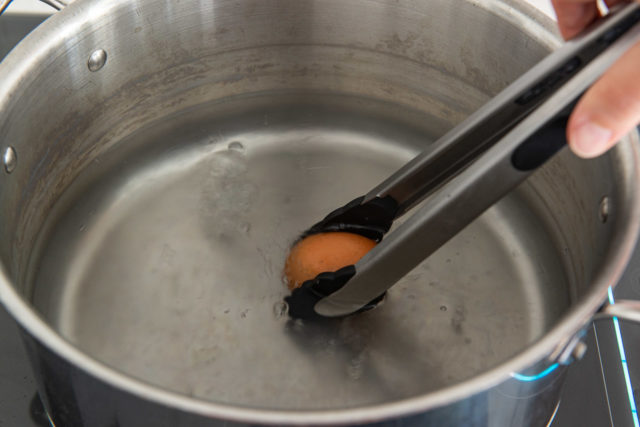
Once the entire batch is in the water, set a timer, and monitor the heat level so that the water is boiling, but not so violently that the eggs are bouncing around like crazy.
If your stove is strong, high heat might be too much. A gentle boil is better than a rolling boil, to ensure the eggs don’t crack prematurely.
Cook Time
How long to boil the eggs depends on the size, but it should take between 12-14 minutes.
Large (most common): 13 minutes.
Medium: 12 minutes.
Extra large/jumbo: 14 minutes.

After 13 minutes, drain the eggs, then place them into a large bowl of ice water for one minute:
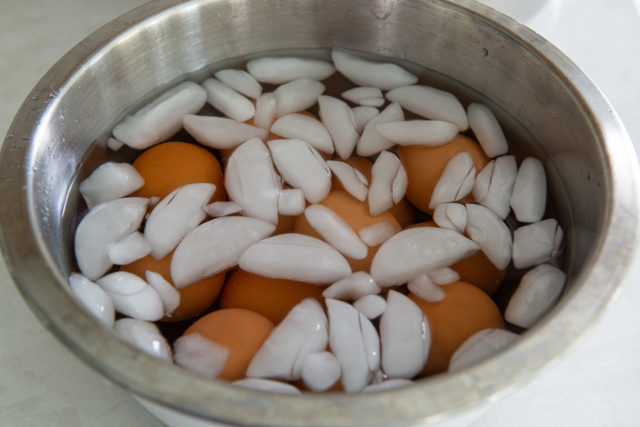
This is enough time to stop cooking and make the shells easy to peel, but the ice bath won’t give you cold eggs in this short of a time.
Is the ice bath necessary?
For the most perfectly cooked and easy to peel eggs, yes. The ice bath stops carryover cooking immediately, which helps us avoid getting a gray ring around the yolk. It also keeps the interior warm, while rapidly cooling the shell, so it’s easier to peel. My fridge has an ice dispenser, so it’s no problem to put some ice and water in a bowl.
If you don’t have ice accessible: you can drain the hot eggs, and place them in a bowl in the sink under a cold running faucet for a few minutes. Just like if you’re quick-thawing seafood. It’s important that you keep the water running so that the bowl is constantly refreshed with cold water.
Also, I used to chill the eggs in the ice bath for longer, but I found it to be unnecessary. You really just need to “shock” them in cool water for a minute to stop the cooking.
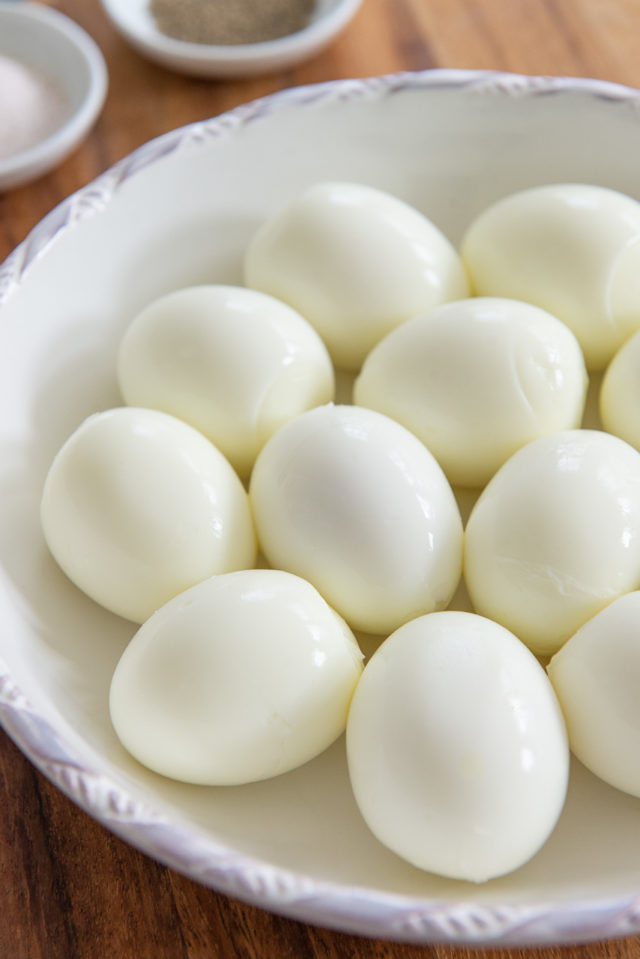
After the carryover cooking has been stopped, peel right away. You want to peel the entire batch while the interior is still warm, but the shell has chilled.
This is when there is maximum space between the two, which makes for the easiest peeling.
How to Use Them
Once you’ve peeled them, your hard boiled eggs may be eaten right away, they can be chilled and kept in the fridge for healthy snacking, or they can be used for recipes.
Deviled Eggs: Turn them into Smoked Salmon Deviled Eggs, Bacon and Crispy Shallot Deviled Eggs, or Chile Scallion Deviled Eggs.
Egg Salad: I LOVE this Egg Salad as is, or you can add these to Red Potato Salad or Cranberry Chicken Salad.
Green Salads: Add this to virtually any green salad for extra protein, but especially Cobb Salad, Kale Salad, or Wild Rice Salad.
Pair with breakfast foods: Add a side of Hash Browns and Oven Bacon and call it breakfast. Even better, pair it with Cheddar Scallion Biscuits or Bacon Cheddar Waffles.
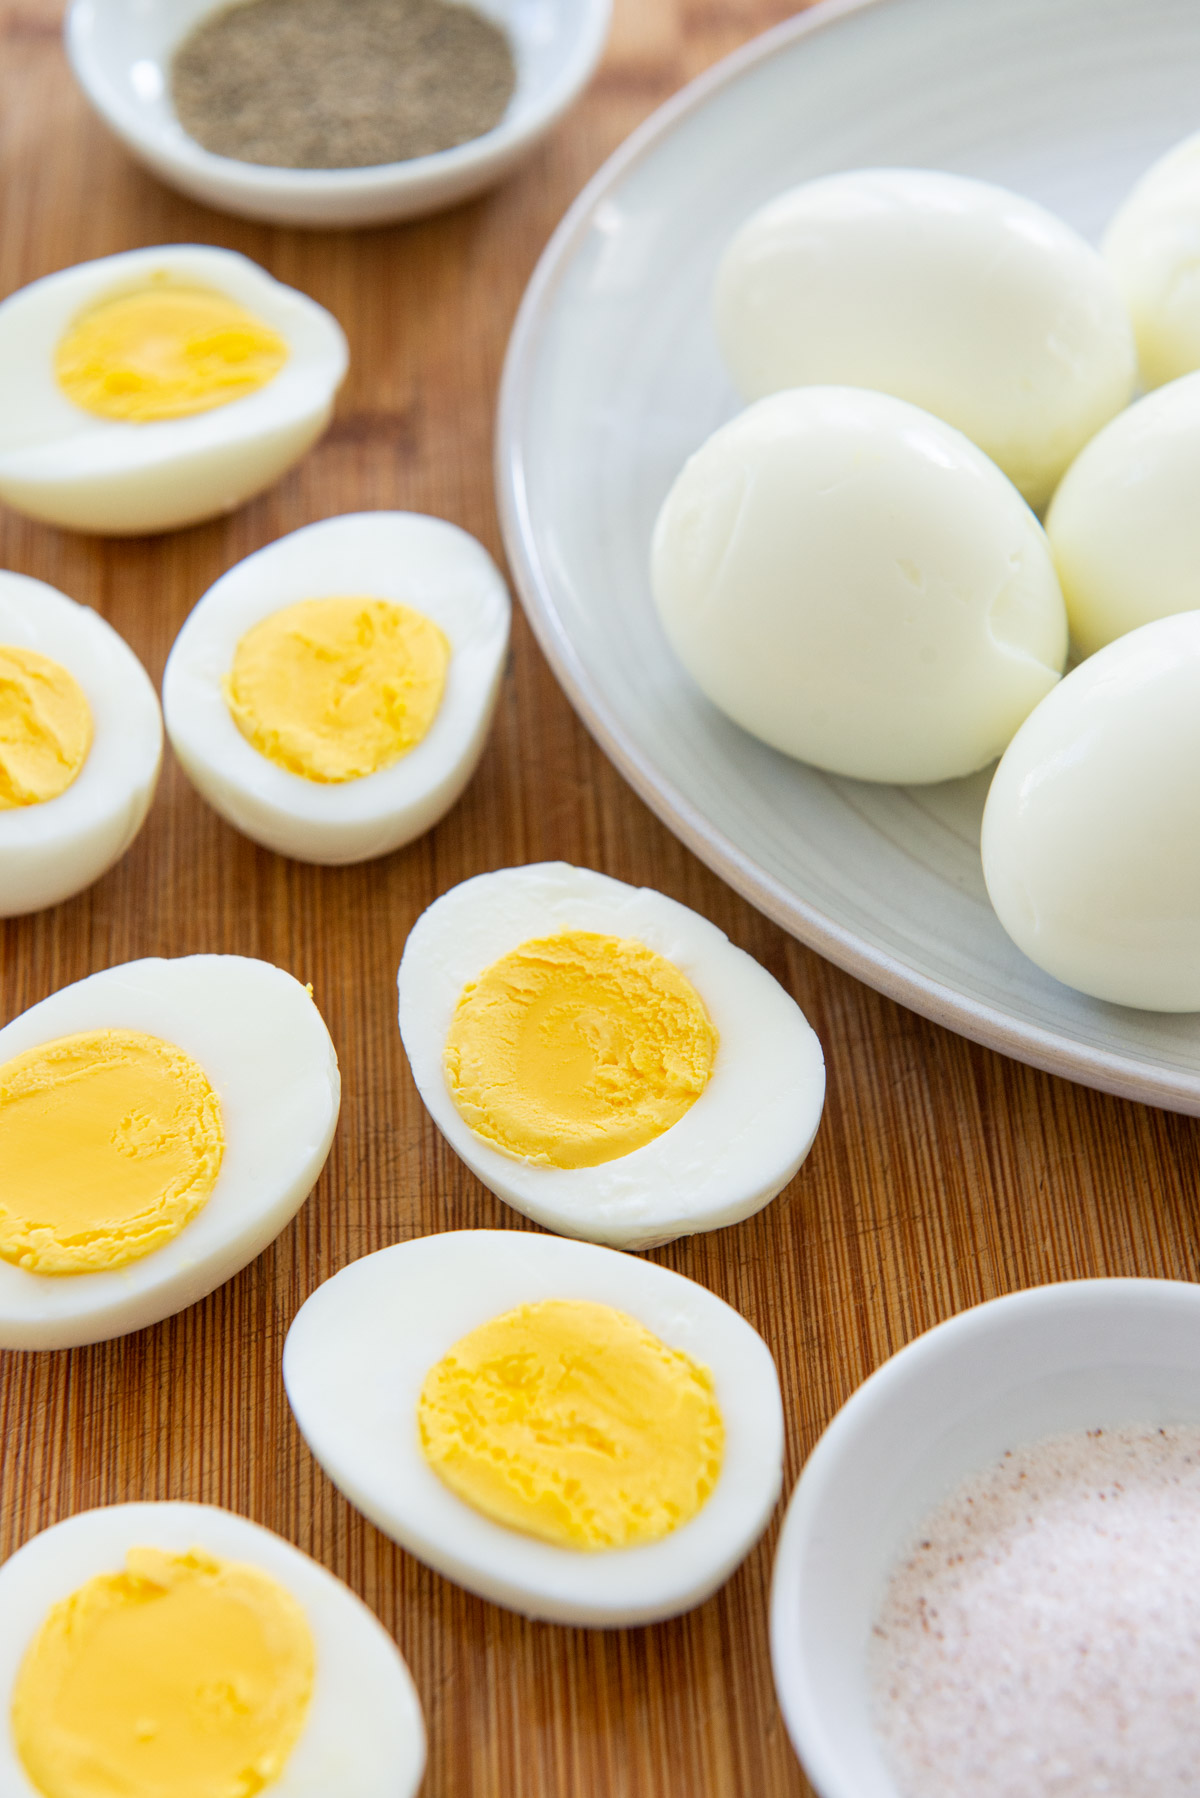
Look, no green ring around the egg yolks! Those are some perfect hard boiled eggs, ready to be devoured.
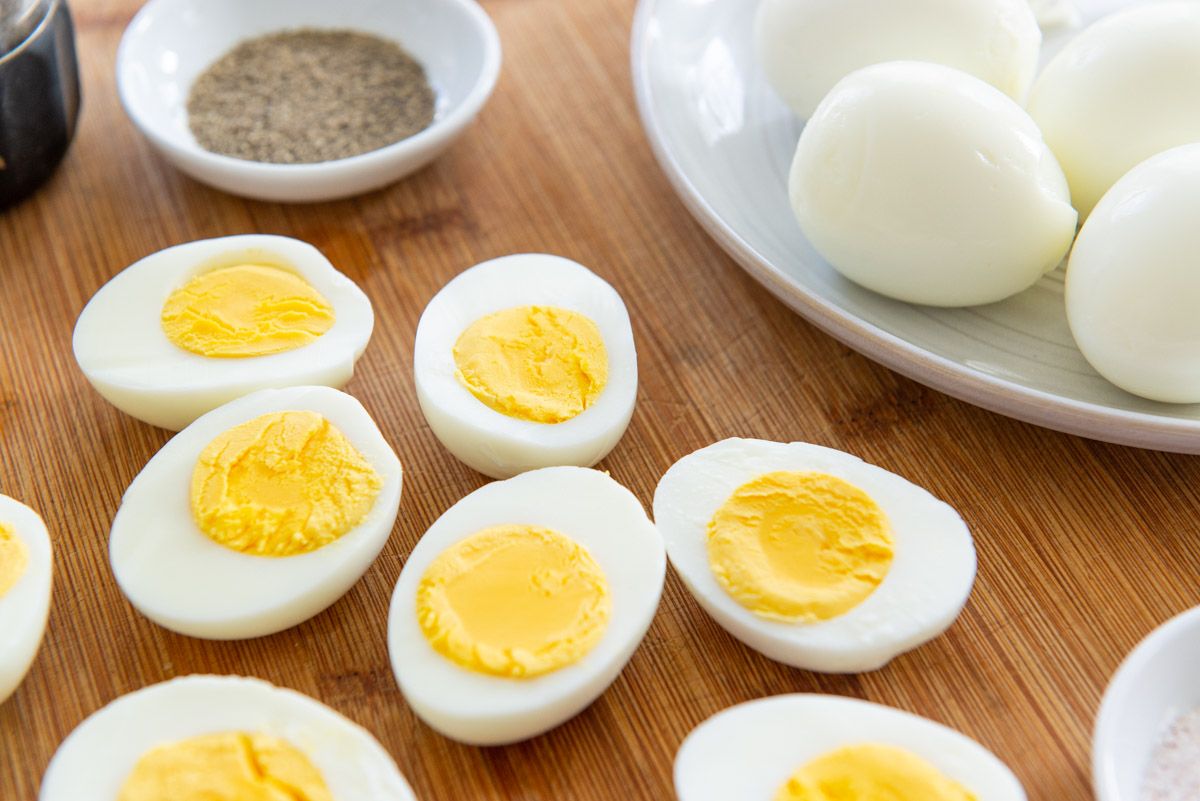
For more of my favorite egg preparations, see How to Poach an Egg, Croque Madame, and Herbed Baked Eggs. Enjoy!
Recipe FAQs:
Store the cooked eggs in the refrigerator for up to 5 days in an airtight container, to prevent the absorption of off odors. Do not keep these at room temperature.
The whites get rubbery and gross, so I don’t recommend it. It’s best to make more or less, depending on how many you think you’ll eat.
If you want to make a batch at the beginning of the week and warm them every morning for breakfast, I recommend leaving the shells on, then covering the desired number of eggs in boiling water for about 5 minutes, to warm the interior. Do not microwave them, as they are likely to explode.
Yes, though I think this is exaggerated. Eggs are usually already “not new” when they get to the store, and there have been plenty of times where I’ve made this with a carton that I just bought the day before.
For the easiest peeling, a hot start and cold finish consistently deliver the best results, again and again.
For large eggs, 13 minutes. Medium, 12 minutes. Extra large or jumbo, 14 minutes.
A gray ring means the eggs were overcooked. Shocking the eggs in an ice bath after cooking helps prevent this ring by stopping cooking.
Yes. Add 1 cup of water to the pot, then place a single layer of large eggs on the metal trivet insert and cook on high pressure for 6 minutes. Quick release, shock in an ice bath, and peel right away. For soft-boiled eggs, do 4 minutes.
Tried this recipe? Leave a rating and comment below — I’d love to hear how it turned out! Or, follow me on Facebook, Instagram or Pinterest!
Easy Peel Hard Boiled Eggs
Ingredients
- 12 large eggs *
Instructions
- Bring a pot of water to a boil over high heat. Make sure the water comes up at least two inches up the side of the pot.
- Using tongs, quickly place the eggs into the hot water. To avoid getting hot water on my fingers, I briefly shake off the tongs each time I remove them from the water.
- Adjust the temperature so that the water is rolling at a gentle boil. Sometimes if you're cooking a lot of eggs, you may need to increase the heat. Or you may find that if the water is boiling too vigorously and causing the eggs to jump up and down too much, you can lower the heat slightly.
- Cook for 13 minutes. Actually set a timer. Then set up an ice bath (just a bowl of ice water) during cooking.
- Drain the eggs, then place them into the ice bath for 1 minute, to stop the carryover cooking.
- Promptly peel the entire batch while still warm. Enjoy!
Notes
Nutrition
Nutrition is estimated using a food database and is only intended to be used as a guideline for informational purposes.
14 Comments on “Easy Peel Hard Boiled Eggs”
I have a question what is the white thing by the yoke I have to take it out everytime I make something with eggs but its kinda hard to take out of a boiled egg it scares me I have my whole family doing this now
Hi Annie, its called a Chalaza. Its like a little anchor that attaches to the shell. Totaly normal and safe to eat but also understand wanting to pull it out! Id say leave it for hard boiled eggs
I tried your method from the Pioneer Woman site. Eggs didn’t peel well. I think I let them sit in the cold bath too long. They were not hard boiled (yolk cooked. White too soft). I will try this tweaked version.
I make these almost everyday so i can assure you this one is tried and true! Let me know if you run into any trouble
I am in my later 70s and have been struggling with peeling hardboiled eggs until now, despite trying every ‘surefire’ peeling trick out there.
This one actually works. Perfectly.
Thank you!
This is great to hear. happy cooking!
Thanks
Works amazing
🤘🤘🤘🤘👌👌👌👌
Thank you!!!! This was the least frustrating experience I’ve ever had peeling eggs. I’m sold.
Looking forward to trying your method, but I disagree that you can use eggs directly from the fridge. The shells always crack if I don’t warm them briefly in hot water before lowering them into the boiling water with a large slotted spoon.
Hope it goes well for you! Interesting you say that, because I haven’t had issues with that and have made a lotttt of eggs. Maybe it varies by brand or egg type.
How to make an easy omelette?
Thank you for this – I can’t wait to try it! Your eggs look so beautiful! How do you not get that ugly green ring around the yolk? I can’t figure that out and I want mine to look like yours!
That comes from overcooking. You should not get the ring with this method and timing. Let me know how it goes!