Oven Roasted Brussels Sprouts
Here’s how to make the absolute best crispy roasted brussels sprouts in the oven, that are perfectly golden and caramelized on the edges, but not dried out. If you need help loving this vegetable, this is one of my favorite ways do it. This entire recipe can made in 35 minutes!

Making a big tray of these is one of my staples for weeknight dinner, and it’s a hit every time. Much like other roasted vegetables like Roasted Cauliflower or Roasted Carrots, it’s all about that oven roasted caramelized flavor. You want the brussels sprouts golden brown and caramelized on the edges, but still tender in the middle.
Often times people roast them too long in order to get them golden, but then they dry out. Brussels sprouts are tough to eat when there’s no moisture left, no matter how crispy they are! That won’t be an issue here.
Why This Recipe Is The Best
Maximizes browning and caramelization – This is the best way of cooking for getting that delicious browning we all love, but without the deep fryer. These are so good when properly caramelized that I only season them with salt and pepper.
Still tender and not dry inside – I’ll go through some tricks for oven placement that will give you a crispy exterior without drying out the middle. The inside remains tender.
Simple and unfussy – This is such an easy side to prepare, and I’ll throw it on the side of a main course like Pork Tenderloin, Beef Wellington, or Parmesan Crusted Chicken and call it a day. You can certainly jazz up this recipe by tossing it with bacon bits and some balsamic, but it truly doesn’t need it. However, I’ve included some flavor suggestions at the end of the post.
Buying Tips: How to Select the Best Brussels Sprouts
Check for bugs – I know it’s gross, but I’ve noticed that there can sometimes be little bugs in the sprouts, and not just the organic variety. Make sure to look closely before purchasing from the grocery store.
Size matters – You can use this recipe and method for any size brussels sprouts you find, but I’ve noticed I tend to like smaller sprouts, as they cook more evenly, and much easier to fit in your mouth!
Make sure they’re firm – Give a few of them a squeeze and make sure they are relatively firm. If they’re on the softer side, that means they’re not very fresh. If you’ve ever seen sprouts on the stalk at the store (which I usually see around holidays like Thanksgiving and Christmas), you can see and feel how firm they are. Starting with fresh produce always makes a big difference in flavor.
Step by Step Overview:
Start by washing your brussels sprouts and dry thoroughly! I like to pat them with a paper towel. Moisture is our enemy here. Excess water turns into steam in the oven and we wont achieve the oven roasted texture we want.
Trim and halve each one, then place in a big mixing bowl. Then add salt, pepper, and olive oil.
*feel free to try different types of fat here. We want a high heat tolerant fat such as duck fat, tallow or even some bacon grease. You can really incorporate tasty flavors but olive oil works great as most of us already have it in our pantry.
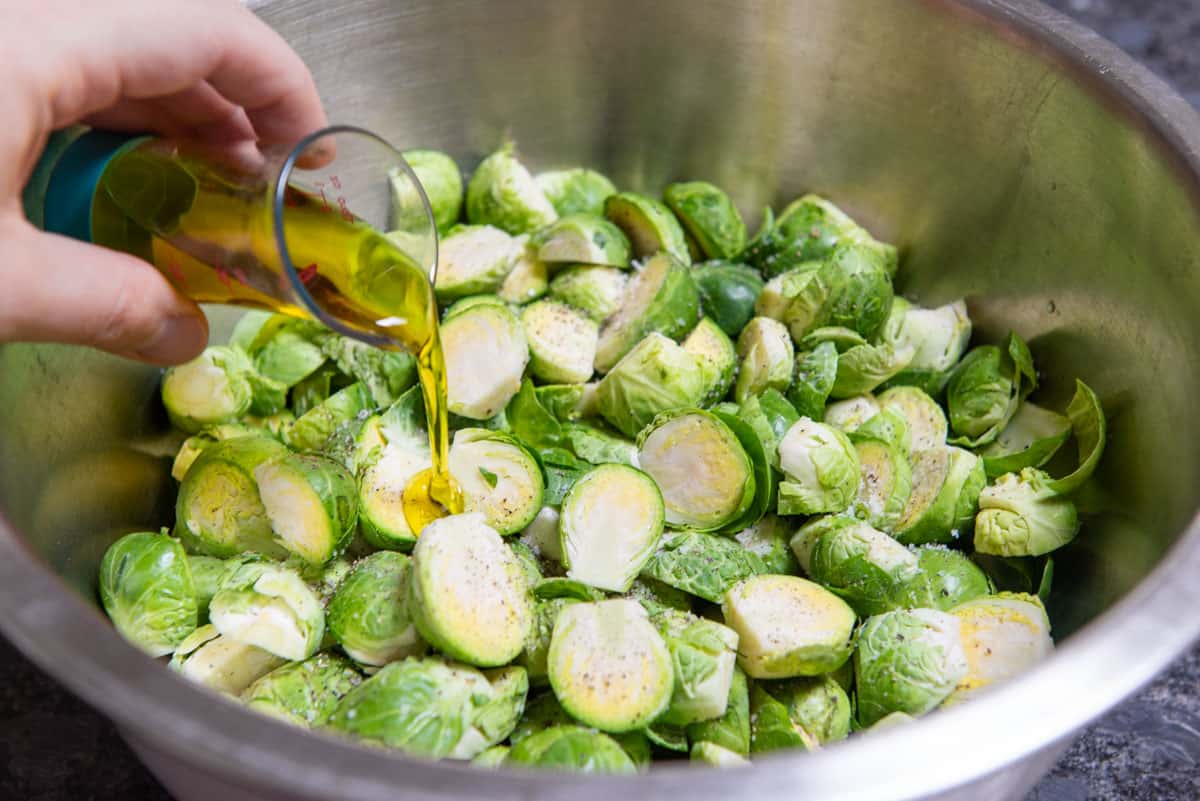
Toss in a bowl and not directly on the pan! This method really gets your oil into the grooves and creates a really even roast. I use this method for roasting any type of veggie and is so much easier than trying to toss on a pan.
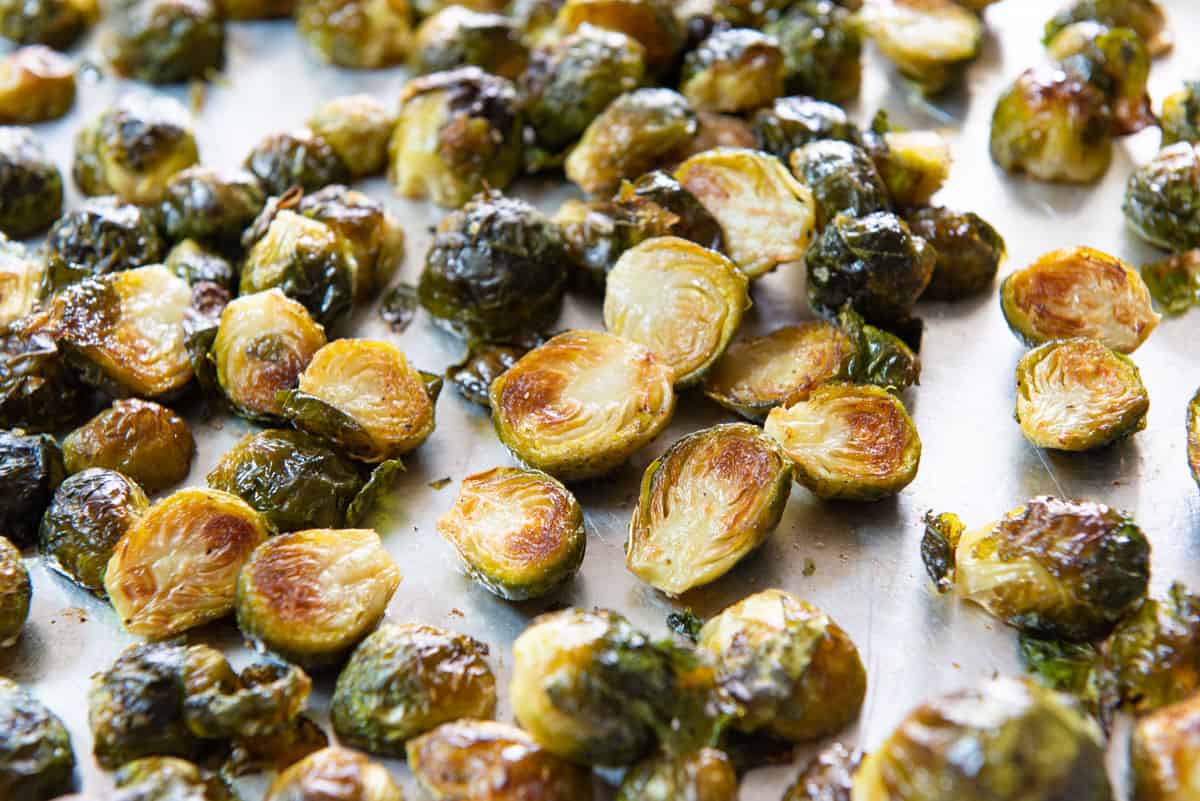
Start them all cut side down!
Spread the brussels sprouts onto a rimmed sheet pan, with the cut flat sides facing down. Yes, this will take a second to flip them all over properly, but then each and every piece will have the best browning on that flat side, which maximizes deliciousness.
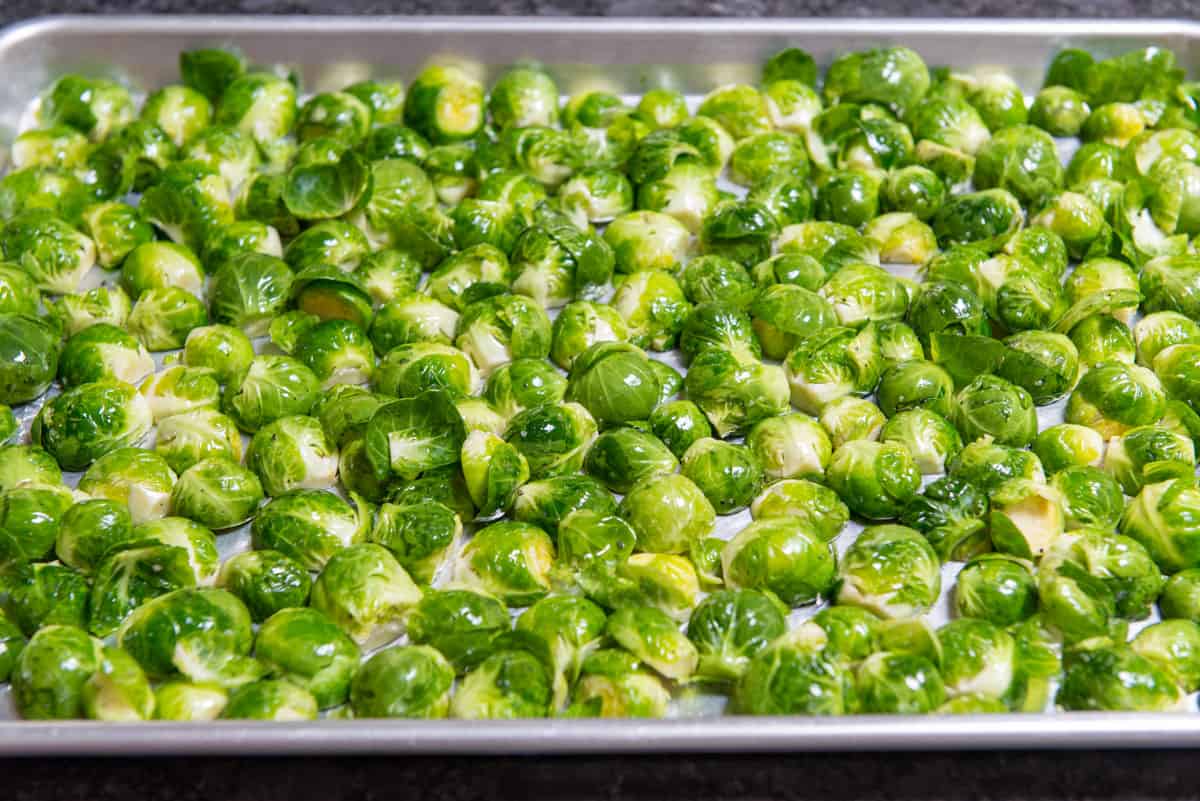
Make sure there’s a little bit of space between the pieces, and that they’re in a single layer (and not piled up on top of each other). This ensures that they will brown instead of getting steamed.
Here I have two pounds on a half sheet pan, which is about the maximum you should do to ensure they have space. If you have more, I recommend using more than one baking sheet.
How long to roast them
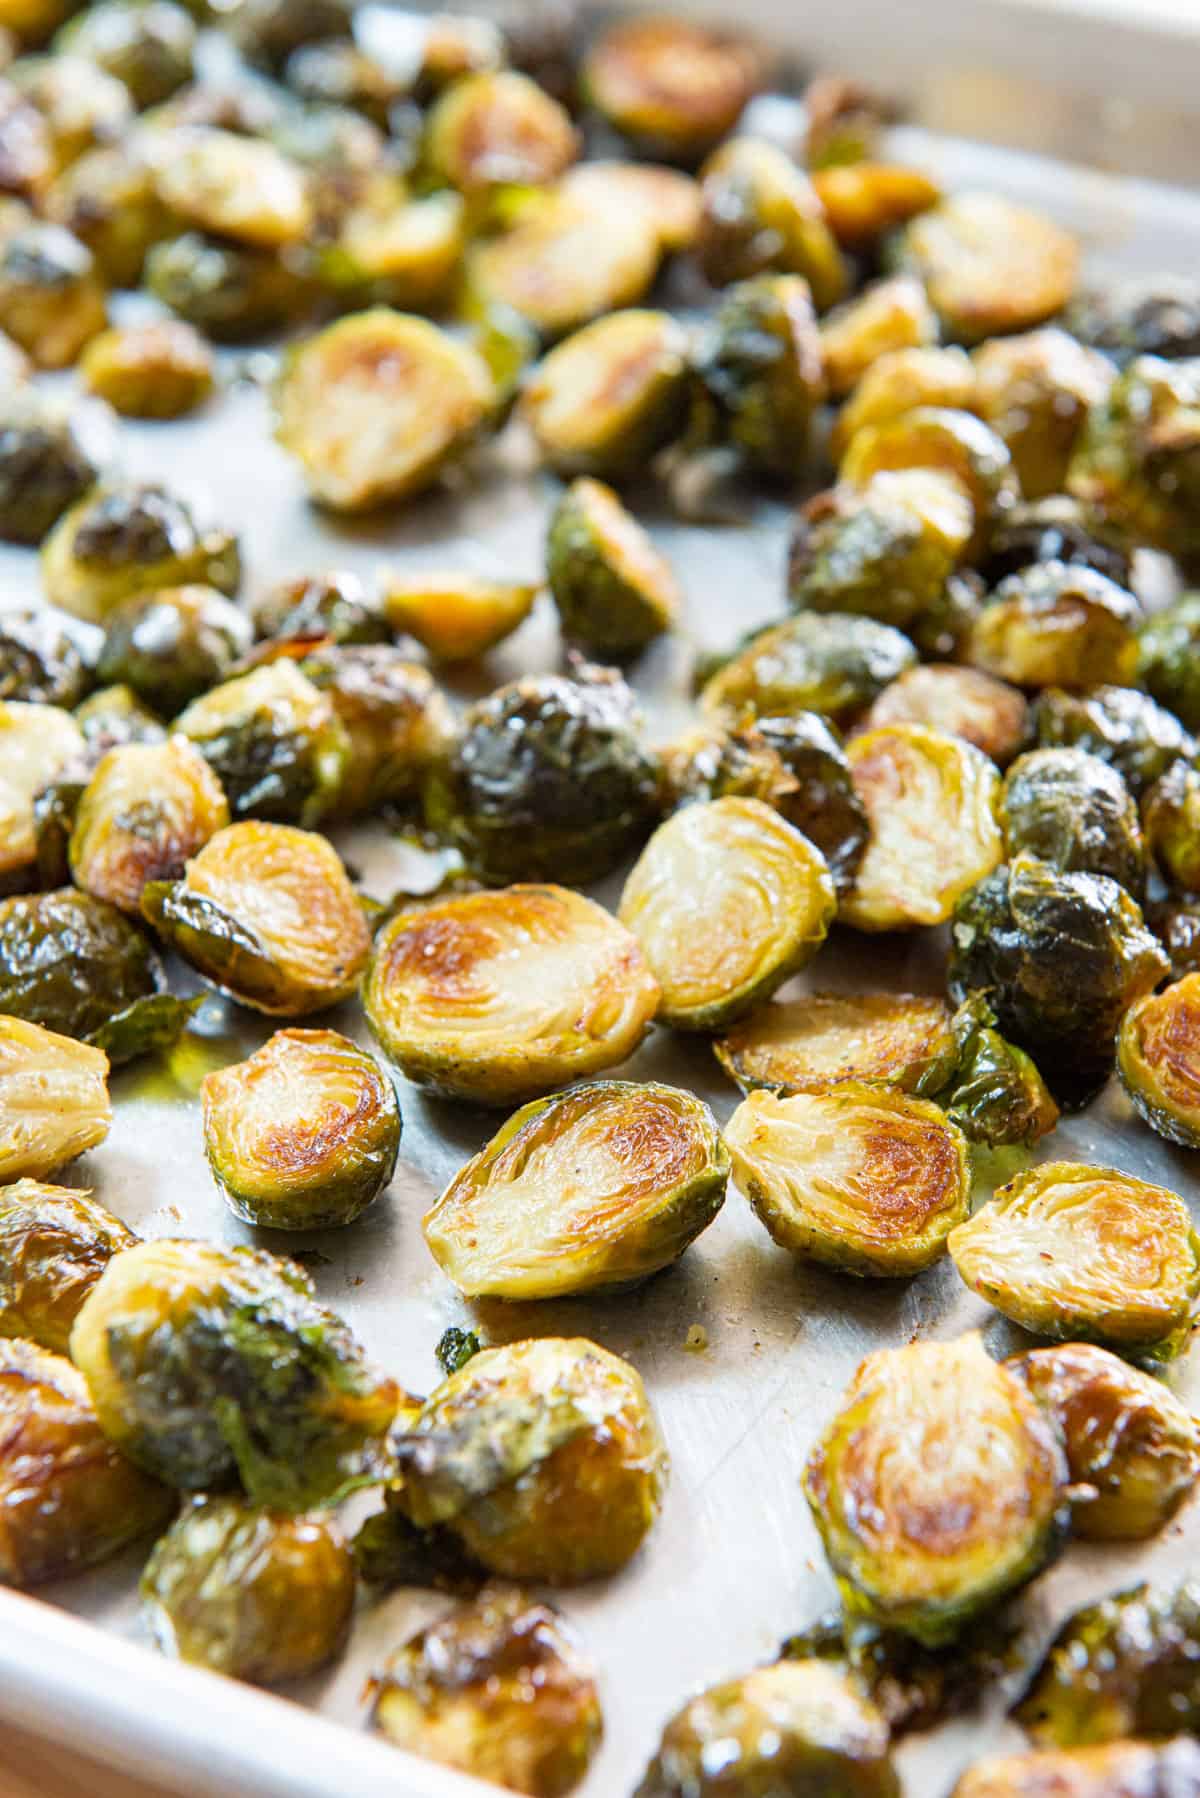
While it will vary slightly depending on size, 25 minutes is usually how long it takes to roast brussels sprouts so that they are golden brown and crispy, but not dried out. The outer leaves should be visibly crispy and browned, but still be tender inside.
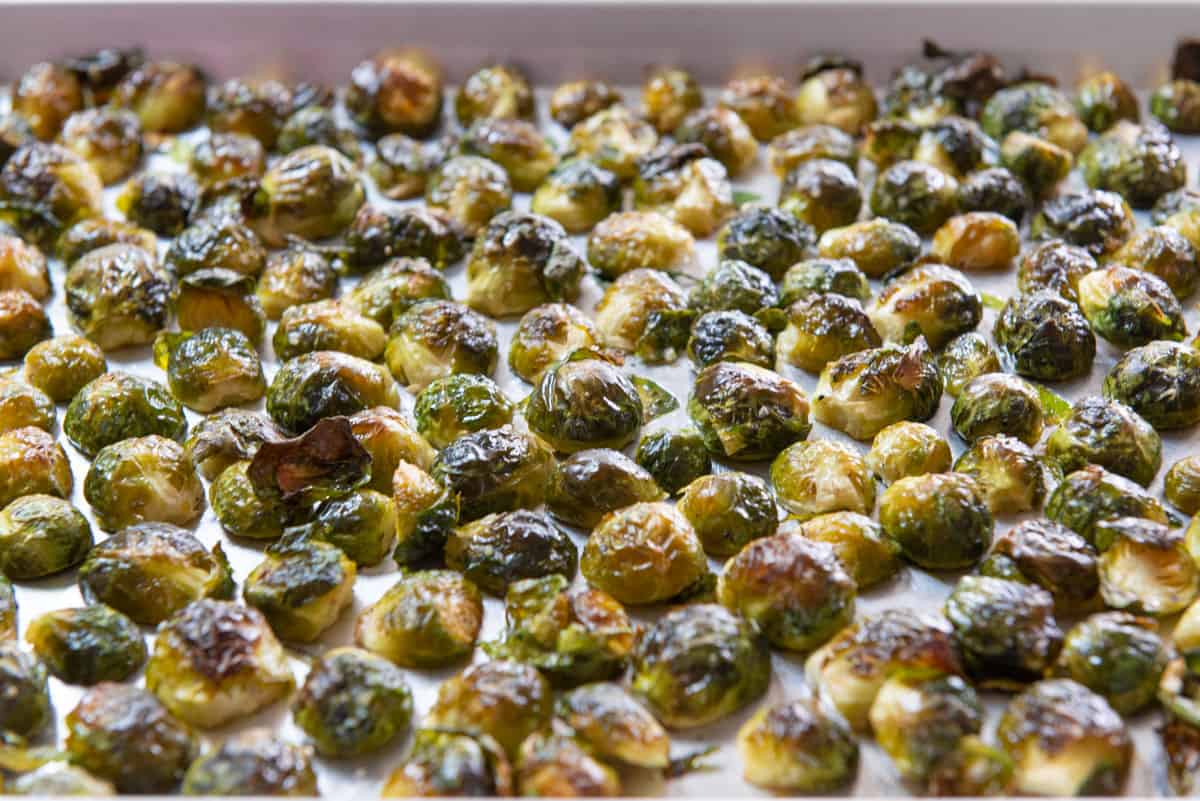
Now flip a few of the pieces over and check the bottom. They should hopefully look like this, with some nicely golden parts on the flat surface:
Use smart oven placement to finish
If the brussels sprouts are not golden enough on the bottom to your liking, then put the sheet tray back into the oven, setting it on the bottom floor of the oven. This is assuming you have a gas oven. If you have an electric coil on the bottom of your oven that’s in the way, then adjust the rack so that it sits right above the coil, and put the tray on that.
Continue baking for 2-3 minutes, checking for brownness on the bottom. The intense close heat should brown them sufficiently within a couple minutes.
How to Serve Them: Delicious Variations
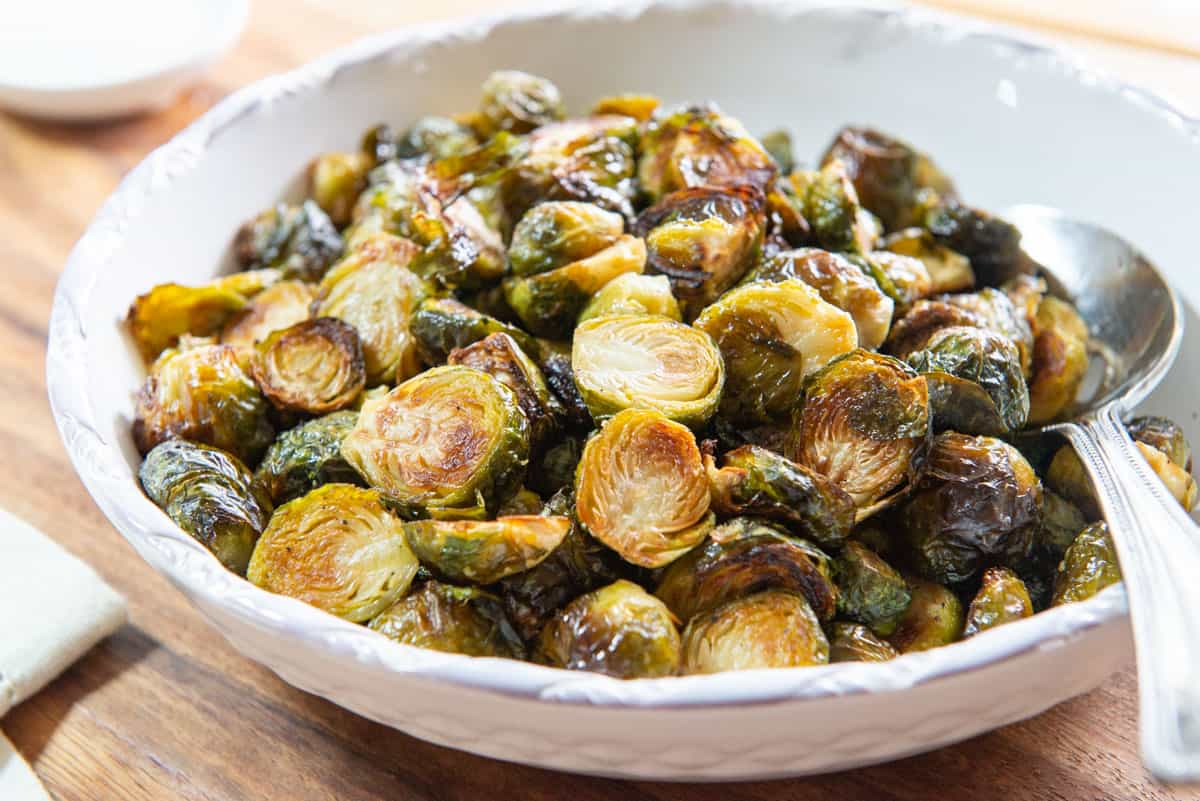
The Roasted Brussels Sprouts are now ready to serve, either as is, or with some other flavors. Here are some ideas:
- Drizzle over some balsamic reduction or Balsamic Vinaigrette.
- Grate some parmesan cheese over the top and sprinkle with a pinch of red pepper flakes.
- Toss them with Lemon Vinaigrette or fresh lemon zest.
- Sprinkle on some Everything Bagel Seasoning (it’s weirdly good).
- Drizzle over some tahini.
- Toss with crispy bacon bits (you can make it at the same time as the recipe. See How to Cook Bacon in the Oven).
- For a really special occasion, toss with Candied Pecans, crumbled Ricotta Salata, and pomegranate arils.
Enjoy! Roasting in the oven truly does make for the best vegetables, and this is the perfect side dish for customization. This recipe is suited to nearly every dietary style, being gluten-free, dairy-free, vegetarian, Whole30-compliant, paleo, and more.
Next time try these oven roasted vegetable sides:
Recipe FAQ and Tips
Leftovers will last in the fridge for 3-4 days, but keep in mind that brussel sprouts get kind of stinky as leftovers. They taste best freshly roasted.
Yes, in the oven, in a skillet, or in the microwave. Oven: 300F for 5-8 minutes, until warmed through. Skillet: medium heat for about 5 minutes, stirring as needed to prevent scorching. Microwave for 30-60 seconds, depending on the amount. The microwave is easiest, but will make them a little bit soggy.
Vegetables generally don’t freeze well. Technically you can store them in an airtight container for up to 3 months, then thaw in the fridge overnight before reheating, but the texture won’t be the same.
A few of my favorites are Braised Lamb Shanks, Prime Rib, and Smoked Pork Butt. Since these are so simple, they go with pretty much any meat entree.
Tried this recipe? Leave a rating and comment below — I’d love to hear how it turned out! Or, follow me on Facebook, Instagram or Pinterest!

Roasted Brussels Sprouts
Ingredients
- 2 lbs brussels sprouts
- 1/4 cup olive oil*
- 3/4 tsp salt**
- 1/4 tsp freshly ground black pepper
Instructions
- Preheat the oven to 400 degrees F.
- Trim and halve the brussels sprouts, then place in a large mixing bowl. Toss the cut halves with the olive oil, salt and pepper.
- Spread the cut halves out on a sheet pan, arranging them cut side down.
- Roast for 25 minutes***, until they're tender and have browned and caramelized on the bottom and edges. If the brussels sprouts are not sufficiently browned on the bottom to your liking, place them on the oven floor and cook for another 2-3 minutes, until well-browned. Keep your eye on them so they don't get burned. If you have an electric oven with a coil on the bottom, position a rack right above it and roast.
- Serve promptly while warm, and enjoy!
Notes
Nutrition
Nutrition is estimated using a food database and is only intended to be used as a guideline for informational purposes.
Post updated in November 2025. Originally published March 2011.
25 Comments on “Oven Roasted Brussels Sprouts”
Can you freeze leftovers?
Thanks, Joanne! I’m talking up your sprouts recipe and sent a friend your web address! You’ve got great stuff, and thanks again. Happy New Year to you as well. Susan Mc
Delicious and easy to make. Thanks for a super simple and delicious recipe.
Hi, Joanne! Just whipped these up and they were great! I left them in a bit longer since I like them dark and crispy (and my oven’s a bit slow). Thanks.
Oh, BTW, saw your piece with Jenna from eons ago. I take it since your hubby was nuke Navy he was at King’s Bay. Not really the sticks, but I guess if you’re from the Bay Area it would seem that way. Very vibrant Vietnamese, Filipino, Lebanese-Syrian, Cuban and Hispanic communities in Jacksonville. Just a thought! Hope you’re loving the Philly area. And welcome, James! Susan Mc
Hi Susan! Glad the brussels sprouts went well. Yes, Kings bay is right! HAHA it definitely felt quite remote for me. But a good experience. We actually live in the Orlando area now, believe it or not! Since June. We are loving it. Happy new year!
I don’t know what the secret is, maybe laying them with the cut side down, but these are the most amazing tasting sprouts ever. I will share this with friends so they can take their cooking a step up.
Delicious! I reduced the oil by half because we’re watching calories, but otherwise followed the recipe as written. Our sprouts came out crispy on the outside, tender in the middle, and absolutely amazing. We’re going to be having these regularly!
I make these all the time, but use way less oil and add a drizzle of balsamic vinegar! I live them even better cold on a salad the next day.i omit the parmesan when using balsamic.
These are delish. I thought I overbaked them and they were tender and juicy. I was shocked. I cooked mine for 15 min (probably less than a pound) and turned off heat bc I thought getting overdone. They sat in turned off oven for 15 min and were the best. Follow instructions.
This was a great way to cook brussel sprouts. I usually steam mine, but decided to give roasting a shot tonight. Thanks for the recipe–cooked on the bottom rack setting of an electric oven and it came out perfect at 25 minutes/400*.
I’m going to try this tonight with some Ribeyes and baked potatoes. I haven’t had brussel sprouts in quite a while. I can’t wait to try them!
I guess it would be easy to use a gallon Ziploc bag to coat the brussel sprouts with the oil, salt and pepper? What do you think?
That works! I just use a mixing bowl and spatula to toss, but the bag can work too, if you shake it up really well.
Definitely a must try. Thank you
This looks like an amazing side for an awesome Sunday roast! The idea of using plenty of pepper on brussels sprouts is definitely appealing!
MMM we love brussel sprouts, will have to try this. I roast fresh green beans this way. I would like to throw in some garlic too, but when I’ve done that, they burn before the green beans are roasted. Wonder if adding the garlic later would eliminate this prob?
Yes, you can add the garlic right at the end to avoid burning. Enjoy!
i never liked them, used to boil with a little water and add butternot very appealing, now i’ll try to roast them ,hope to enjoy them. thanx hey!
I can’t eat them any other way besides roasted, so let me know what you think!
I realized about a month ago that I’d never had a brussel sprout in my life, so I made a lemon-braised version & I’m now a fan. I will be sure to try your version next. Thanks!
Lemon braised???? That sounds so interesting! I’ll have to try doing that. And yes, you must try them roasted. It’s amazing.
I don’t know why people hate these wonderfull little green beauties. I just love them, even raw in salads. I like what you did with ours….
this is my favorite way to prepare brussels sprouts too… and now they are one of my favorite vegetables! the 8 year old me would never have believed it! haha 🙂
I never liked them until I roasted them. Roasting does wonders for vegetables!