Homemade Chicken Pot Pie
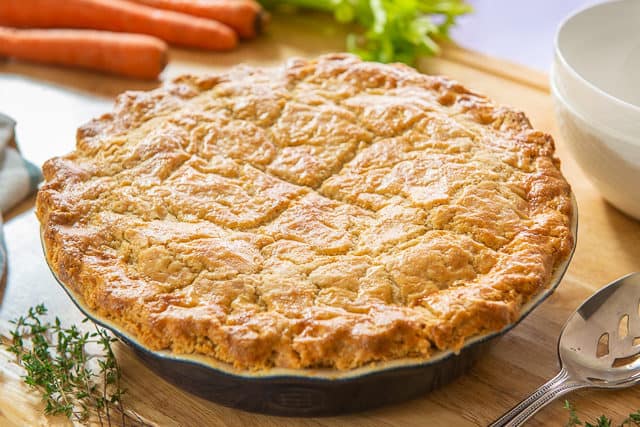
This homemade Chicken Pot Pie is filled with tender pieces of chicken, carrot, celery, potato, and herbs. It’s classic comfort food that’s wonderful on chilly days, and you can even make multiple batches at once and store in the freezer. Then just bake in the oven for the best “instant meal” made from scratch!

If you’re looking for a hearty recipe to make for dinner on chilly nights, this homemade Chicken Pot Pie is the ultimate comfort food. Sometimes people think of chicken pot pie as boring freezer food, but when it’s done right, made from scratch, it can be really delicious and satisfying.
This is a dish that is made in many ways, sometimes with biscuits or puff pastry, but I think a classic flaky pie crust is best. And of course, there must be crust on both the bottom AND the top.
My brother used to call me and rant when he’d dine out and get a chicken pot pie with only a “pie crust lid on top,” saying that his favorite part was the delicious bottom crust that soaks up all the delicious flavors of the “chickeny goodness.”
He makes a good point, doesn’t he? The crust on the bottom is arguably even more important than the top.
Tips for Best Results
Cut the vegetables uniformly – Take the time to cut all the vegetables into pieces that are the same size. If you use a food processor, you can do this very easily, but you can also do it by hand. Kind of like a perfect Fried Rice, part of the magic is when all the different flavors come delivered in the proper proportions, so you don’t want any pieces too big or too small.
Keep the crust chilled – For the best flaky texture, you want to keep the crust as chilled as possible before it goes into the oven. Roll out your circles of dough, then keep them in the fridge until they’re needed.
Place the pie plate on a sheet pan – This is more of a tip for your oven, but I recommend placing the pie plate on a sheet pan before it goes into the oven, just in case any butter from the crust drips and burns. If you’re careful not to shape the crust too high up the sides, this won’t be an issue, but I like to do this as extra insurance, because I hate cleaning the oven.
I always like to make my pie crust from scratch with butter, and recommend you do the same. Here’s my step-by-step post with tips for Butter Pie Crust.
There’s no flavor comparison when it comes to homemade vs. storebought, the latter often made with vegetable oils or shortening. I get that pie crust can be kind of intimidating for some, but you only get better at it with practice.
At the very least, if you purchase a storebought crust, make sure it is made with butter. Anything other than that will have vastly inferior flavor.
Step by Step Overview:
Combine chopped carrots, celery, onion, and potato in a large pot, along with rosemary, sage, thyme, butter, salt, and pepper:
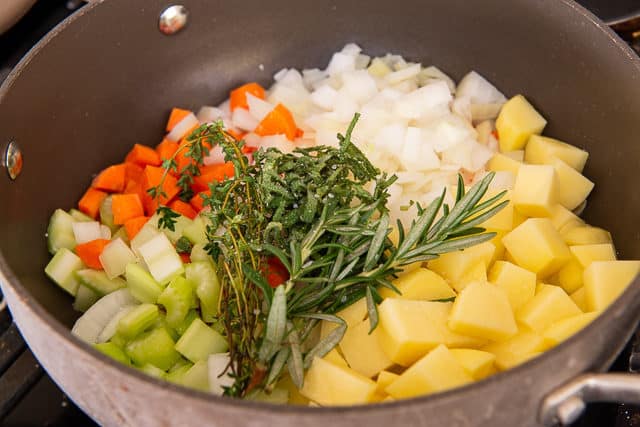
I think fresh herbs are always best in home cooking, but you can substitute up to 1 tsp of dried herbs if you don’t have any fresh on hand. You can also swap in Italian seasoning or poultry seasoning.
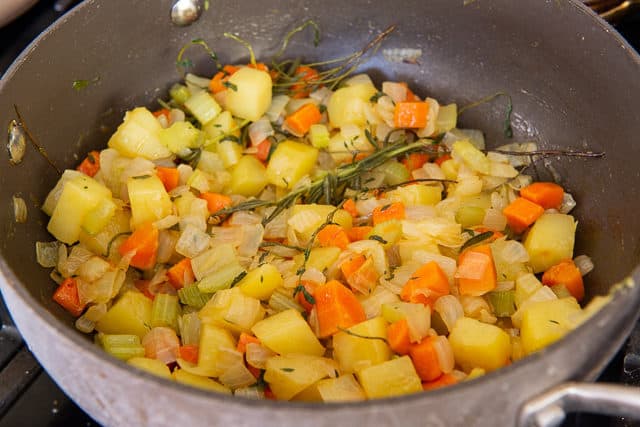
Let this cook for about 20 minutes over medium heat, until all the vegetables have softened:
Add diced, cooked chicken breast and frozen peas to the pan:
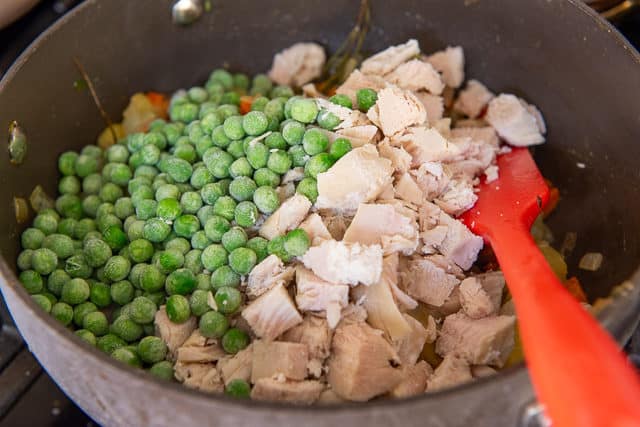
I use boneless skinless chicken breasts cooked via my Crockpot Chicken Breast method for the meat here. It’s so easy, and the chicken is always tender.
You may also use cooked thighs, if you prefer dark meat, or simply shred up a rotisserie chicken from the grocery store. After Thanksgiving, I will even use leftover turkey here.
Next add butter to the pan, and stir it around until the butter melts.
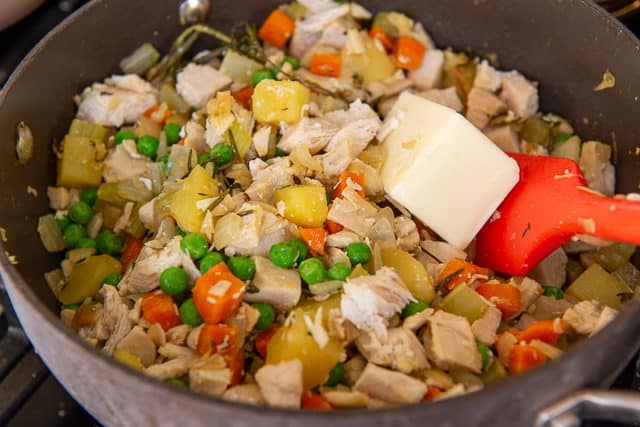
Once the butter has melted completely, add all-purpose flour. This flour/butter combo is what will thicken the creamy sauce later.
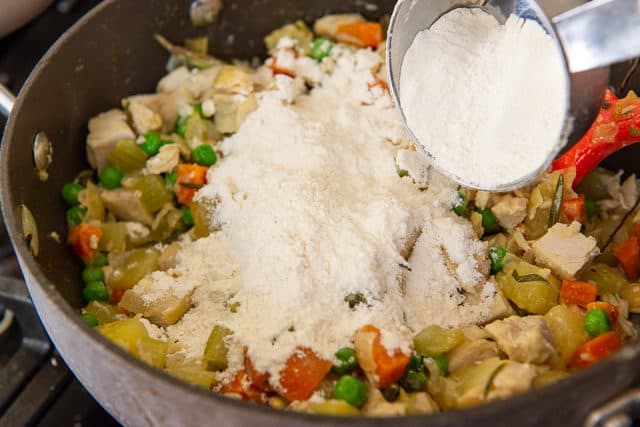
Toss the flour around until it’s moistened, and you no longer see any dry spots.
Next, remove the herb stems from the pan. You will see that they’ve pretty much given off all their leaves by this point:
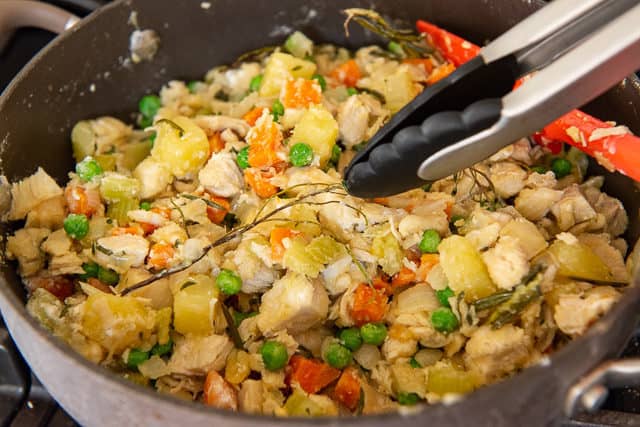
Add chicken broth (or chicken stock) to the pan:
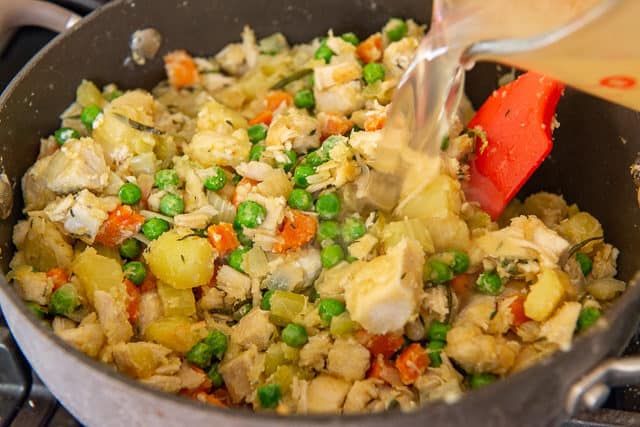
Bring the mixture to a boil, and cook for 2-3 minutes until thickened.
Then add 1/4 cup of cream for a touch of richness. This small amount makes a big difference!
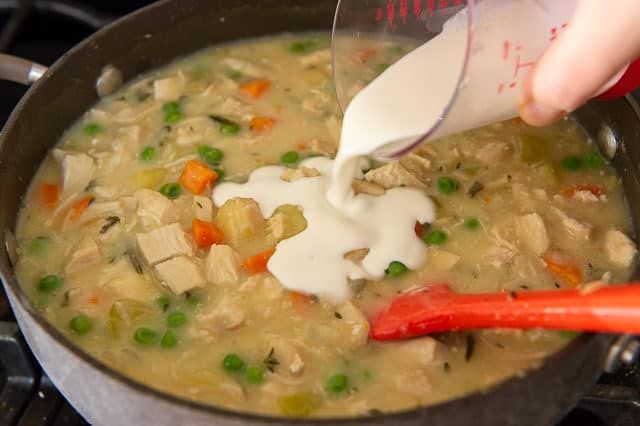
Stir the heavy cream in, then remove the pan from the heat. Now it’s time to put the creamy filling in the pie crust!
How much crust do you need?
You will need one batch of double pie crust for this recipe, or two single crusts. This will ensure that we can cover the bottom and top, and completely enclose the filling into these layers.
Homemade crust is always best since you can make it with butter, and store-bought pie crust made with real butter is hard to find. My Perfect Pie Crust Recipe is a double batch and uses all butter (no shortening) for the fat, but you may use any prepared crust you like.
Roll a single crust out and press it into the pie plate:
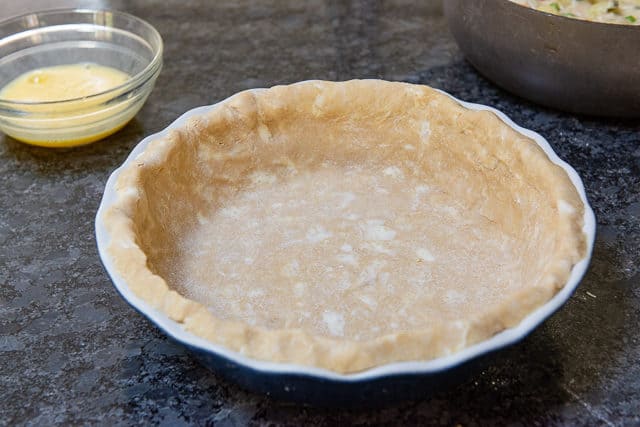
I actually like to have the bottom pie crust chilled and waiting for me in the fridge before I add the filling. The colder the dough is going into the oven, the flakier your buttery crust will be.
Next, add all your homemade filling to the crust. It should be the perfect amount to fill a 9″ pie plate:
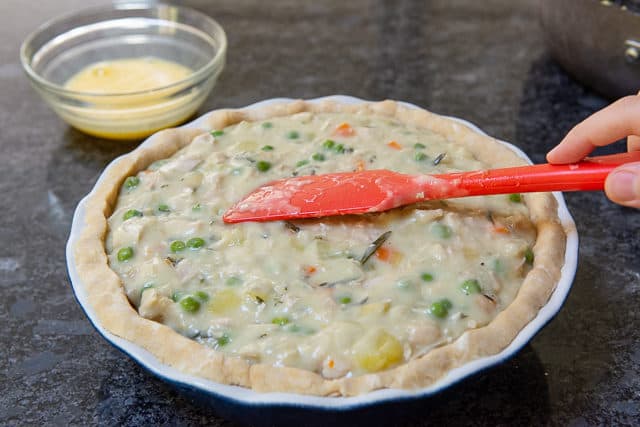
I used this Emile Henry Pie Plate (affiliate) that is 9″ in diameter and 2.25″ high.
Lay the other crust on top, and crimp as desired. You can use the tines of a fork, but I like to pinch it with my right thumb and pointer finger, and left thumb:
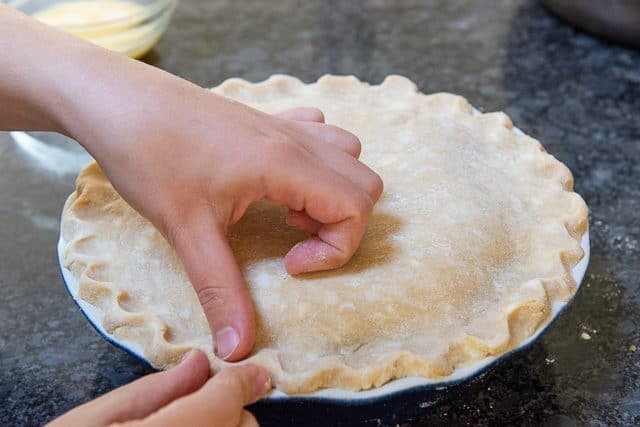
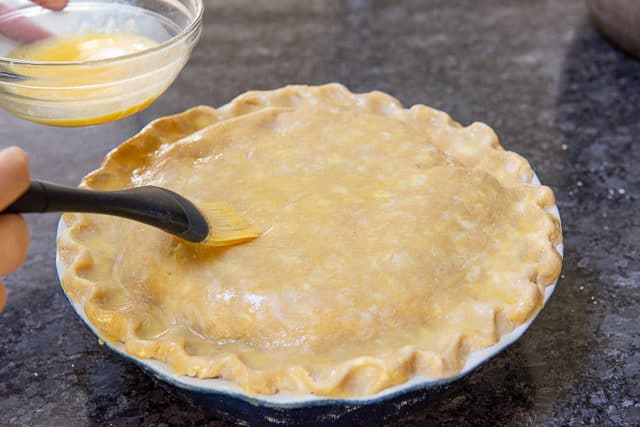
Next brush the top with egg wash. This is just for appearance, but it’s worth the minute it takes to do it. It makes the crust come out so shiny and golden brown.
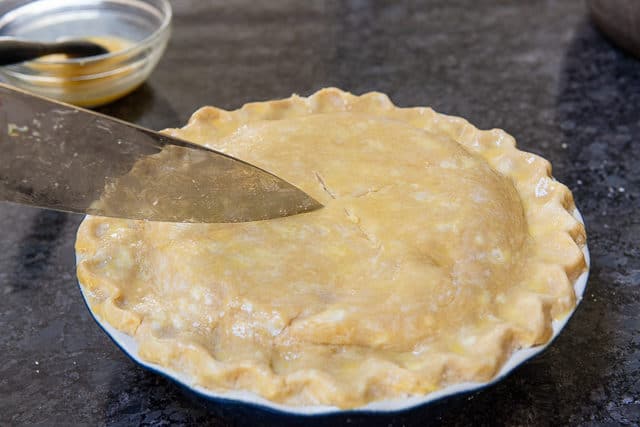
And finally, cut a few slits into the top of the pie crust, to let the steam escape.
Bake for about an hour, until the crust is deeply golden and flaky. I recommend placing a sheet pan underneath the pan, just to make sure nothing drips out and makes a mess in your oven.
I’ve never had any issues with the crust browning too much, but if it does, simply place a piece of aluminum foil on top toward the end of cooking if it looks too brown.
How to Serve
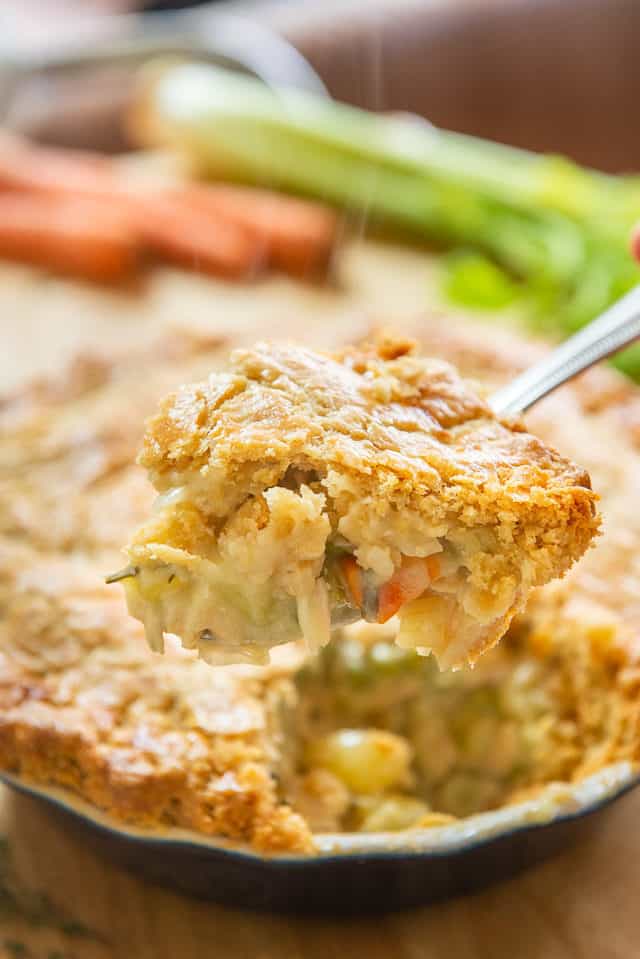
Once your homemade chicken pot pie has finished baking, it is ready to serve right away. There’s no need to rest the dish. You can cut slices into the crust, but you will likely need a large spoon as well to gather up all the filling that was part of that slice. Fortunately, the filling should be thick enough that the sauce clings pretty well to the chicken and vegetables.
Since this is such a rich recipe, I recommend pairing lighter side dishes here, such as a Wild Rice Salad, Roasted Fennel, or Prosciutto Wrapped Asparagus.
Lasagna, Buffalo Chicken Dip, and Chicken Noodle Soup are some of my other favorite big batch comfort recipes. Enjoy!
Recipe Tips and FAQ
Keep in an airtight container in the fridge for up to 7 days. You may also cover the pie dish thoroughly with plastic wrap.
Yes, there’s a reason this is a typical freezer meal you can buy from the store. You can either freeze leftovers for up to 3 months, or you can freeze an unbaked pie in the actual pie plate ready to go, then bake the frozen pot pie for an extra 15 minutes. To thaw fully cooked leftovers, leave in the fridge overnight. Or, you may reheat cooked leftovers straight from frozen by adding 5 minutes of extra oven time, or 30-60 seconds of extra microwave time.
The microwave is the most convenient, though the crust will not be as crisp as the oven method. Microwave in 30 second intervals until warmed through. Alternatively, you can heat a serving in a 300F oven for 15 minutes, or until warmed through. If reheating the whole dish, it will probably take closer to 25 minutes.
Yes, and there are a few options for doing this. The two I recommend are to 1) make and chill the filling as well as the crusts, assemble it all with cold ingredients, and pop the entire unbaked pie into the freezer, then bake when you’re ready. You will likely need an extra 15-20 minutes of bake time, if baking straight from frozen. The other option 2) is to make the filling and refrigerate it, and prepare and refrigerate the crusts ahead of time as well. Then simply assemble everything in the pie plate the next day, and bake.
Did you enjoy the recipe? Please leave a 5-star rating in the recipe card below and/or a review in the comments section further down the page. Or, follow me on Facebook, Instagram or Pinterest!

Homemade Chicken Pot Pie
Ingredients
- 8 tbsp unsalted butter divided
- 2 cups chopped yellow onion
- 1 cup chopped carrot
- 1 cup chopped celery
- 1 cup chopped potato (I like yellow or red potatoes)
- 10 sage leaves chopped
- 5 sprigs thyme
- 1 rosemary stem
- 1 cup frozen peas
- 3 cups diced, cooked chicken breast
- 3 cups chicken broth (or chicken stock)
- 1/2 cup flour
- 1/4 cup heavy cream
- 2 prepared pie crusts*
- salt
- pepper
- 1 egg, beaten (for egg wash)
Instructions
- Melt two tablespoons of butter over medium heat in a large pot, and add the onion, carrot, celery, potato, sage, thyme, rosemary, 1/4 tsp salt, and 1/8 tsp black pepper.
- Saute the vegetables, stirring every few minutes, until soft, about 20 minutes.
- Add the peas and diced chicken to the pot.
- Preheat the oven to 375 degrees F.
- Add the remaining 6 tbsp of butter to the softened vegetables, and let it melt completely.
- Add the flour and stir to distribute, until there are no more pockets of dry flour.
- Remove the herb stems from the mixture and discard.
- Add the chicken broth, bring the mixture to a boil, reduce the heat to a simmer, and let it bubble for a minute or two until the mixture has thickened.
- Stir in the heavy cream, as well as 1/2 tsp salt and 1/4 tsp black pepper (or desired amounts to taste). Remove the pan from the heat.
- Lay the bottom pie crust into a standard 9″ pie plate, and spoon all of the chicken vegetable mixture into the crust.
- Place the other pie crust on top, and crimp with your fingers or with the tines of a fork.
- Brush the top with egg wash, then cut slits into the top of the crust, so the steam can escape during baking.
- Bake for one hour, until the pie crust is deeply golden brown and flaky. I recommend placing the dish on a sheet pan to make sure nothing drips and makes a mess in the oven. Then, serve and enjoy!
Notes
Nutrition
Nutrition is estimated using a food database and is only intended to be used as a guideline for informational purposes.
Post updated in November 2018. Originally published January 2012.

62 Comments on “Homemade Chicken Pot Pie”
I agree this made too much filling, but I also added extra heavy cream. I ended up putting my chicken in the bottom of the pie then pouring the gravy/ veg on top and keeping the rest of the filling in the freezer for next time. All I will need is chicken and pie crusts! I also added a handful of fresh parsley and it added some pretty color ( we don’t like peas)
Yes, great recipe but filling was enough for 2 pies. I used a 3 lb. rotisserie chicken from Sam’s. Everyone loved this chicken pot pie and wanted the recipe!😋
Did you blind bake the bottom crust on your pie
I don’t. You can if you wish.
I am making several for a crowd, can I put them in 9×13 containers?
I was wondering the same thing. Did you happen to make it in 9×13? How did it turn out?
Great recipe for a day at home with the government shutdown and leftovers from last night’s roast chicken. Our kids each wanted seconds, including the kid who supposedly hates chicken. Thanks. Two notes – This recipe made more filling than needed for the pie – you could reduce amounts by 20%. Also there is a LOT of butter here – 3.5 sticks, between the crust and the filling.
I prefer to roast my vegetables and chicken then add them to a garlicy, highly seasoned “béchamel” made with stock heavy cream.
Really enjoyed it. Thank you.
Really enjoyed this one. Thanks!
That’s great, glad you enjoyed!
Why only white meat chicken? Would some dark meat add more flavor?
Hi Bud, Absolutely you can do dark meat if you’d like. I’m a fan of white meat but it’s completely personal preference. Both work nicely!
Sounds so good~are there differant sizes of ramekins?Another question is
do you have to bake the bottom crust first so it does not get soggy?
Thanks for this recipe~I am going to try.
Hi Sally, There are all sorts of sizes of ramekins, the small ones I use here were 4oz ramekins, but you can really use whatever size you want. Just make sure you adjust for time, and only pull the pot pie from the oven when the crust is golden brown (that’s how you know it’s done).
If you want a crisp, dry crust on the bottom then yes, I would suggest you blind bake it first. I don’t mind a wetter crust for this since I have dry crust on top too and I kind of like the bottom crust soaking up all the chicken gravy, but it’s all a matter of personal preference. Enjoy!
Beautiful and tasty!
Yum! Your brother is right but I’ve never put crust on the bottom… might try next time!
I am with your brother. I remember my first chicken pot pie and I ate it in Venezuela.
What a cute little chicken pot pie! I love the lattice crust and your filling. Yummy recipe!
Yes, as I say, there must be a crust going along the sides and at the bottom! Otherwise it’s a devious trick getting to the end and there’s no pot of gold(crust)!
So adorable and yummy. With the chill in the air this is the perfect dish.
So pretty! I wouldn’t want to eat it! 😉