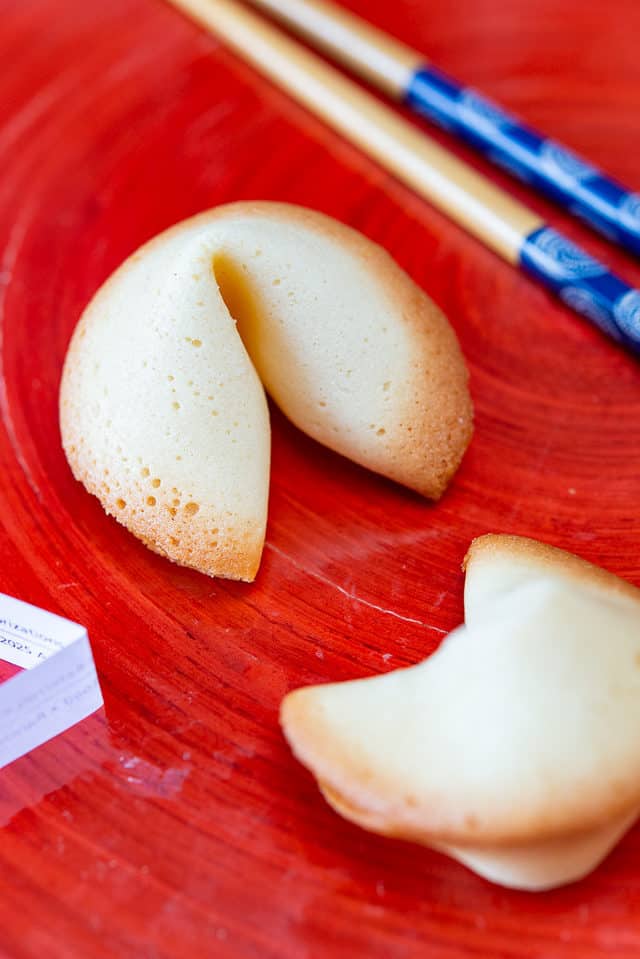
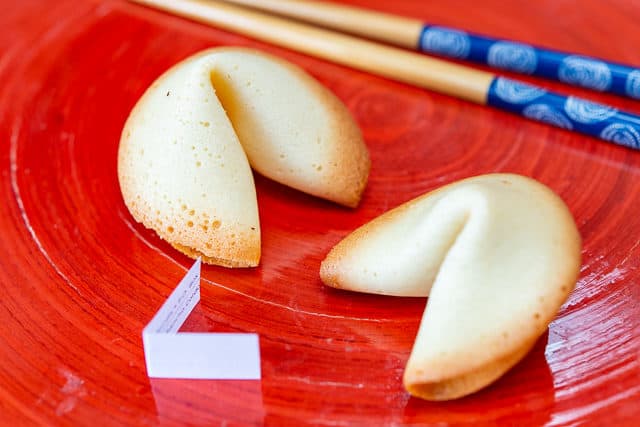
Homemade Fortune Cookies
Fill these Homemade Fortune Cookies with your own personal fortunes for a fun and delicious crafty treat!
I love when food crosses into the craft category and these cookies certainly do.
That’s what makes fortune cookies so fun to do yourself, even though they are a bit tedious to make.
You can put your own notes inside the fortune cookies, and gift them to friends, family, co-workers, and so on, and also customize them for different events.
As I mentioned briefly above, a fortune cookie is not as easy to make as say, a batch of Peanut Butter Cookies.
These are made and folded individually, and because they have to be crimped while they’re hot, you can only do a few at a time.
My recommendation is to get a few helpers and have fun making them together. It goes a lot quicker that way!
How to Make Fortune Cookies:
Start by whipping egg whites, melted butter, sugar, vanilla extract, and almond extract until frothy:

Add flour, and whip until the flour *just* disappears:

Shape the batter into small circles on a silicone mat, and notice how thin they are:

Bake until the circles are slightly golden on the edges, then quickly fold the circles in half with the fortune inside, and bring the ends down over the lip of a cup (this is an old picture, but I have a fortune cookie tutorial video below where I show you exactly how to do this).

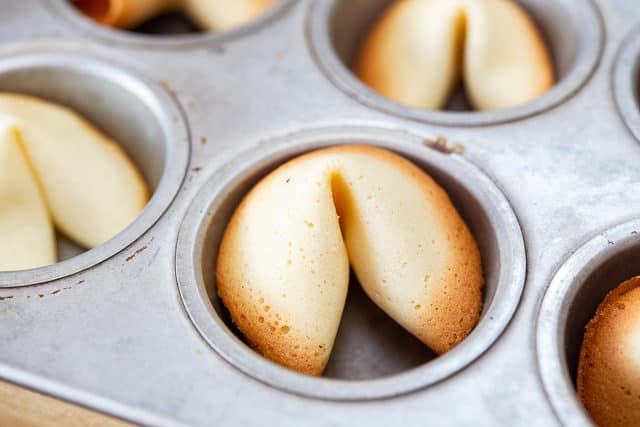
Once the fortune cookie is crimped, place it into a muffin tin to hold its shape, and let the cookies cool while you repeat with the remaining batter.
Here’s the step-by-step video tutorial, and the recipe is below. Enjoy!
Homemade Fortune Cookies
Ingredients
- 3 large egg whites
- 3/4 cup sugar
- 1/2 cup butter melted
- 1/4 tsp vanilla extract
- 1/4 tsp almond extract
- 3 tbsp water
- 1 cup all purpose flour (5 oz by weight)
Instructions
- Preheat the oven to 375 degrees F. Line a sheet pan with parchment paper or a silicone mat, and have your fortune strips ready to go.
- In a stand mixer (or large bowl with a hand mixer), whip the egg whites and sugar on high speed for about 2 minutes, until frothy. Whip in the melted butter, vanilla, almond extract, and water until incorporated. Add the flour and mix until the flour *just* disappears.
- With a tablespoon measure, spoon the batter onto the parchment paper and spread it out into an even 3 inch circle. I recommend not doing any more than 2-3 at a time, since they set very quickly and you will not be able to fold more than that.
- Bake the fortune cookies for 7-8 minutes, until the edges brown slightly. If you let them brown too much, they will snap when you shape them. Conversely, if they don’t brown a little bit, they will also break (but tear, rather than snapping).
- When each batch of fortune cookies finishes baking, remove them from the oven and quickly flip the circle over, and fold your fortune cookie in half, into a semicircle. This is when you slip your note into the cookie (quickly) because if you slip it in right at the beginning, the cookie will be too hot and your paper will stick to the cookie. Place your semicircle onto the edge of a cup, and quickly fold the ends down, to crimp into a fortune cookie shape (see above tutorial video if needed).
- Place the cookie in a muffin tin to let it cool and hold its shape.
- Repeat with the remaining batter and enjoy!
Nutrition
Nutrition is estimated using a food database and is only intended to be used as a guideline for informational purposes.
Post updated in January 2019. Originally posted January 2014.
133 Comments on “Homemade Fortune Cookies”
The best way to not burn your fingers ( and I have made many of these) is to go to staples or the like and get a few of the finger shields that postal workers use. Rubber whatsnots that you put on your fingers. Problem solved ;o)
They are turning out great but honestly I am having a hard time not burning my fingers when I shape over the mug. Am I moving TOO fast? It seems like they will set really quickly, but maybe I can wait a little longer before moving half moons to the mug rim? Or let me know if you have any other tips.
Thanks, great recipe!
I definitely burned the pads of my fingers too!
Do you have suggestions on how to make them glutem free? Eill any gluten free flour bkend work?
Hi Cecilia, I haven’t tested anything gluten free, but if you do, please let us know.
I know this is years later, but I just made these gluten free! I thought I would answer this for other gluten free people who were reading all the comments for this answer. I used Better Batter flour and measured it to the weight listed in the recipe. They came out perfect and tasted yummy!
Thanks for sharing! that is great to know!
Should I use salted or unsalted butter for this recipe?
My default is always unsalted, but you can use either.
Just made these and they were a bit hit. Easy to follow instructions.
Hello there! I just used your recipe to make fortune cookies for my daughter’s class and I am so happy I was able to pull them off thanks to your expertise! No fortunes for them though, ran out of time! Maybe a New Year’s party in the future! THANKS!!!
Great recipe! Tastes good, simple instructions, and turned out really cool the first time around. To be honest, seeing people fail on The Great British Bake Off made me extremely hesitant about trying to make these but this recipe is fantastic.
Hi Joanne, I haven’t made this recipe yet but I was thinking of making them for my dad’s 80th birthday party, I thought I could put “thank you for attending George’s 80th birthday party. But my real question is, do you think it would be possible to add a couple drops of food coloring or a spec of dryou food coloring to this recipe, to give the plate some color. Thanks
Hi Cyndi, a few drops of food coloring should be fine, since it’s such a tiny amount of liquid. Enjoy!
Hi, can I switch the melted butter with a vegetable oil? Allergies in family to milk products….
Hi Avi, I haven’t tried it, but it would likely work fine since the butter is melted. Use slightly less oil…subtract a tablespoon.
Thank you!!
Will try
For how many days can they be stored?
Hi Mariah, let them cool completely, then you can store at room temperature for at least one week.
Do you have to use an electric beater or can I just use a whisk?
Thank you for the Recipe and the Video of clear instructions. I am so happy with the results – just made a batch for an extra Christmas treat 2014 here in New Zealand.
Joanne,
Thanks ! Your idea worked great! They turned out perfect!
Tom
Hi. We have made these for a school project but after one night they were soft and not in the least crunchy or hard enough to crack. Any suggestions on how to make these harder? Since we made so many, we don’t wan to start over. Any way to make the ones we already made harder??? If not, what are we doing wrong if they are soft . Thanks!
Tom
Hi Tom, I’m glad you held onto the cookies, because they simply need to be baked longer so more of the moisture is cooked out. Place the cookies in a muffin tin (preferably, so their shape is contained) and bake in a 350 oven until they look golden brown all over. Let me know if this helps.
These seem so complicated to make, but I feel I could do it after watching your tutorial. I’ll have to give it a try.
Thank you for sharing. I never knew fortune cookies were so easy to make! Can’t wait to try them next dinner party I have. I just love your little appetiser/starter ideas too – they will come in handy! Just became your new foodie reader. Can’t wait to get some more inspiration from you