Crispy Baked Chicken Wings (Easy Oven Method)
These crispy baked chicken wings come out crackly on the outside, juicy inside, and packed with flavor — all without a deep fryer. If you’re wondering how to bake chicken wings and actually get them crispy, this is the method that works. Less fat, less calories, and healthier than deep-fried!
This is one of the most tried-and-true recipes on my site, with nearly 1,000 raving reviews from readers who say it beats anything they’ve had in a restaurant. The secret? Parboiling the chicken wings first to remove excess fat, then baking at high heat for golden, crackly skin.
Whether you’re planning game day snacks, a party appetizer, or just craving crispy oven baked chicken wings without the mess of frying, this method is easy, reliable, and absolutely delicious.
Why My Method is the Best
Crispy without deep frying – For over a decade, this has been the go-to recipe on my site for crackly, crispy chicken wings—no baking powder or flour needed. Parboiling first removes excess fat, and a super hot oven finishes the job beautifully.
Easy to scale – Whether you’re cooking for a party or just a few people, this oven-baked method makes it easy. No fryer to manage, no batches to babysit. Just pop multiple trays in at once and bake.
The healthiest option – These wings get golden and crisp without being deep fried in vegetable oil. They’re lighter, but still satisfy that fried-wing craving.
Make ahead friendly – Parboil the wings in advance, then store them in the fridge for up to 24 hours. When you’re ready, bake them straight from the fridge—perfect for parties or meal prep.
I’ve Tested It All – Here’s What Actually Works
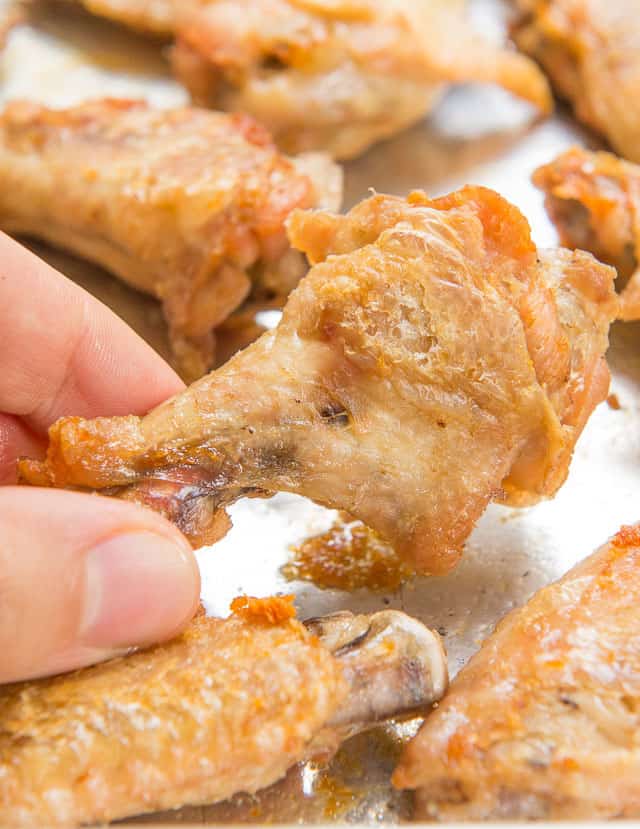
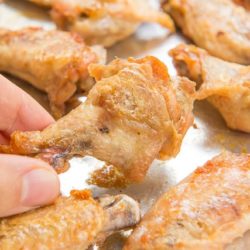
I’ve tried every method for baked wings—baking powder, hybrid approaches, deep fryers. But nothing beats parboiling then baking. The skin turns out crispier and lighter, without that leathery feel some other methods give. The results speak for themselves, Look how golden my parboil method is!

Tips for the Best Results
Dry the skin well – Water and moisture are the enemies of crispy, so you will need to make sure to dry the chicken skin thoroughly so they can get supremely crispy.
Flip once during cooking – It’s a little more work to flip the pieces over during cooking, but it really is essential. They won’t get as crispy all over unless you flip them over and give the other side a chance to brown.
Buy “party” cut pieces – It’s true that you can sometimes save a tiny bit of money by cutting the whole wings yourself into wingettes and drumettes (and discarding the wing tips), but pre-cut pieces tend to be more consistent. This consistency in size is essential for even cooking and browning. If you have some larger pieces and some smaller, you’ll have a mix of over and underdone chicken.
Step-by-Step: How to Make Crispy Baked Chicken Wings
Here’s an overview of the game plan.
- Cut the chicken wings into drumettes and wingettes, if needed. If you buy “party wings” at the store instead of whole, they are already prepped for you. I recommend this to save time and hassle.
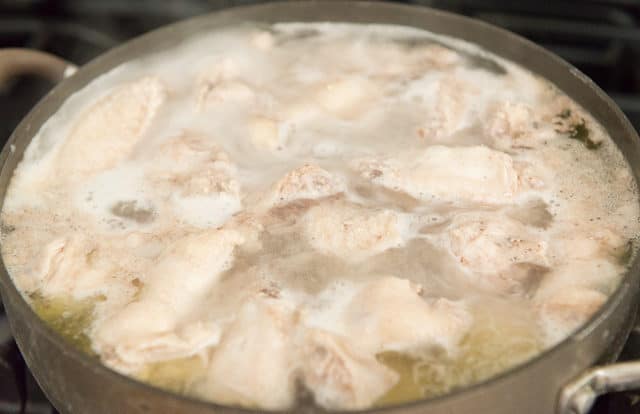
- Simmer the chicken in salted water for about 7 minutes, to render excess fat.
- Dry them thoroughly.
- Place them face down on a sheet pan and bake, flipping once while cooking.
- Coat in sauce, and serve.
Let’s look at some step by step photos.
Parboil First:
- Bring a pot of water to a boil and heavily salt. Add your Chicken wings and reduce to a simmer. Parboil for 7 minutes
I know it feels strange but this renders fat and is the secret to crispy wings.
Drain in a colander
2. Drain your wings into a colander. Really let it sit for a few minutes so the steam can finish burning off.
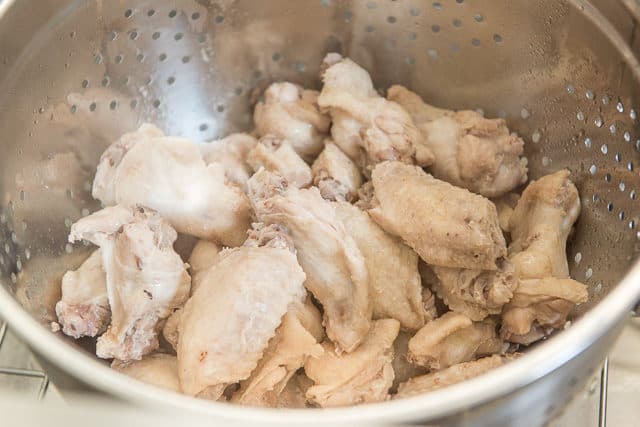
Dry the wings
3. Lay the chicken pieces out on paper towels and dry very well, giving each one a squeeze.
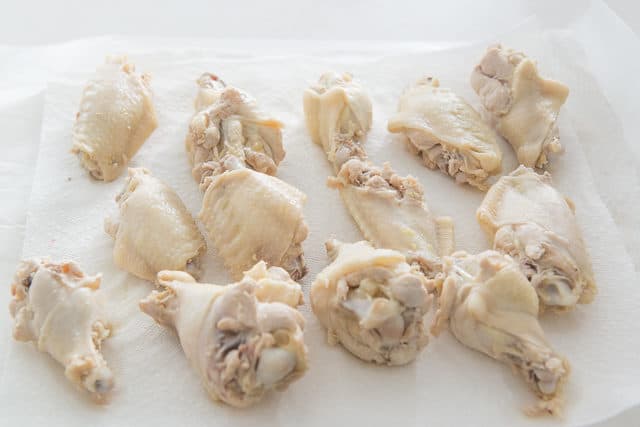
If you want crispy results, you have to dry thoroughly
It’s REALLY important to dry the pieces well with the towels, because it has a big impact on how crispy they will end up later. In order for the skin to get crispy, all the surface water must evaporate and cook off first, so you want as little there as possible from the start.
Want to add seasoning?
If you’d like to add some sort of seasonings or a dry rub, now is the time to rub it onto the chicken. Popular choices are garlic powder, onion powder, chili powder, and of course, black pepper and kosher salt. However, because I like to add the flavorings via the sauce, I do not add any spices to the meat here.
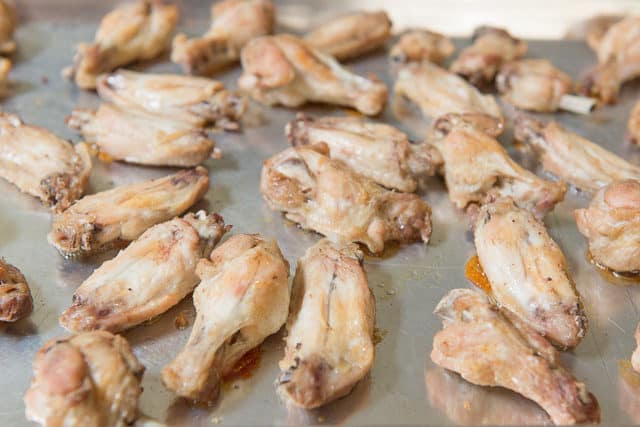
Bake in the Oven
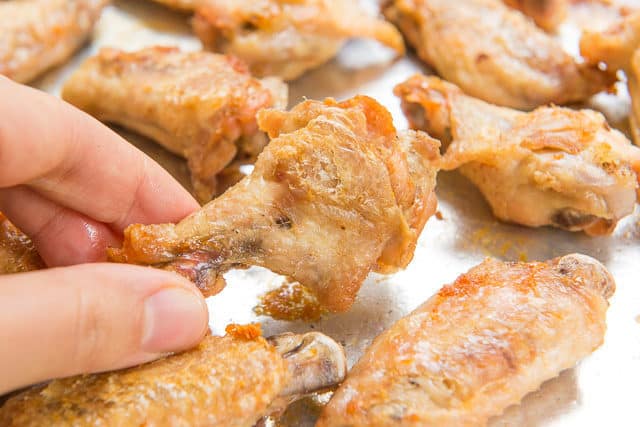
4. Lay the wings in a single layer on a rimmed baking sheet, and bake in a 450F oven for about 25 minutes, until you start to see golden brown bits on the bottom of the wings.
Look closely, and you can see golden bits peeking out from the sides here:
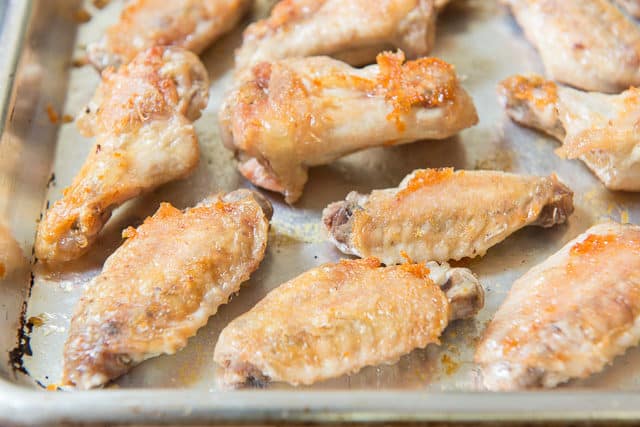
Flip them over
5. Flip all the pieces over, and you can see those caramelized parts starting to develop:
This is what we want! But, we need to cook it more. Most of it is still isn’t crispy yet.
Continue baking for another 5-10 minutes, until much more of the skin has crisped:
6. Once your wings have all developed their crispy skin you can remove from the oven.
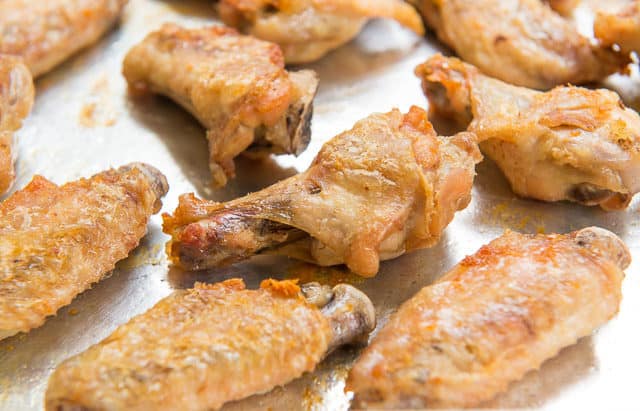
Variations on Baking Time: Size Matters
The sizes of chicken wings at grocery stores vary hugely, so the visual cues are incredibly important! Make sure to look at the photos above, and to use the baking times as estimates, but go more by visual cues. If the wings turn out dry, this means they were overcooked. They definitely shouldn’t be dry on the inside.
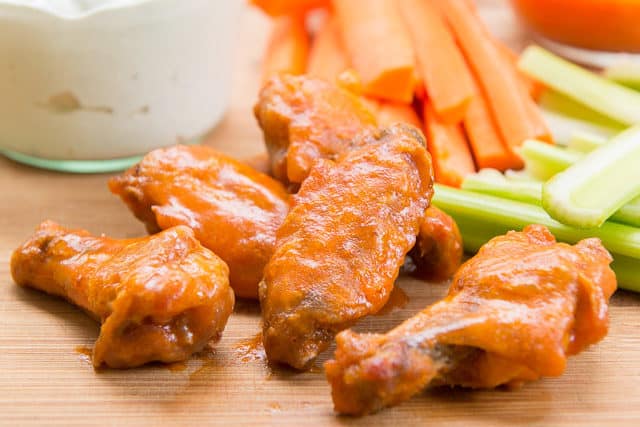
Toss in your preferred sauce
At this point your crispy baked wings are ready to be tossed in a large bowl with Buffalo Sauce (assuming you want to enjoy these as the classic buffalo wings, but oven baked), and devoured.
Don’t like spicy sauce?
If you prefer something that isn’t spicy, you may like Garlic Parmesan Wings better. I also have sweet and spicy Korean Chicken Wings, Honey Garlic Chicken Wings, or you can toss in BBQ Sauce. Feel free to try out your personal favorite sauces, as this cut of chicken is like a blank canvas that works well with most flavors.
What to Serve with This Recipe:
Serve your delicious wings with a side of Blue Cheese Dip if you’re doing classic Buffalo Sauce, along with celery sticks and carrot sticks. This is one of the most popular and favorite dips on the blog.
You can also do a side of Buffalo Garlic Knots and Buffalo Chicken Dip (or the Crockpot version, Crockpot Buffalo Chicken Dip) to round out a full spread of tasty appetizers for football or game day snacks!
I also love making Homemade Guacamole and a pot of Ground Turkey Chili.
How to Make Sure The Meat Doesn’t Stick to the Pan
A few people have reported issues with the wings sticking to the pan. This means they were too wet when they went into the oven.
Make sure to:
- Dry the wings very thoroughly after parboiling. As stated in the recipe, let them air dry for a few minutes (you will literally see steam evaporating off the wings as they cool). Then dry them very well with towels, squeezing well.
- If you want extra insurance, you may grease the pan with a high smoke point oil, like ghee, tallow, avocado, vegetable, canola, etc. Just make sure you don’t put parchment paper or a silicone mat underneath the wings, because they won’t crisp up the same.
Tips and FAQs:
I only recommend you bake these fresh. They won’t stay crispy later.
Yes! Parboil and dry the wings, then refrigerate UNCOVERED on a sheet pan for up to 24 hours. Bake them straight from the fridge — just add a few extra minutes to account for the chill.
You’ll need to thaw first. Once thawed, parboil and continue as directed. Never cook chicken wings straight from frozen.
Yes, definitely! Parboiling renders out some of the fat, and the remaining fat is used to crisp the wing naturally. Plus, the vegetable oils most people use for frying are very unhealthy.
Absolutely. Unfortunately, frozen meats lose moisture in the freezing process. This is true not just for chicken but also beef, pork, etc.
Yes — no breading, no flour, no baking powder. These wings are Paleo and Whole30 friendly too.
Bake at 450°F for 25 minutes, flip, then bake 10 more minutes until golden and crispy on both sides.
What Readers Are Saying
⭐️⭐️⭐️⭐️⭐️ “This was the best baked chicken wing recipe I have ever made. The chicken was super crispy. My family enjoyed. I will definitely make this recipe again.” – Victoria
⭐️⭐️⭐️⭐️⭐️ “By far the BEST oven baked wing recipe out there. They are just as, if not crispier than their fried companion. Could not recommend this recipe more!” – Alicia
⭐️⭐️⭐️⭐️⭐️ “My favorite way to make wings. I will never make another way again! Super crispy every time!” – J
Tried this recipe? Leave a rating and comment below — I’d love to hear how it turned out! Or, follow me on Facebook, Instagram or Pinterest!
Crispy Baked Chicken Wings
Ingredients
For the Chicken Wings:
- 2 lbs chicken wings "party style" (pre-cut into wingettes and drumettes)
- salt
What to Serve With Them:
- Blue Cheese Dip
- Cut celery and carrot sticks
- Buffalo Sauce
- Buffalo Garlic Knots
Instructions
- Preheat the oven to 450 degrees F.
- Heat up a big pot of boiling water. Season the water like you would for cooking pasta (taste the water, it should taste a little repulsively salty, like sea water).
- Add the chicken wings to the pot, and reduce the heat slightly to keep them at a simmer for 7 minutes.
- Drain the chicken pieces in a colander, then place them on a wire rack for a couple minutes, letting the steam evaporate from the cooling wings and also letting any excess moisture drip down. Then dry them very well with paper towels or highly absorbent kitchen towels.
- Place the chicken wings directly on a metal sheet pan, with the fattier top side down.
- Bake for 25 minutes on the first side, then flip the pieces over and bake for another 5-10 minutes on the other side, until the skin looks golden and crisp. Make sure to keep your eye on them, particularly if you have smaller wings, to check for doneness. Overcooking risks drying the inside out.
- If serving the wings with sauce, coat them while they're hot out of the oven. Enjoy!
Notes
- Dry the wings very thoroughly after parboiling. As stated in the recipe, let them air dry for a few minutes (you will literally see steam evaporating off the wings as they cool). Then dry them very well with towels, squeezing well.
- If you want extra insurance, you may grease the pan with a high smoke point oil, like ghee, tallow, avocado, vegetable, canola, etc. Just make sure you don’t put parchment paper or a silicone mat underneath the chicken, because the skin won’t crisp up the same.
- Bake on an uncoated sheet pan (affiliate) for best results, and use a turner like this (affiliate) to really get under the pieces and scoop the crispy bits off.
Nutrition
Nutrition is estimated using a food database and is only intended to be used as a guideline for informational purposes.
824 Comments on “Crispy Baked Chicken Wings (Easy Oven Method)”
I have a recipe that has to marinate overnight. Can I do the 7 minute boil to get rid of the fat first and then marinate?
Hi Nancy, i dont love the idea of partially cooking and then marinating. I think this will open up the possibilty to food bourne illnesses
I rarely make chicken wings because of the time and mess involved and because I can never get them crispy enough for my taste. This recipe is a game-changer! I only added one step. I liberally greased my cookie sheet with avocado oil and put it into the hot oven until it was piping hot and then added my boil and dried wings. The wings didnt stick at all and were super crispy. These wings will now be on my regular recipe rotation. Thank you so much! 😃
So glad you are back to making wings! I love making them at home too. Cheers Jackie!
I want to make these for a party where people will be dropping in at different times. Can I throw them into a crockpot on warm after baking and tossing in my sauce?
Excellent! Easy, quick and delish!! Recommend
Thank you Dave!
I have made this recipe multiple times always thinking I will freeze the “extras” but I end up making them all every time with not one left (48 pieces). I even have had two of my husband’s friends ask for the recipe !! And yes, they are guys !
No matter how many I make the plate always seems to be empty after too! Glad everyone is loving them!
This was the best baked chicken wing recipe I have ever made. The chicken was super crispy. My family enjoyed. I will definitely make this recipe again. Thank you for such a wonderful recipe.
Thank you Victoria! I love hearing this!
Hi, thank you for your recipe! Can you please tell me which oven rack should I be cooking these wings on and should I use convection oven setting?
Hi Holly! I would recommend cooking them on the top rack so they get nice and crispy!
By far the BEST oven baked wing recipe out there, they are just as, if not crispier than their fried companion, could not recommend this recipe more!
So true! so happy you enjoyed them!
My favorite way to make wings. I will never make another way again! Super crispy every time!
right! so glad you enjoy them!
I made the recipe and followed every detail…I wasn’t that pleased I found that the sauce did not adhere that well to the chicken and the boiling affected the taste – made them bland. I find either frying in oil or air frying eas better.
Awesome8
Living in Belgium and craving for Buffalo wings I got my hands on some Franks Hot Sauce and started looking for wing recipies. Deep fry or not that is the question.
I came upon your recipe and was sceptical about the pre-cooking in water but it works. Crispy not too fatty wings. I also used your Blue cheese dip recipe. Everything turned out great. Thanks !
Parboiling was something I wanted to do to eliminate fat in the chicken wings. One really good tip for you for baking is to dredge them slightly in cornstarch. Anybody using baking soda is going to have a gritty salty finish on them but the cornstarch actually makes them really crispy. I use a perforated pizza pan with parchment paper for baking these so that he comes up from the bottom as well.
Far & away the best wings I’ve ever made. My Superbowl party guests didn’t stop raving about how moist yest crispy they were. Beautifully brown and perfectly crunchy in all the right places. I will never fry wings again!
Thank you for this awesome, easy recipe.
I’ve made these about ten times and they are fantastic. They really do crisp up nicely and they hold the sauce well. For sauce, I use2 TBSP melted butter mixed with about 1/3 cup Frank’s Red Hot Sauce. That will sauce about 16 wings. On occasion, a couple of the wings will stick to the pan, but a quick slice underneath with a thin spatula fixes that so I can flip them.