Rice Pilaf
This Rice Pilaf is a classic side dish that goes well with nearly any meal, making it a wonderful staple in anyone’s kitchen. It’s simple, fluffy, and flavorful, and ready in about a half hour. It’s satisfying as is, or it can easily be customized with fresh herbs and other additions.
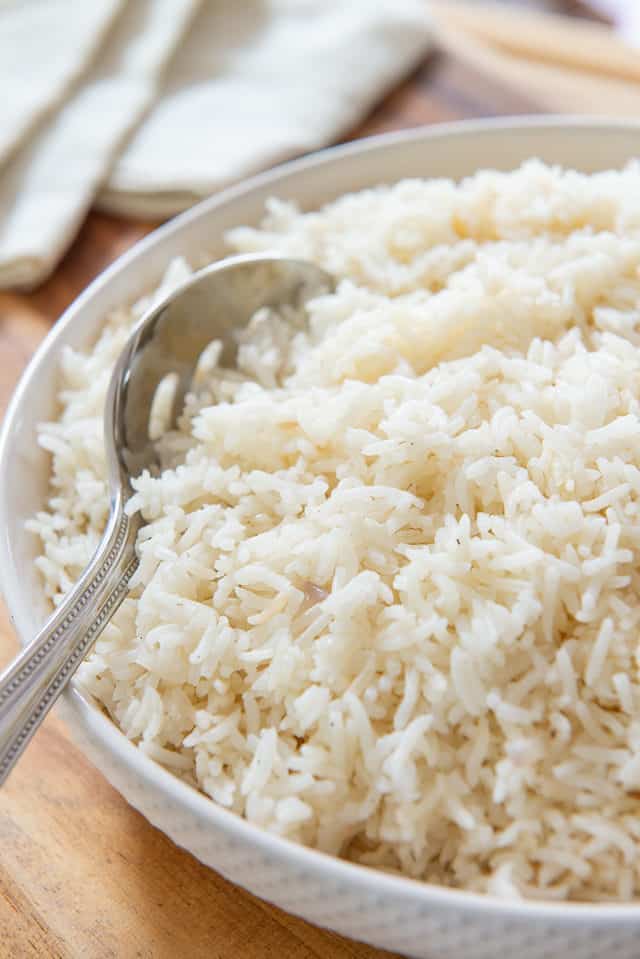
A lot of times people think of plain rice as a boring side dish, but you can create quite a different experience depending on how you cook it.
This easy rice pilaf recipe is about as minimal as it gets when it comes to ingredients, but still has wonderful flavor and texture. It’s perfectly fluffy and steamed, with separated, tender grains that aren’t sticky.
The method I share here is adapted from a Cook’s Illustrated cookbook I received for Christmas many years ago, called The Science of Good Cooking (affiliate), and it has gone through MANY rounds of recipe testing.
I was quite intrigued by their chapter on rice and have since experimented with several methods, as well as many different varieties. This is my favorite way to make pilaf, and the results are quite compelling for skipping the box mix and cooking from scratch!
Tips for Best Results
Pick the right variety – My two favorites are jasmine or basmati, which are both long-grain, fragrant, and easily accessible varieties. I find that generic “long grain rice” doesn’t have as much aroma.
Rinse thoroughly, but don’t soak – No matter what type of rice you use, for the distinct separate grains that typically characterize a Rice Pilaf, you’ll want to rinse the grains thoroughly under running water, to rinse away the excess starch from the outside. Soaking will actually give you a bloated end result and should be avoided.
Let it sit for 10 minutes after cooking – This makes such a big difference in the end “fluffiness” and allows any last bits of moisture to absorb in. Don’t skip it unless you’re absolutely in a rush.
Step by Step Overview:
To get started, melt butter in a nonstick pan over medium heat, then add shallots and salt:
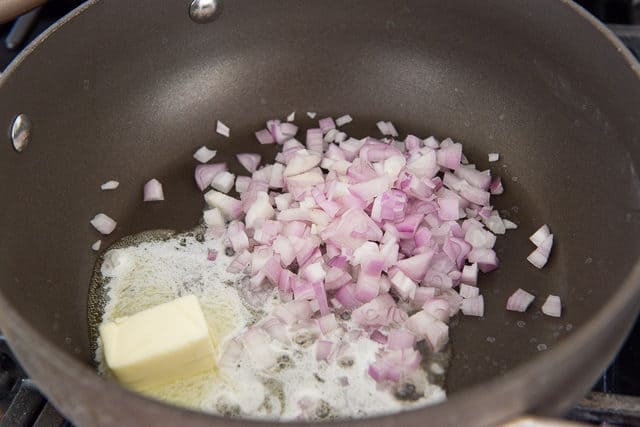
Butter will give you the superior and classic flavor, but you may also use olive oil if you prefer.
You may also substitute yellow or red onion if you prefer them over shallots.
Let that cook for about 5 minutes, until the shallots soften. While the shallots cook, prepare the rice.
What kind of rice to use?
My top recommendations are to use Jasmine or Basmati. They are both quite different from each other, so try both to see which you like better. I personally prefer Jasmine a bit more, but will do Basmati if I’m making a more Indian-themed meal.
You may also use the generic “long grain rice” or standard white rice from the store, but keep in mind that quality ranges quite a bit.
Place the rice in a strainer, and rinse for 2 minutes with cold water.
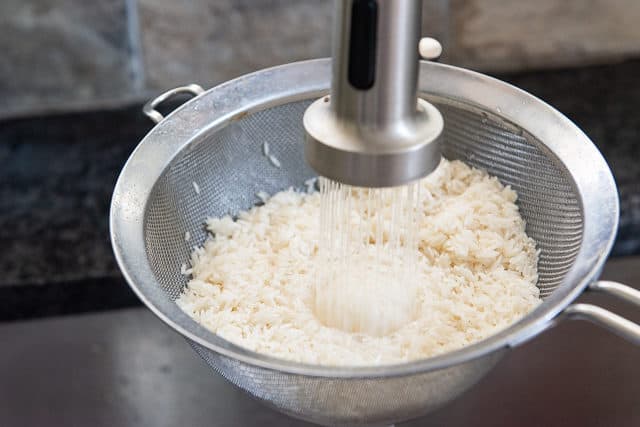
Rinse but don’t soak
No soaking is necessary for a good rice pilaf. Cook’s Illustrated did tests and discovered that it can actually make the grains bloated and overcooked. Rinsing under running water is perfect for rinsing away the outer starch and giving you nicely separated grains in the final dish.
When the shallots are properly softened, they should look like this:
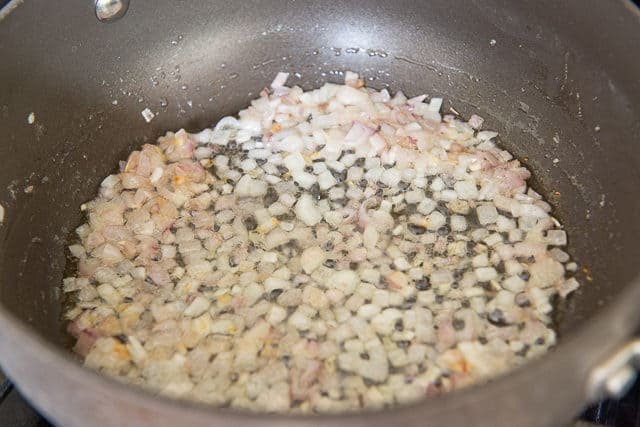
Add the rinsed uncooked rice to the pan, and stir:

Cook for 3-5 minutes, stirring often, until the grains looks chalky and opaque. You can see how different the rice looks in the photo below. This toasting period also aids in getting the best rice pilaf texture we ultimately want, with separated individual grains.
Then add chicken stock or chicken broth and a little extra salt to the pan:

Broth vs Stock
Broths are typically made more with meat, whereas stocks are made more with bones, giving a different type of mouthfeel to each one. However, here you can use either one and have similar results.
Just make sure to use a good quality stock or broth. I suggest buying a handful of brands from the store and doing your own taste test. I have found that brands vary hugely in terms of richness and flavor. I tend to like Swanson and Imagine.
The Perfect Rice to Liquid Ratio
For rice pilaf, we do a 2 cups rice to 3 cups liquid ratio. That’s right: the amount of liquid and ratio for pilaf is different than regular steamed rice. You don’t need as much liquid when you’re toasting the grains beforehand in oil, and adding more will give you mushy rice and a bloated end result.
Bring the liquid to a boil over medium-high heat, then reduce to a simmer (medium-low heat) and put the lid on. After 18-20 minutes of cooking time, the liquid will be absorbed:
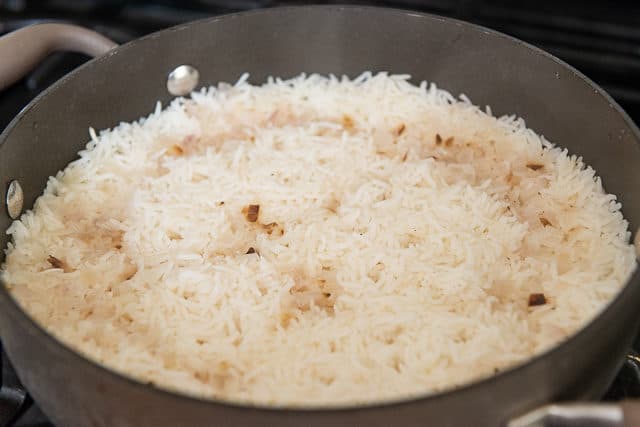
Fluff the rice and give it a good stir, as it can get drier on the bottom than the top.
Then replace the lid and let the rice rest for 10 more minutes.

This gives the water more time to redistribute, and gives the grains a lighter texture. This really does make a big difference for fluffy rice!

How to Serve It
The Rice Pilaf will be at its best when served piping hot after cooking, because the grains tend to firm up as they cool to room temperature. You may want to keep it in the pan to better retain heat, instead of placing in a serving bowl.
I love serving this classic recipe with dishes like Crispy Braised Chicken Thighs, Chicken Cordon Bleu, Spatchcock Roast Chicken, and Pork Tenderloin.
Feel free to throw in some chopped fresh herbs, like chives, basil, chervil, or parsley. You may toss it in either right before you rest the pilaf for 10 minutes, to wilt the herbs slightly, or right before serving, to wilt the herbs less.
Tabbouleh, Herb Mushroom Barley, and Quinoa Cakes are a few of my other favorite starch sides. Enjoy!
Recipe Variations
This basic rice pilaf can be customized in a variety of different ways. For more flavor, try adding a bay leaf and garlic clove to the broth, then remove before serving. Or top with grated parmesan cheese, fresh parsley, or other favorite herbs.
Tips and FAQ
Keep in an airtight container so the pilaf doesn’t dry out, and store for up to 5 days in the fridge.
Yes, it freezes well for up to two months.
Cooking the rice in the oil is essential, so a rice cooker won’t work well. An Instant Pot (affiliate) is a better option.
Reheat in the microwave, always with a lid or some sort of cover to trap the steam in, otherwise the pilaf will dry out.
I recommend looking up a different recipe specifically tailored to brown rice. Swapping in a brown rice here will not work well. I advise the same if you want a wild rice pilaf recipe.
Did you enjoy the recipe? Please leave a 5-star rating in the recipe card below and/or a review in the comments section further down the page. Or, follow me on Facebook, Instagram or Pinterest!
Rice Pilaf
Ingredients
- 2 cups long grain white rice (I think jasmine and basmati are best)
- 2 tbsp butter (or olive oil*)
- 1/2 cup chopped shallots
- 1/4 + 1/4 tsp salt
- 3 cups chicken stock
Instructions
- Place the rice in a strainer, and rinse well for 2 minutes.
- Add the butter, shallots, and 1/4 tsp salt to a nonstick pan (use one that has a lid), and cook for 5 minutes over medium heat, until slightly softened.
- Add the rinsed rice and toast for 3-5 minutes, stirring often, until the grains turns chalky and opaque.
- Add the chicken stock and remaining 1/4 tsp salt, and increase the heat to medium high to high, just enough to bring the liquid to a boil. Once the liquid reaches a boil, reduce the heat to a simmer (medium low or low heat), and cover the pan with the lid**.
- Cook for 18-20 minutes, until the liquid has been absorbed.
- Stir and fluff the rice, as the bottom tends to get drier than the top, replace the lid, and let the pilaf sit for 10 more minutes. Serve and enjoy!
Notes
Nutrition
Nutrition is estimated using a food database and is only intended to be used as a guideline for informational purposes.

9 Comments on “Rice Pilaf”
Absolutely delicious.
Did you ever actually try making rice pilaf in a rice cooker before saying it won’t work? I do it regularly, and it turns out very well. You can open the cooker, add butter and shallot, and press the COOK button. (On my Zojirushi fuzzy logic machine, at least) I can soften the shallot in the butter in the rice cooker pan this way, even with the lid open. Add the rice and stir to coat, letting it warm and become fragrant for 10 minutes or so. After all that is done, add the stock and run the rice cooker on the usual setting. (Sometimes I have to wait another ten minutes for the machine to cool off before I can set it to COOK again.) I got this idea from a “Rice Cooker Cookbook” many years ago, and it turns out well and is a favorite for my family.
My rice cooker definitely doesn’t have those functionalities, but I’m not surprised to hear that Zojirushi does. Those are the fancy ones!
Delicious! Came out great and with such a nice texture – no mushiness. Small point – the directions say that the cook time is 30 minutes and the rest time is 10 minutes, but then lists the total time as 35 minutes. Shouldn’t it more accurately be 40 minutes?
So glad to hear that, Nan. Glad you enjoyed. Thanks for pointing out the recipe card. It says 5 minutes prep time, 30 minutes cook time, 10 minutes resting time…should really be 45 minutes. It’s fixed now. Thanks!
Hi Joanne
Can this recipe be adjusted for brown rice or won’t it come out right? I’ve got jasmine brown rice on hand and rarely use white rice any longer.
Hi Dave, great question. I haven’t tried this myself, but my best guess is it’d all go the same except require a longer simmering time. I’ll try this with some brown rice soon…though come to think of it, the one I keep on hand is sprouted brown rice. I’ll pick some regular up from the store next time. If you try it, let me know.
1. Thank you for the new printing format! It is awesome, it’s so nice to have great recipes available without having to use tons of paper and toner. (Not everyone is techie – old person here!)
2. Thanks for a great pilaf recipe, I love this stuff. I used to be able to make it all the time but with Alzheimer’s those days are gone and I can’t tell you how much I appreciate this! Keep up the great work and thank you so much!
Made this last night and really enjoyed it. Simple but tasted great.