Homemade Vanilla Ice Cream Without An Ice Cream Machine
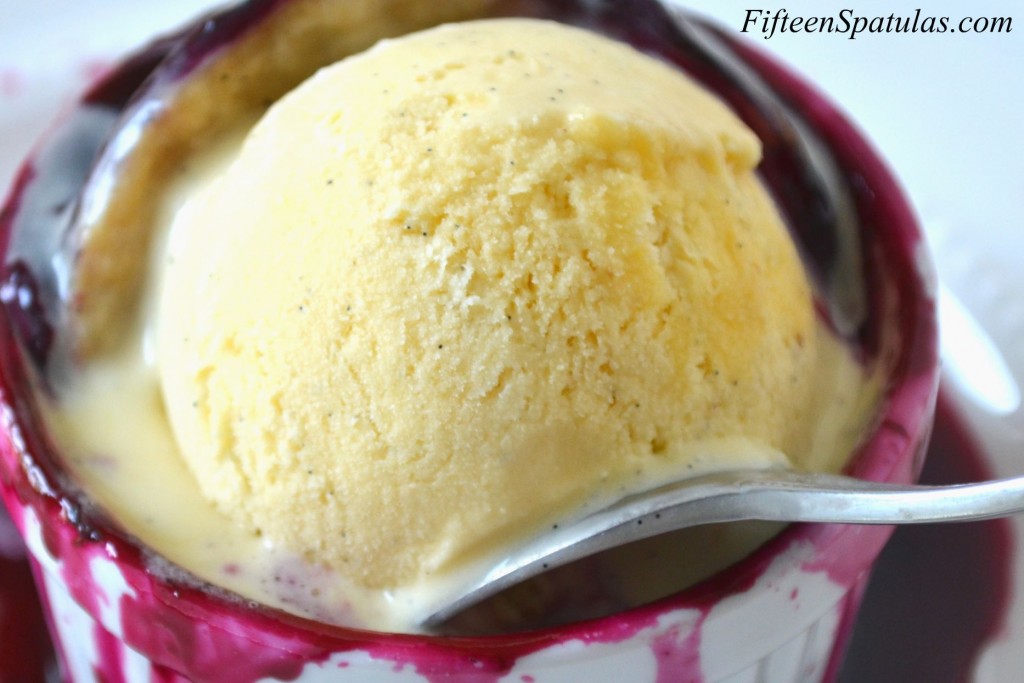
No ice cream machine is needed for this homemade vanilla ice cream recipe! It’s made in the French style with cooked eggs, giving the creamy ice cream an extra rich texture and luxurious quality.
As I promised last week, here is a post on how to make French vanilla ice cream at home, no ice cream machine required. And it is the creamiest ice cream ever!
This no churn ice cream is basically a spin on a semifreddo, which I have made so many times I could do it with my eyes closed. What’s with all the semifreddo in my life?
Well, after I tasted some, I simply didn’t care for storebought ice cream anymore. Most of them are these atrocious guar gum xanthan gum whatever gum filled fakeries (exception: Haagen Dazs, which is generally made with simple ingredients, but is also pretty expensive). This way I can put whatever I want in my ice cream for CHEAP.
I’ve made this delicious homemade ice cream as pistachio, mango, peanut butter, chocolate, melon, and so on, but today I’m going to show you how to make some good old vanilla, so you can take that Summer Berry Cobbler Ramekin Pie I posted the other day to the next level.
What’s nice is that unlike the typical no churn ice cream made with sweetened condensed milk, this has a more mellow and marshmallow-like flavor.
Step by Step Overview:
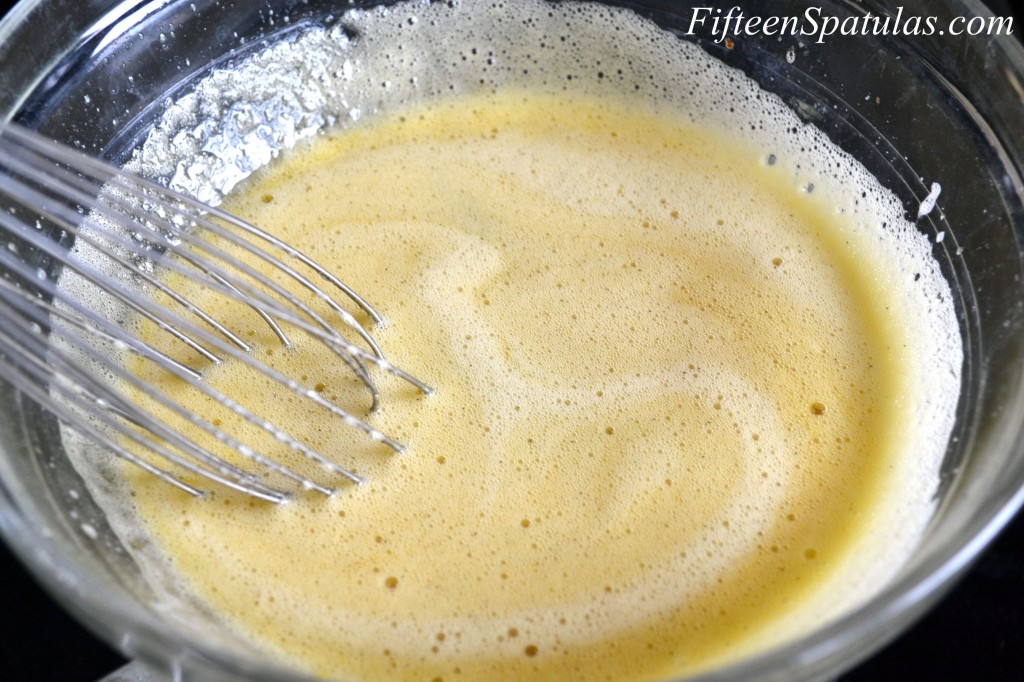
Start by whisking up 2 eggs and 4 egg yolks with granulated sugar in a double boiler until thickened and frothy:
My double boiler setup is simply a large bowl set over a saucepan with an inch of simmering water. Make sure the bottom of the bowl does not touch the water at all.
If six eggs seems like a lot, know that it’s those egg yolks that increase the fat content and make this the most delicious ice cream. Just wait until you try it!
Next, make whipped cream out of heavy cream, sugar, and vanilla extract, mixing it with a hand mixer or simply a whisk until you get soft peaks. If you accidentally go to stiff peaks, that’s okay, but make sure not to go beyond that, or the cream will separate into butter and buttermilk.
Also, you may use a vanilla bean paste instead of extract, or add a scraped vanilla bean pod for visible vanilla specks throughout the mixture.
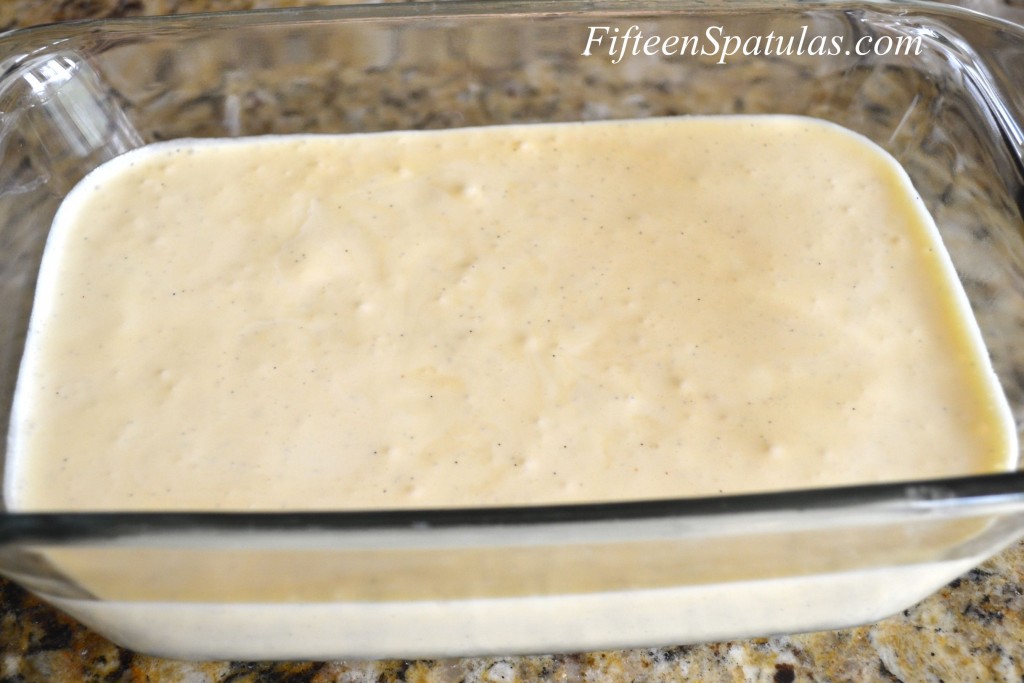
Fold the whipped cream into the custard, then place it in a glass loaf pan container, or the freezer-safe dish of your choice:
If you can, try to put the dish in the freezer ahead of time for best results, but it’s no big deal if the dish is at room temperature.
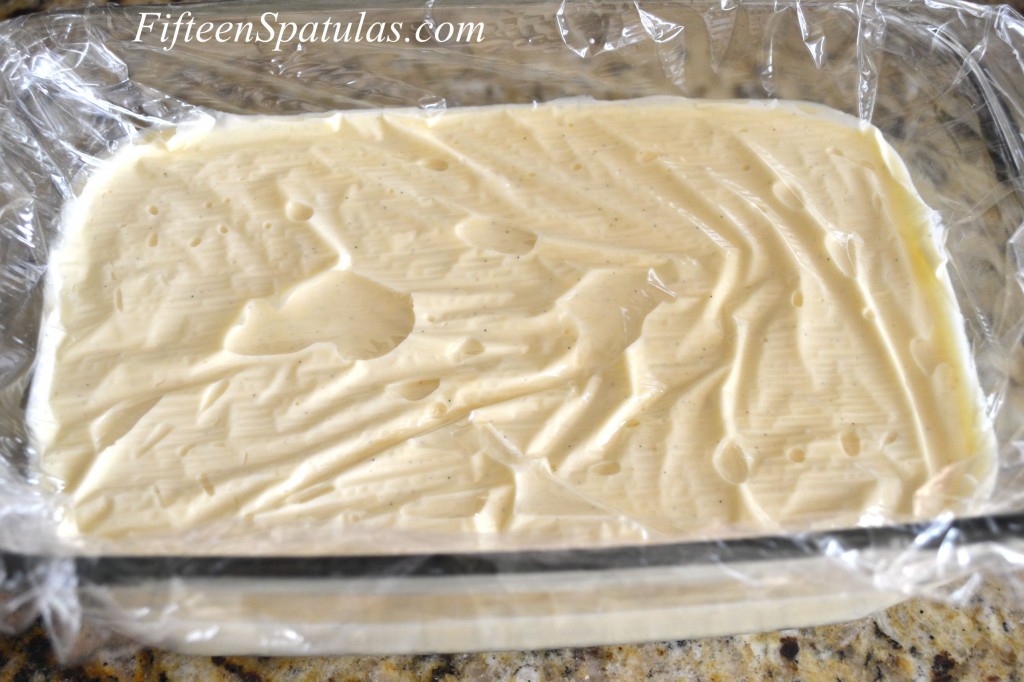
Place plastic wrap directly on the surface of the custard to prevent a skin or ice crystals from forming on top:
Freeze immediately for 4-6 hours, until it is completely frozen.
Then either cut into slices, spoon some into bowls using an ice cream scoop, or portion scoops into ice cream cones. Enjoy! It is especially wonderful on a hot summer day.
Recipe Tips and FAQ
Keep in an airtight container in the freezer for up to 4 months. Make sure it is tightly sealed to prevent freezer burn.
No. Make sure you buy heavy whipping cream for this. You need high fat here to make the recipe work.
Yes, though know that fresh fruit is pretty firm when it’s frozen. Jam swirls, or even lemon curd, tend to be better choices.
For more of my favorite ice cream recipes, try Biscoff Chocolate Chunk Ice Cream, Pumpkin Chip Gingersnap Cookie Ice Cream, or Mint Chip Gelato Ice Cream Sandwiches.
Recipe Variations
Chocolate chips – Feel free to mix in chocolate chips for a straciatella-like effect. I recommend using mini chocolate chips, or cutting shavings from an actual block of chocolate. Chopped mini peanut butter cups are also delicious.
Easy Hot Fudge Sauce – Swirl up to 1/2 cup into the base before freezing.
Caramel Sauce – Swirl up to 1/2 cup into the base before freezing. Or drizzle it over the top before serving.
Did you enjoy the recipe? Please leave a 5-star rating in the recipe card below and/or a review in the comments section further down the page. Or, follow me on Facebook, Instagram or Pinterest!

Homemade Vanilla Ice Cream Without An Ice Cream Machine
Ingredients
- 2 extra large eggs
- 4 extra large egg yolks
- 1/2 cup sugar+2 tbsp sugar
- 1/4 tsp salt
- 1 vanilla bean
- 1 cup heavy cream
- 1 tsp vanilla extract
Instructions
- Start by setting up a double boiler (a heatproof bowl set over a pot with an inch of simmering water), and prepare an ice bath that the bowl can be set into later. Place the eggs, egg yolks, 1/2 cup sugar, and salt into the bowl. Split the vanilla bean down the middle and scrape out the seeds, and add those and the scraped vanilla bean to the bowl as well. Cook for about 10 minutes, whisking frequently so the egg doesn’t scramble**, until the mixture reaches 160 degrees F on an instant read thermometer. Immediately remove the custard and place it into the ice bath to cool, and remove the vanilla bean.
- **If you do happen to scramble some of the eggs, don’t worry. Just strain the custard through a fine mesh sieve after it’s reached 160 and beat air back into it with a hand mixer.
- In a medium bowl using a mixer, whip the heavy cream until a little frothy. Add in the 2 tbsp sugar and 1 tsp vanilla extract, and whip to soft peaks.
- Remove the egg custard from the ice bath, and add 1/3 of the whipped cream to it to lighten. Fold in the rest of the cream and pour into a container. Place plastic wrap directly on the surface of the custard so a skin doesn’t form. Freeze immediately for 4-6 hours, depending on your freezer. Enjoy your homemade ice cream!!!!
Nutrition
Nutrition is estimated using a food database and is only intended to be used as a guideline for informational purposes.


50 Comments on “Homemade Vanilla Ice Cream Without An Ice Cream Machine”
I cannot believe how easy it is to make rich, creamy ice cream. I love that I can control what kind of and how much sugar goes into it. I will never buy store bought again. Thank you!
Thanks Nikki! And with no mystery ingredients they sneak into the store brands!
Most delicious and creamy icecream. Can’t wait to try making some with berry swirls.
that sounds delicious! Thanks Tony!
ur recipe helped me through my anxiety attacks:))
I made the ice cream for the first time. The consistency is smooth and creamy. However, when I froze the ice cream the bottom portion of the container is a slightly different color — darker than the ice cream. Did I do something wrong? Is it safe to eat? I did heat the egg mixture to 160 as noted in the instructions and mixed by hand with the whipped cream mixture. Thanks for your help!
I found this recipe easy to follow and easy to do. I had to get a proper thermometer to make sure I didn’t overdo cooking the eggs and egg yolks, but everything went well when I followed the instructions. Very well according to my family! I substituted monk fruit sweetener for most of the sugar. I only added 2 T. of coconut sugar when I was beating the cream. I like this recipe because it seems healthier to be using eggs instead of propylene glycol to keep the ice-cream from forming large ice crystals… like some commercial brands do… https://www.thehealthyhomeeconomist.com/antifreeze-in-your-ice-cream/
Okay, so I have the opposite question; I do have an ice cream maker that I would like to use. Could I make the custard, chill it, and then stir in vanilla extract and churn with chilled whip cream? Thank you!
I have actually never tried that so I have no idea how it would turn out. If you try it, please let us know how it goes.
Is there any substitute for the vanilla bean?
Can we use non dairy whipping cream?
Hi, can I use while milk? Heavy cream is really expensive in this part of the world and me buying it defeats the whole purpose of making ice cream. At that rate I will have to opt for store bought. Thanks
Unfortunately no. Way different fat contents.
Best best and very easy ice cream!
Started with the perfect vanilla, yum! Then expanded to variations including cookie dough, butterscotch ripple, cherry, chocolate chunk and going to keep experimenting.
Thank you so much!
Most home made ice creams turn out to be hard as a rock. Does this oce cream behave the same way? Or should I add some alcohol (vodka) to soften things up?
really good ice cream recipe I just try it and its yummy
Hi do you need an instant-read thermometer
My eggs were cooked to a paste like consistency when it reached 155, was this supposed to happen??
Hi there! I don’t have heavy cream, can i use whole milk instead?
Sorry but no, that won’t work.
You can make heavy cream but it takes a while.
HEAVY CREAM
2/3 c
whole milk
1/3 c
real butter. melted’ room temperature
COMBINE INGREDIENTS AND USING MIXER , WHIP UNTIL DESIRED THICKNESS.IT TAKES AWHILE. CHILL UNTIL READY TO USE.
The vanilla ice creme was sooo good! Currently all ice creme are completely sold out in the store nearby. This sure have made my whole family lighted up today! thanks
pleaseis cream the same as milk if not then what is it ?
No heavy cream/heavy whipping cream not milk