Apple Tarte Tatin
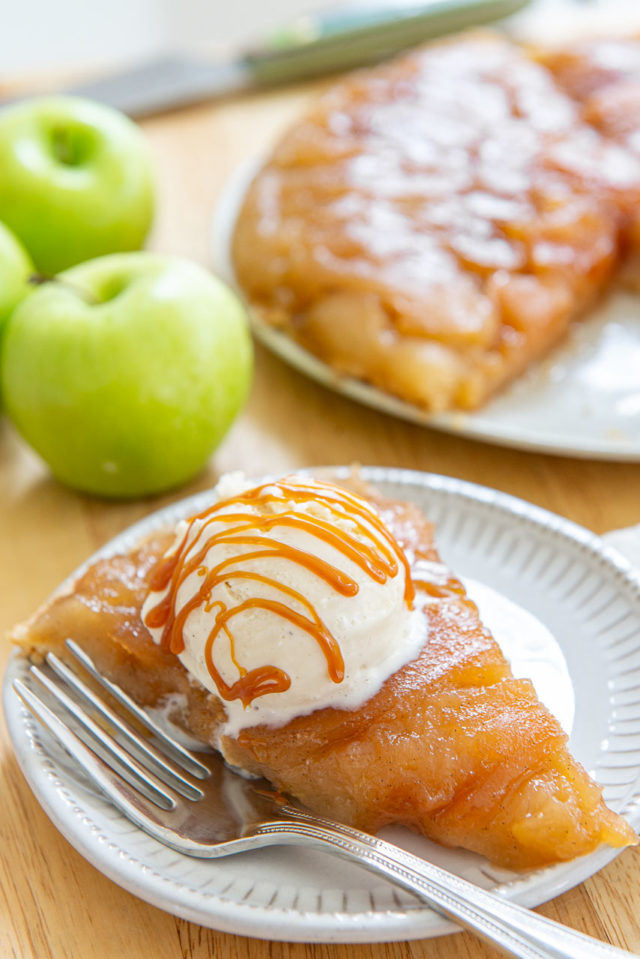
This Apple Tarte Tatin is my absolute favorite apple dessert, with tart Granny smith apples caramelized in a buttery apple cider caramel, and laid on a crisp pie crust base.
For those of you who plan to crash one of my Thanksgiving dinners some day in the future, you should know in advance that there are no apple pies to be found at my Thanksgiving table.
The reason is because the French version of apple pie is better, and it’s called tarte tatin.
It’s not that I don’t like apple pie, but apple tarte tatin is superior.
If you’re not familiar with it, it’s an upside down tart baked in a skillet.
You make a vanilla bean apple cider caramel, saute sliced apples in that caramel, top it with pie crust, and bake it, until the apples have soaked up every last drop of the caramel goodness.
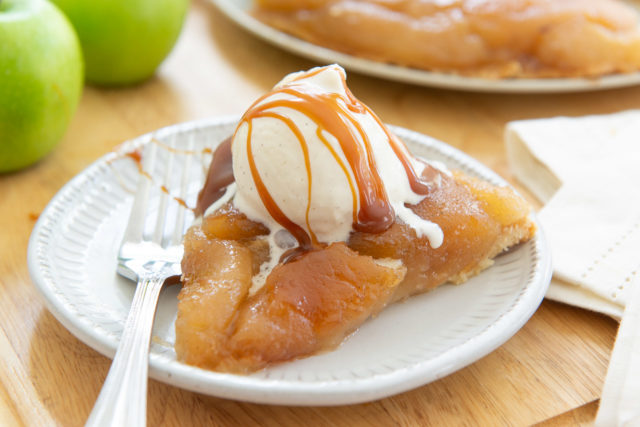
Then when you take it out of the oven, let it cool slightly, invert, and devour. Ideally, with some vanilla ice cream and extra caramel on top (I’m not claiming that this part is French, but I am claiming that it’s delicious).
I love the blending of the apple juices with the caramel. It’s so good!
One of the keys here is to use a really good quality butter and a good quality pie crust. You can make your own with my pie crust tutorial, or buy a butter pie crust from the store.
As with anything made with simple ingredients, quality matters.
Step by Step Overview:
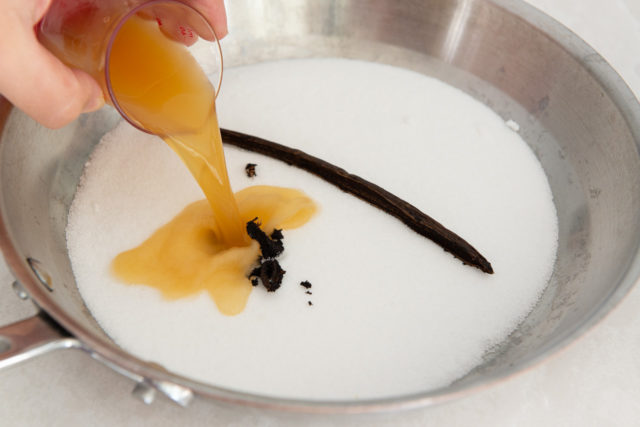
To get started, combine granulated sugar, apple cider, and a scraped vanilla bean with its seeds in a large skillet:
A well-seasoned cast-iron skillet is also a good choice.
Let this sugar mixture start simmering on low heat on the stove while you work on the apples.
Prepare the Apples
For this recipe, I like to select Granny Smith apples from the grocery store because they have an amazing tart flavor and they hold up really well. You can also use Braeburn, Pink Lady, Golden Delicious, or Honeycrisp apples if you prefer. The end result may be a little sweeter.
Peel the apples using a vegetable peeler, then core them. There are dedicated apple corers you can buy, but I simply use a melon baller to scoop out the middle and the stem ends.
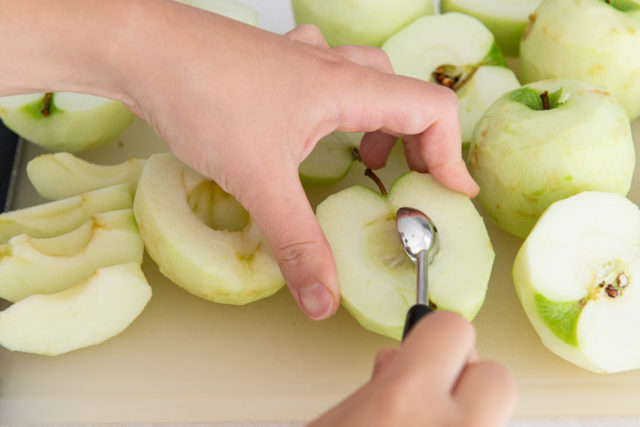
Cut the apple halves into quarters using a sharp knife, so you get eight slices per apple. You can also get away with apple quarters if you prefer the look of larger pieces.
Check on the Caramel
At this point the sugar should be dissolved and starting to bubble:
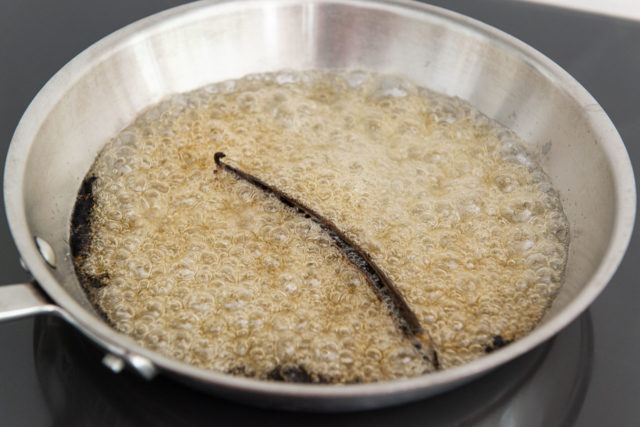
Turn the stove setting up to medium heat, and stand by for a few minutes until the caramel turns light brown.
Use your nose to guide you, and if you smell the faintest sign of any burning, immediately proceed to the next step of adding the cold butter and turning the heat down to low.
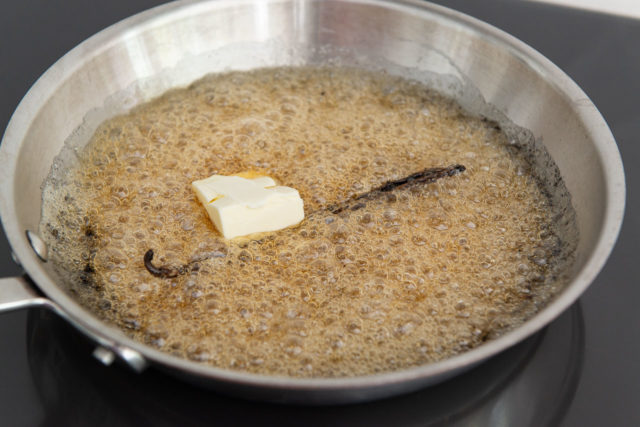
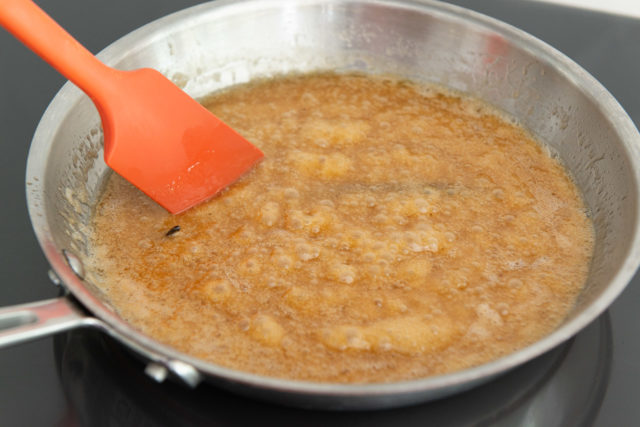
Swirl the butter around using a spatula, piece by piece, until it dissolves and the sauce starts to look creamy and smooth as it bubbles. It should have a dark brown color.
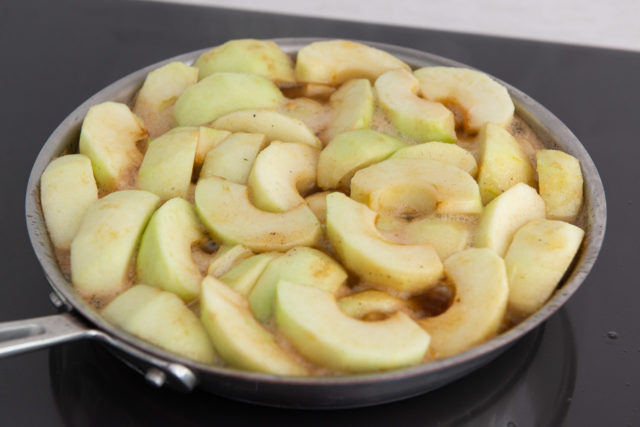
Lay all of the apple slices very carefully in the pan, making sure you don’t accidentally touch the caramel with your fingers (it’s very hot!):
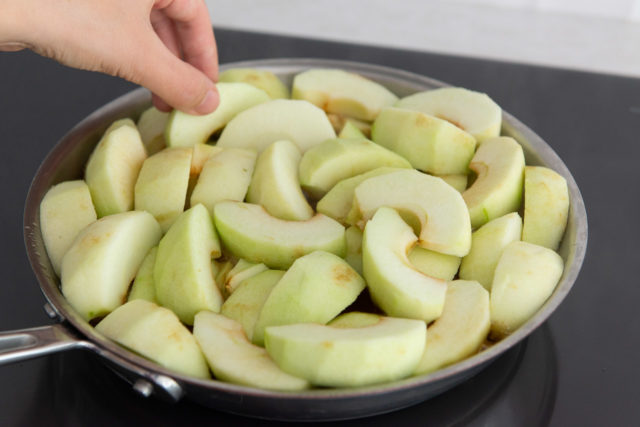
I’m sure you could arrange these in a more pleasing circular pattern, like in concentric circles, but I simply put them in a relatively even couple of layers. Keep in mind the apples will cook down a bit, so it’s okay if the pan looks too full at this point.
Simmer the apples in the caramel for about 15 minutes, until they start to soften and sink down.
By the end of the 15 minutes, it should look like this:
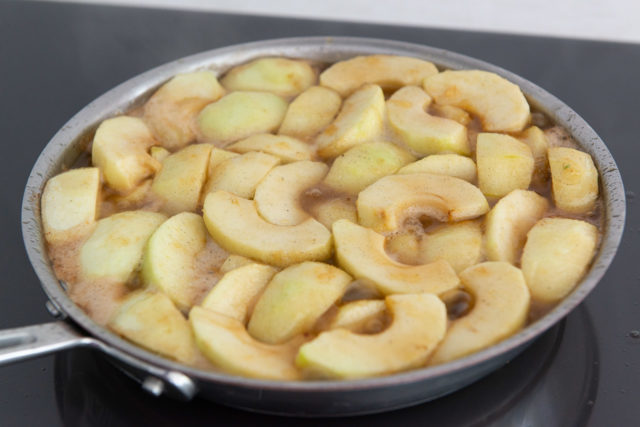
Turn the heat off, the apples are done.
Prep the Pie Crust
To finish off the apple tarte tatin, we need to add pie crust to the top. As I said above, you can use a good quality storebought crust, or make your own.
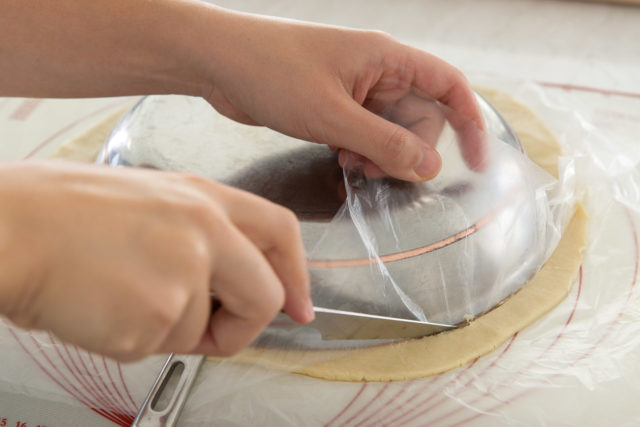
I make a perfect circle by placing a similarly sized skillet on top of the pastry dough, and running a knife around the edges:
Then you can take the pie circle and lay it right on top of the apples:
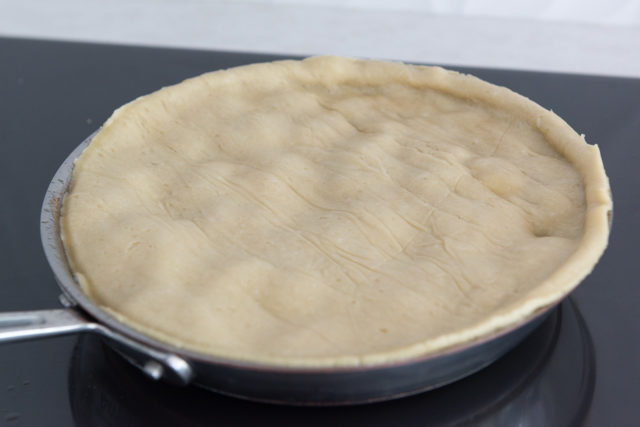
If you don’t get the right sized circle, no problem! Just tuck the excess pastry inside the skillet.
Bake!
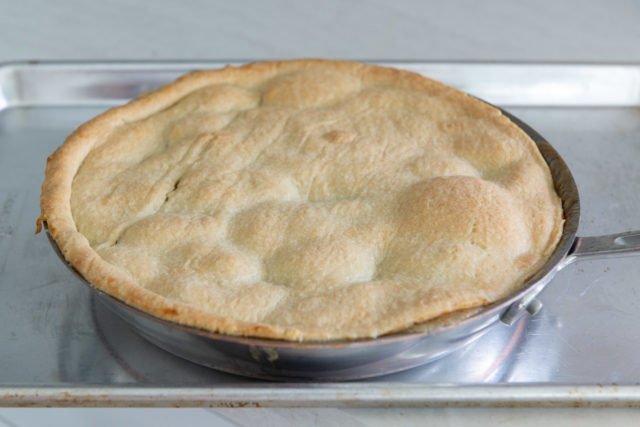
Place the skillet on top of a rimmed baking sheet to catch any drips, then bake in a 400F preheated oven for 20 minutes, until the buttery pastry crust is golden brown on top:
Let the tart cool for 20 minutes, and choose a serving plate. You want a large plate that’s at least the same size as the skillet, but preferably a couple inches larger (12″ diameter is great).
Then place the dish on top, grab your oven mitts, and flip everything over. The bottom of the pan now becomes the top of the tart.
If the tart doesn’t seem to want to come out, wait another 10 minutes, then try again.
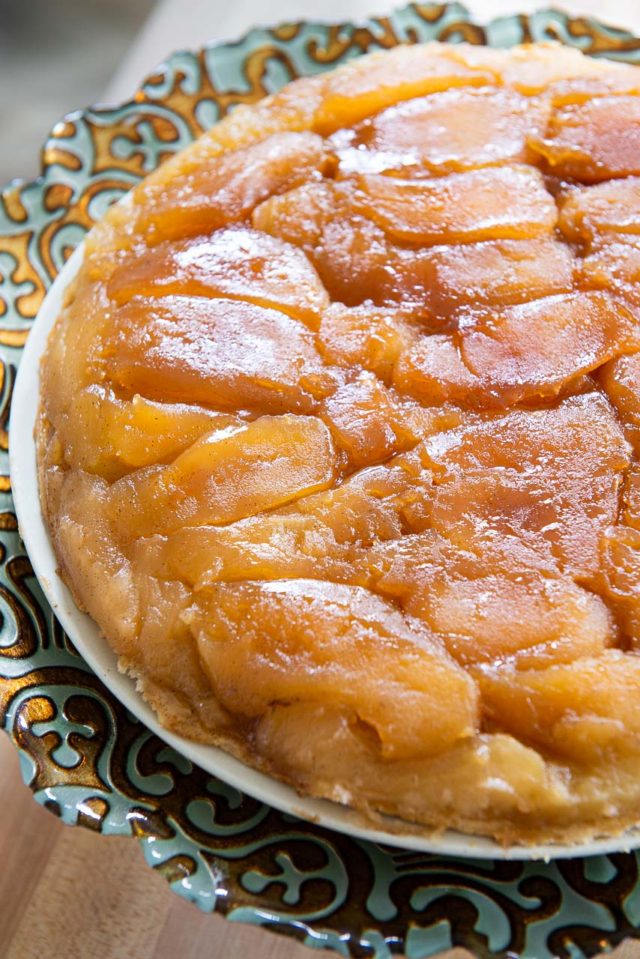
The caramelized apples should be soft but still retain their shape, and have a glossy sheen:
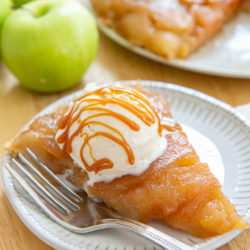
Serve and enjoy as is, or top it with vanilla ice cream or crème fraîche for a tangy creamy pairing. You can also add extra hot caramel sauce!
Apple Cobbler, Caramel Apple Crisp, Crockpot Applesauce, and Apple Pie Milkshake are a few more of my favorite apple recipes. Enjoy!
Recipe Variations
This tart recipe can handle some variations, if you wish to play with it in the future.
Puff pastry – Feel free to use a good quality puff pastry as your pastry base, if you wish. Cook time should be similar.
Brandy – Try swapping half of the apple cider for an apple brandy.
Lemon – Toss the apple slices in a little lemon juice as you peel them for a bright flavor. 1-2 tablespoons total is perfect.
Recipe FAQ and Tips:
The apples will seem overly firm when they head into the oven, but they will soften quite a bit in those 20 minutes, so do not cook them longer, despite any temptation. It is possible to overcook the apples and have them come out mushy.
Any leftovers can be stored in the fridge or in the freezer, either in an airtight container, or tightly wrapped with plastic wrap. Store in the fridge for up to 5 days.
The tart will freeze well and keep for up to two months. Store in an airtight container so the tart doesn’t absorb off flavors or get freezer burn.
Tried this recipe? Leave a rating and comment below — I’d love to hear how it turned out! Or, follow me on Facebook, Instagram or Pinterest!
Apple Tarte Tatin
Ingredients
- 1 cup sugar
- 1/4 cup apple cider
- 1 vanilla bean seeds scraped out and saved
- 3 lbs Granny Smith apples about 6-8 apples, depending on size
- 1/2 cup unsalted butter cut into tbsp pieces
- 1 single pie crust (if using my recipe, it's a double crust so you'll only need half)
- flour for rolling the crust
Instructions
- Preheat the oven to 400F.
- Place the sugar, apple cider, and vanilla bean pod AND seeds in a 10 inch stainless steel skillet.* Turn the heat to low and let it sit while you prepare the apples.
- Peel and core the apples to remove all the skin, seeds, and stems. Slice each apple in half, then each half into quarters. You should have eight pieces per apple.
- Return to the caramel. At this point the sugar should be dissolved. Turn the heat up to medium, and watch as the mixture begins to turn light brown, which should take about 5 minutes. Do not stir at any point. Cook the mixture for another minute or two until it become a deep amber color, making sure to use your eyes and nose to check for any signs of potential burning. Once the caramel is a deep amber, turn the heat to low and add the butter, two tablespoons at a time. Use a spatula to stir the butter in until incorporated.
- Add the apple slices carefully to the caramel, making sure not to burn your fingers. Keep in mind that it will look like too many apples at first, but they will cook down. Turn the heat back to medium and cook for 15 minutes, until the apples have cooked down and softened slightly.
- Lightly flour a work surface and roll the pie crust big enough that you can cut a 10 inch circle. I lay another 10" skillet on top and trace around it using a paring knife to get a perfectly circular piece. If you don't get a nice circle, don't worry, you can just tuck the excess pastry inside the frying pan.
- Place the pie crust on top of the apples, then bake for 20 minutes, until the crust is golden brown.
- Let the tart cool for 20 minutes, then place your serving platter on top of the pan, and invert using oven mitts. If the tart doesn’t seem to want to come out, let it cool for 10 more minutes and try again. Serve** and enjoy!
Notes
Nutrition
Nutrition is estimated using a food database and is only intended to be used as a guideline for informational purposes.
Post updated in February 2021. Originally published November 2011.
15 Comments on “Apple Tarte Tatin”
Can i substitute apple cider with apple juice in this recipe?
That’s probably fine. It’s less flavorful but it should work.
I own a cow and make my own butter, would that work in this recipe?
You have your own cow?! That is the coolest thing I’ve heard all day. Yeah, I think the butter would work just fine here!
Thanks for another awesome recipe! I have celiac disease, so I thought I would try a rice flour crust version and used a whole egg instead of just the yolk so it would still bind ok without the gluten. Total success! Everyone loved it and it was the first dessert to go on Thanksgiving. And no one even noticed it was gluten-free!
Mmmmmm, I can just imagine the smell of those freshly baked
Absolutely stunning! I have NO problem with skipping the apple pie for this beauty!
Beautiful execution! Did you have any struggles getting the pie to come out of the pan? For me that is the most stressful part after all of that hard work. Take Care
I had absolutely no issues! Isn’t that amazing? I was worried because I used an uncoated pan and most people do them in nonstick pans. I did a stainless steel frying pan and I didn’t have a single apple stick. The photo I took of this is right after I inverted it…I cut a big piece out to show the detail, and it just looked beautiful. I agree, it is stressful!!!
I have never had a Tarte Tatin before, but I really want to find a time to make one now. This looks gorgeous!
Tarte Tatin, the first time I ate it was in France, so you can imagine the taste of it, so now everytime I have one I can’t avoid to compare it. I never tried to make it at home, but now that I have the recipe tested by you, I will do it.
That looks beautifully done. I’m off to Paris this weekend to catch up with friends and I can’t wait to order a tarte tatin. Yum!
This looks beautiful, as usual, Joanne. I am solidly in the apple pie camp though — I like double crusts and I don’t want any sugar in a crust — none. Happy early Thanksgiving.
This looks fantastic, Joanne. I can just tell from the dough how amazing the crust must have been. The first photo is gorgeous!
I wouldn’t miss the pie at all. This looks fabulous!