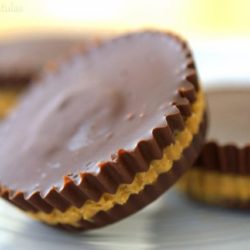
Homemade Peanut Butter Cups
Homemade Peanut Butter Cups are easy to make yourself from scratch, and the best part is that you get to use good quality chocolate and all natural ingredients. These are a massive improvement on the cheap, preservative-filled ones you typically find at the store.

Quite possibly the most popular candy of all time, there’s a reason this simple treat is so loved by many. It’s so simple, so unpretentious, and so heavenly.
You might say, why make your own peanut butter cups when you can buy them?
I have a few reasons. First, I get to use my good chocolate and good peanut butter. The popular one you buy at the store uses such junky chocolate, and you can really taste the difference here.
Second, I find that a quality homemade peanut butter cup is WAY more satisfying than the storebought one, and thus I tend to eat less this way. Better for my waistline!
And third, when I make these myself, I know there are only four simple ingredients. And none of those ingredients are preservatives or other stuff I don’t want in my body.
I have no idea what TBHQ is, but I know it’s something I would not like to eat.

Tips for Best Results
Use good chocolate – Chocolate varies HUGELY in quality. In fact it might be the one food that has the biggest range of quality out of anything you’ll find at the grocery store. I highly recommend Guittard brand here (my favorite kind of chocolate is made by them), which you can find at Target, Whole Foods, and Amazon. To me it is the best combination of quality and affordability. If you can’t find that, Ghirardelli is also decent. Callebaut, Vahlrona, and Scharffen Berger are also great, but tend to be expensive and hard to find.
Use your favorite peanut butter – Unlike my epic Peanut Butter Cookies where I recommend not using natural peanut butter, it’s actually okay to use any kind you like here. If your grocery store has a grinder, that can be a wonderful treat because it tastes so fresh.
Don’t rush the chilling process – The peanut butter cups will need to be assembled in layers and chilled in the fridge or freezer every step of the way. Don’t rush this, or you won’t give the layers time to set.

And most of all, if you’ve got kids, invite them to make these with you!
My kids have the grandest time banging the pan against the counter like a bunch of maniacs, and this tapping is quite essential for flattening all the layers out. It’s fun to tell them that they’ve got the most important job of all.
Step by Step Overview
Start by whipping peanut butter with a little bit of softened butter and confectioner’s sugar (aka powdered sugar) in a medium bowl:

You may either use natural or smooth ground peanut butter with oil added, like what’s typical of Jif or Skippy. Above I used natural, which makes it a bit more textured. It’s also up to you whether you use creamy or crunchy peanut butter.
Place a little dollop of the whipped peanut butter filling atop a small layer of melted chocolate that’s been frozen for 15 minutes.
How to Melt the Chocolate
The easiest way to melt the chocolate is to place the chips or chopped chocolate into a microwave-safe bowl, and microwave in 30-second intervals, about 3-4 times, stirring after each interval, until melted. However, to absolutely ensure the safest melting, the best way is to melt in a double boiler set over low heat. This takes much longer though, and so long as you watch closely in the microwave, I’ve never had an issue.
Note: Do not overheat while melting. If you overheat the coating, it may seize and be unrecoverable clumpy. When there are only little bits of unmelted chips or chunks left, I stop microwaving and stir for a few seconds, as usually there’s enough residual heat to melt the rest.

I like to put everything into paper cupcake liners by the way, setting them inside the muffin cups of a metal tin, so that the cups are easy to remove. You may also use silicone liners instead of paper liners.
Now, you see how the peanut butter layer is not a flat surface?
Just drop the pan on the counter a few times and the filling will flatten and smooth itself out, like this:

Freeze the tray for 15 minutes, then finally, pour on the top layer of the melted remaining chocolate.

If the top of the chocolate layer is not smooth, tap gently on the countertop to smooth.
If you wish to add a touch of flaky sea salt to the top, or some chopped roasted peanuts, do it here.
Freeze for 15 more minutes until it hardens, then you’re good to go!
Which Darkness of Chocolate to Use
As a rule of thumb, the lower the cacao content in the chocolate, the softer and easier it will be to bite into. You’ve probably noticed that milk chocolate is much softer than dark chocolate, for instance. White chocolate even more so. Keep this in mind when deciding on the chocolate you use for this recipe.
Personally, I use a straight melted semisweet chocolate here, as milk chocolate is a little too sweet for me. I find that it’s still easy enough to bite into when served at room temperature. However, if you’d like to use a darker type and make it softer to bite into, what you can do is make a chocolate ganache, which is basically just chocolate mixed with heavy cream. I have instructions in the recipe box. Or you can stir in 2 tbsp of oil into each 8-ounce batch of chocolate, and that will make it slightly softer.
For more homemade candy, try Pecan Praline Candy, Peanut Brittle, or Chocolate Bark.
Here’s the full video on how to make the peanut butter cups, if video is your style. I talk a little bit about the different methods of melting the chocolate, as well:
Recipe Tips and FAQ
Keep at room temperature in an airtight container for up to 2 days, or in the fridge for up to 2 weeks. If storing in the fridge, you will need to allow them to come back to room temperature again for a softer texture.
Yes, store in an airtight container for up to 3 months. To thaw, leave at room temperature for 1 hour.
You may use any nut butter that you prefer, including almond butter, cashew butter, or a mix of nut butters. However, some nut butters are looser than others, so you may need to add extra confectioner’s sugar to thicken up to the right consistency. You can also thicken with crushed graham crackers for a more cookie-like filling.
No. You need the cornstarch that’s in the confectioner’s sugar to thicken up the peanut butter mixture.
Yes, simply rotate the pan while the chocolate is still melted, to come slightly up the sides of the cups. That way you can conceal the peanut butter layer visually.
Tried this recipe? Leave a rating and comment below — I’d love to hear how it turned out! Or, follow me on Facebook, Instagram or Pinterest!
Homemade Peanut Butter Cups
Ingredients
- 16 oz semisweet chocolate chopped, or in chip form
- 1/2 cup creamy natural peanut butter
- 2 tbsp butter softened
- 1.75 oz confectioner’s sugar, by weight (1/4 cup+2 tbsp, measured), sifted
Instructions
- Line a standard 12 cup muffin tin with paper cupcake liners.
- Melt half the chocolate either in a double boiler (the safer method) or in the microwave (the slightly more dangerous, but easier method). I opt for the latter. Place the chocolate into a microwave-safe bowl, and microwave in 20 second intervals, about 3-4 times, stirring after each interval, until melted. Make absolutely sure not to overcook the chocolate, or it will seize and turn grainy.
- Distribute the melted chocolate into the 12 muffin tins (I use a cookie scoop to portion it out evenly), only barely filling the bottom of each cup. If the chocolate does not lie flat, drop the pan repeatedly on the counter, and it will flatten and smooth itself out. Place the pan in the freezer for 15 minutes, until the layer is firm.
- In the meantime, whip the peanut butter, butter, and confectioner’s sugar together with a hand mixer for about 1 minute until creamy and light. Taste it and make sure the sweetness is to your liking. Place small tablespoons of the peanut butter mixture into each cup, then drop the pan repeatedly on the counter again, so the layer is flattened out. Place in the freezer for 15 minutes, until the second layer is firm.
- Melt the last 1/2lb of chocolate, and portion small spoonfuls into the cups, one cup at a time, immediately dropping the pan repeatedly on the counter to flatten each cup. In my experience of making these, the chill from the peanut butter layer (because it was just in the freezer) will harden up that top layer very quickly, so you must flatten out the tops immediately after you pour the chocolate into each cup. Place the tray in the freezer for 15 minutes to set the top layer of chocolate.
- In order to have the softest bite, I recommend enjoying the peanut butter cups at room temperature. If you store them in the fridge or freezer, the chocolate will be more firm, making the filling more likely to ooze out. See the notes below for more commentary on storage and texture.
Notes
Nutrition
Nutrition is estimated using a food database and is only intended to be used as a guideline for informational purposes.
222 Comments on “Homemade Peanut Butter Cups”
I’m just curious about the 2 tablespoons of butter softened. Nowhere within your directions. Does it use butter. Yet you call for in your ingredient list
Hi David, in step 4 it calls to whip the peanut butter, butter, and confectioners sugar together. Hope that helps and you enjoy the peanut butter cups!
i think this is a very good recipe and is easy to make.
Hi, since the recipe says 18 servings, but we’re using as 12-muffin tin, does that just mean that we’re going to pop the 12 out when done and fill 6 molds again? Or should the servings actually be 12?
Trying to input the nutrition info into my tracker, and just a bit confused.
These were really tasty, and I had a hard time not just devouring them while I made them lol. I also thoroughly enjoyed licking the spoons and such clean 😀
How do you keep chocolate from melting in your hands as you eat them? I made a batch and have them in the freezer. When I go to eat them, the chocolate quickly softens and it gets messy.
Hi Cali,
I’m fairly sure the issue you describe is because the chocolate in not in temper. When chocolate is melted and cools the molecular structure changes. Chocolate that is out of temper is not shiny and doesn’t snap.
Not a huge fan of the semi sweet chocolate in this recipe. I would prefer milk chocolate. It just tastes like I’m eating melted chocolate chips with a little peanut butter. Love the filling; there’s just not enough of it in my opinion.
hi! these look amazing! Can you please tell me…what kind of butter should I use? Salted or Unsalted? thanks!
can i just use nutella instead of chocolate? and would this be cocoa butter chocolate or vegetable fat?
Awesome and very easy. Definitely great for beginners (don’t allow children alone with all the stove top and hot situations that could burn. Definitely impressive for those who aren’t into cooking to bring to impress!
The peanut butter recipe peanut butter cup recipe was good
I tried these, and the cups were as amazing as you described them. Thank you!
Are the nutrition facts for the entire batch or is that per piece?
You must not think half a cup of peanut butter alone does not exceed 185 kcal? Haha! Per peanut butter cup! 🙂
Wonderful recipe, however I’m not sure where in the world you got the idea that the total time is 20 min, unless you didn’t factor in the time waiting for it in the freezer! 🤣 Total time for me was about one hour, including melting chocolate, scooping in layers, and freezing.
That’s great! How odd that the chill time field isn’t showing. I will have my tech person fix that. Thanks for letting me know!
Do you think I could use Swerve instead of the confectioners sugar? I’m trying to cut carbs where I can. I was thinking about making these for my dad and mom, she’s diabetic.
Hiya, for solid peanut butter layer I would recommend mixing in some melted white chocolate! Works a treat!
I’m wondering does the chocolate melt if they are not refrigerated? I want to make them for gifts, but wasn’t sure if they would need to stay refrigerated after the chocolate has been melted?
So I made this recipe a few days ago, and while they were delicious, the peanut butter never really solidified. Is there anything that might have caused this?
Are you using natural peanut butter?