Crepes
I’m going to show you how to make Crepes with only 6 basic ingredients! These have a wonderfully thin and delicate texture, with rich flavor. They are certainly delicious enough to be eaten on their own, but I also share tons of sweet and savory filling ideas for serving them!

I love a good batch of Buttermilk Pancakes for its fluffy texture, but there’s something about the flavor and eggy texture of crepes that’s SO delicious.
I first fell in love with crepes while living in NYC, when a bunch of creperies opened up around the city. I couldn’t believe that these places sold ONLY crepes, but once I saw the menus, I realized how many different ways they can be served. The possibilities are endless when it comes to crepe recipes, and testing out different fillings and your favorite toppings is the best part.
What’s Great About This Recipe
No special crepe pan required – I just use my standard nonstick skillet here and pour the batter straight into the pan.
Easy to work with – This recipe has a few tricks that will ensure a lump free crepe batter and also prevent tearing. Crepes do require some practice, but properly preparing the batter gives you a better starting point.
Versatile – You can go sweet OR savory with these delicious crepes. They’re good enough to be eaten on their own, with a simple dusting of sugar and some berries, or they can be drenched in various sweet sauces or filled with Nutella. My favorite savory option is stuffed with arugula and raclette cheese. I have more ideas below.
Make-ahead friendly – You can make the batter the day before. This is especially great if you want to make crepes for breakfast. Simply blend the batter the night before, and leave in the fridge for the morning.

The Secret to a Lump Free Batter
Using a blender (affiliate) is the best way to make sure you don’t have any lumps in your crepe batter, as it blends the wet and dry ingredients very thoroughly. You can also use a food processor if you don’t have a blender.
How to Make Sure They Don’t Tear
For crepes that don’t tear apart, you want to make the crepe batter at least 30 minutes before you’re using it. This allows the flour to absorb the liquid and results in a crepe that’s more tender and delicate. It also allows air bubbles to rise to the surface and release, which will make the crepe batter easier to work with and less likely to tear.
Usually, I will make the crepe batter the night before, and store it in the fridge overnight. This is even better for batter strength, and can be more convenient than preparing the batter in the morning.
Step-by-Step Overview:
The process for how to make these french-style pancakes is pretty simple, and basically involves throwing ingredients into a blender, then cooking. Here’s the breakdown:
- Blend together eggs, whole milk, flour, butter, vanilla, and sugar for 15 seconds.
- Tap the container against the counter to release air bubbles.
- Refrigerate batter for 30 minutes.
- Pour crepe batter into a heated nonstick skillet with a thin layer of butter.
- Cook for 45-60 seconds on the first side, and 30 seconds on the other.
- Repeat with remaining batter.
No leavening agents are needed for the batter, as we want the crepes relatively flat, and the blended egg provides the necessary amount of aeration and lift.
Make the batter in the blender
In a blender jar, combine all-purpose flour, milk, eggs, vanilla extract, sugar, and melted butter:
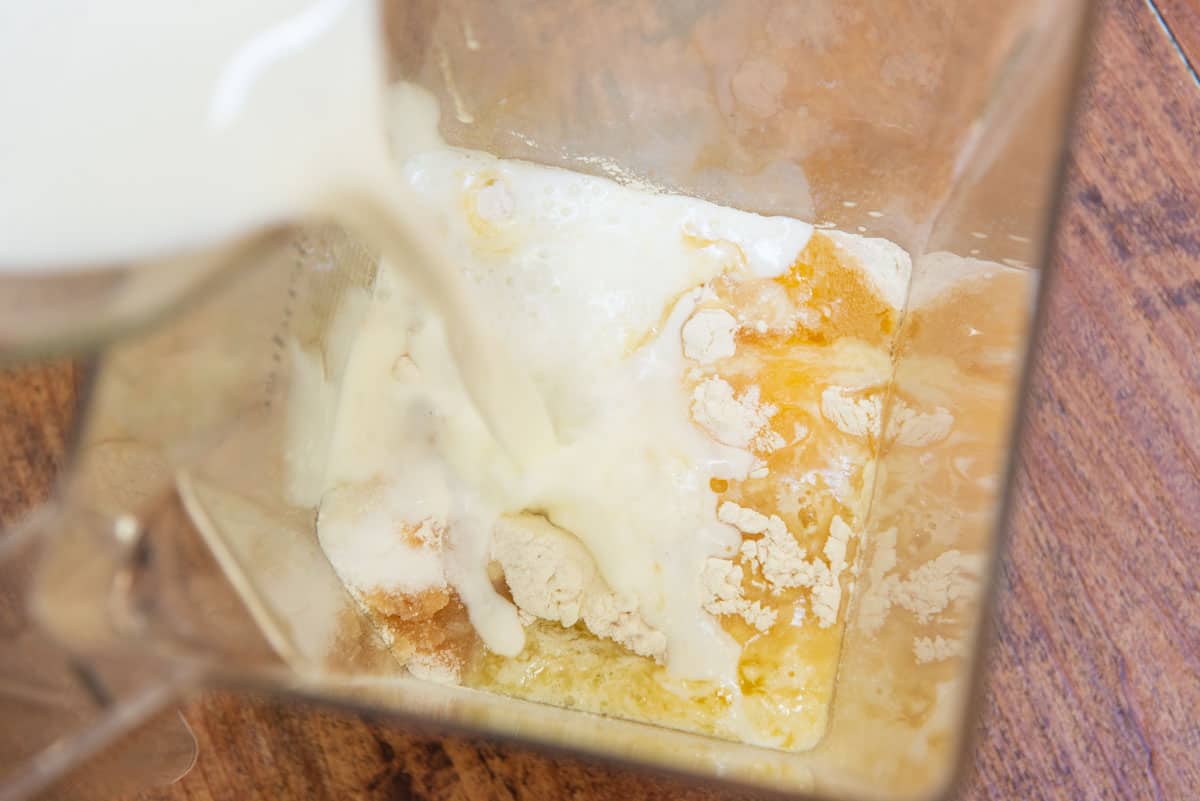
Blend everything together for about 15 seconds, until no flour pockets remain and the batter looks homogenous.
No blender?
If you don’t have a blender or food processor, you can make this whisking by hand in a large bowl, but make sure you are very thorough. In my experience it’s not quite as good as the machine but it’s still decent. Make sure to follow all the other guidelines, like letting the batter rest.
There should be quite a few bubbles on top:
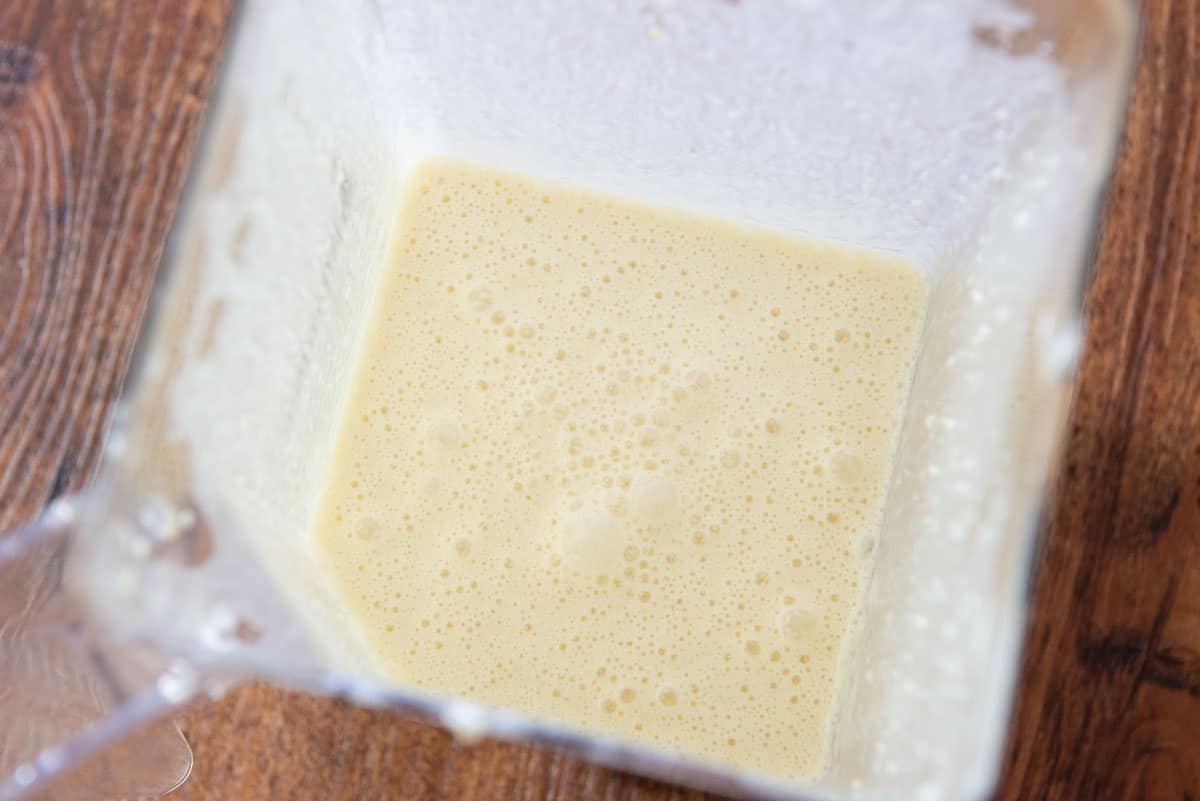
Tap and refrigerate, to release bubbles
Tap the blender container against the counter several times to make the bubbles rise to the surface and break, then refrigerate for at least 30 minutes, covered with an airtight lid or plastic wrap. This will reduce the chance for tearing later on.
The refrigeration time gives the batter a chance to become more cohesive as the flour absorbs the liquid, and also gives the bubbles time to rise out of the batter.
If you’re truly in a hurry, you can skip the refrigeration step, but the crepe batter is a little less easy to work with freshly made at room temperature. That’s often why I like making the batter the night before, so I don’t even have to wait in the morning.
Time to cook!
For cooking, you will need a nonstick skillet, which is a must for the batter releasing easily from the bottom of the pan. Special pans with low sides are not required, though it can make things easier. I just use a regular skillet I already have.
Melt a thin layer of butter in the nonstick skillet, then I like to let it sit for a moment to brown slightly, to give the outside of the crepe a subtle brown butter flavor. I also think salted is slightly better than unsalted butter here.
Then pour in the desired amount of batter per the size of your pan. 1/4 cup is a good place to start, but I simply pour directly from the blender container and go by eye.
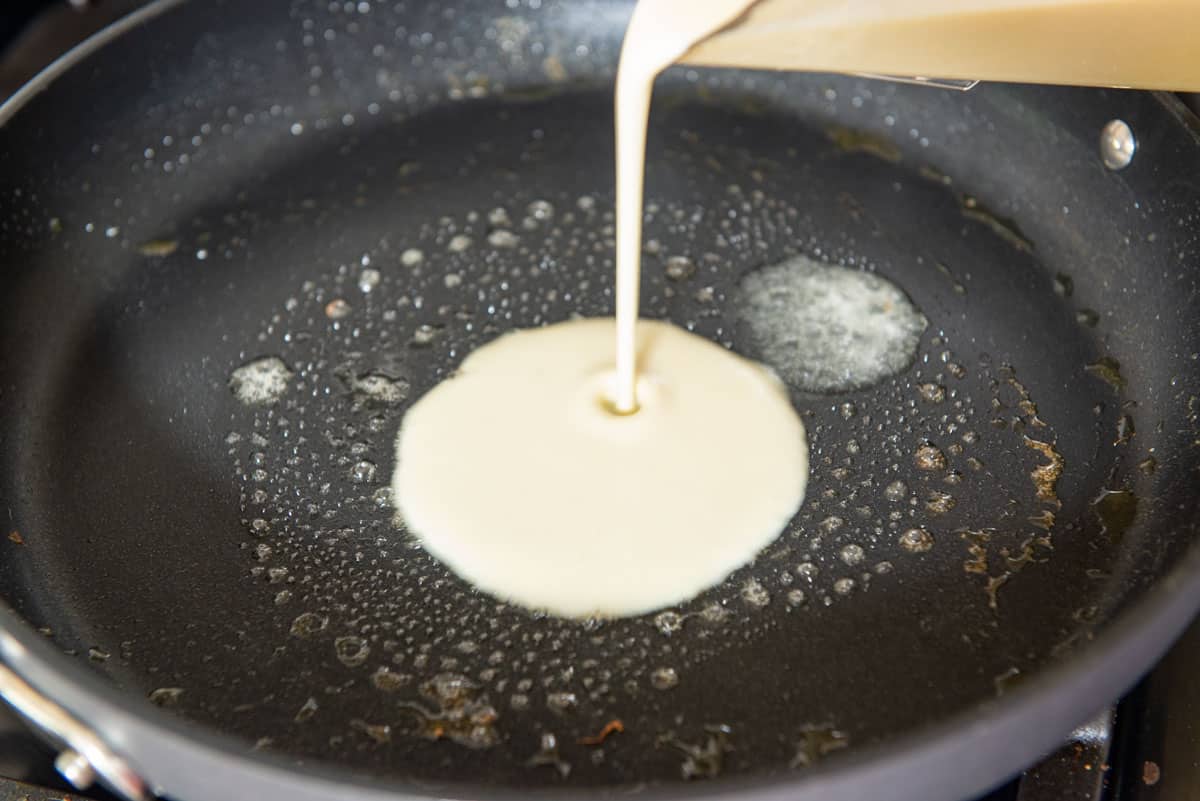
Use an offset spatula or a crepe spreader (affiliate) to spread the batter evenly in the center of the pan with a circular motion. I personally don’t have a spreader, and know I could get more perfect circles with one, but I fold my crepes so they don’t have to be perfect anyway!
I also don’t like to spread them too thin, but you can spread them however thin or thick you like.
Let the crepe cook for 45-60 seconds on the first side, until golden brown on the edges.
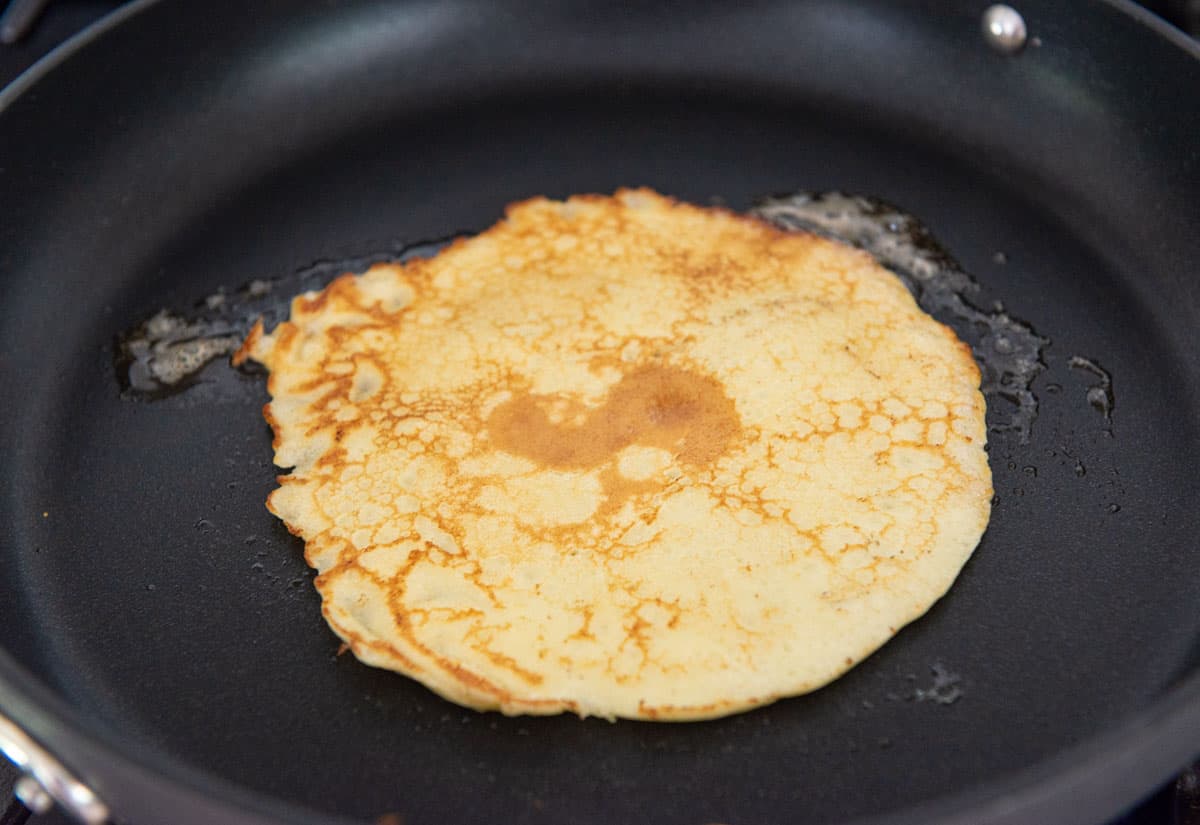
Cook for about 30 seconds on the other side, then repeat with the remaining batter.
Keep them warm while cooking
To keep the crepes warm as I make them, I stack them on a big plate, and flip another plate upside down over them so it creates a sealed space to retain heat. You can also wrap a piece of foil around the top.

How to Serve
I like to fold the crepes into triangles and arrange them on a plate with mixed berries and a dusting of confectioner’s sugar. Make your sweet crepe more special by serving with Homemade Orange Honey Butter, Strawberry Jam, or any of the sweet or savory fillings below.
You can also stack crepes on a plate for serving, and put an assortment of favorite fillings on the table, so people can choose fillings as desired.
Whole Wheat Pancakes and Blueberry Muffins are some of my other favorite sweet breakfasts. For savory, I love this Potato Frittata, and this Breakfast Burrito.
Sweet Filling Ideas
Crepes have a natural sweetness that lends well to fruity and dessert-like pairings, which is why I like dessert crepes the most. Here are some of my favorite sweet fillings.
- Dust with confectioner’s sugar and garnish with berries
- Spread with Nutella
- Stuff with Pan-Fried Honey Bananas
- Fill with whipped cream and sliced strawberries tossed with a touch of vanilla extract and lemon juice
- Drizzle with the sauce from Bananas Foster French Toast
- Stuff with sliced bananas, peanut butter, and honey
- Fill with lemon curd and fresh raspberries
- Fill with vanilla ice cream, Blueberry Sauce, and a dusting of fresh lemon zest
- Fill with Pumpkin Butter
Savory Filling Ideas
Savory crepes are particularly well suited for brunches and lunchtime. Here are my favorite combinations.
- Stuff with thinly sliced Black Forest ham and Gruyere cheese
- Fill with slices of Brie, deli turkey, and fresh basil leaves
- Fill with prosciutto, tomato slices, and mozzarella
- Stuff with smoked turkey, sauteed mushrooms, and Swiss
- Fill with chicken and pesto
- Fill with smoked salmon and whipped goat cheese
Recipe FAQ and Tips:
Yes, crepes freeze very well. I recommend stacking them individually between pieces of parchment paper or wax paper, which allows you the option to take a few out at a time. Then place them in a plastic bag or airtight container. Store for up to 2 months.
You can make the batter up to 24 hours ahead of time. I find the easiest thing is to make the batter the night before, then store in the fridge. Then cook the crepes fresh in the morning. You can also cook the crepes completely, then either freeze them per the instructions above, or store them in the fridge for a couple days.
Microwave: This is an instance where the microwave actually works really well. Microwave in a closed container (with a lid) until warm. Time will vary depending on the number of crepes and appliance strength, but I’d start with 15 seconds for one, and 45 seconds for a stack.
Skillet: You can also reheat them in a skillet, but you’d have to do this one-by-one, so it’s not as ideal. Try medium heat for 30 seconds per side.
Oven: Wrap in foil so moisture is not lost, at 250F for 8-10 minutes.
Once they’re cooked, they can be stacked right on top of each other. No need to put wax paper between them or anything (that only applies for freezing, so they don’t get frozen stuck together). They will keep in the fridge for up to 5 days, but for optimal flavor, I recommend finishing them within 2-3 days.
Did you enjoy the recipe? Please leave a 5-star rating in the recipe card below and/or a review in the comments section further down the page. Or, follow me on Facebook, Instagram or Pinterest!

Crepes
Ingredients
- 2 large eggs
- 1.5 cups milk*
- 1 cup all purpose flour (5 ounces by weight)
- 3 tbsp melted salted butter**
- 1 tsp vanilla extract
- 2 tbsp granulated sugar
- extra butter for cooking if desired***
Instructions
- Combine all ingredients in a blender and blend for 15 seconds, until combined.
- Gently tap the blender container on the counter a few times to make the bubbles in the batter release, then place the crepe batter into the fridge for 30 minutes.
- Heat a 10" nonstick pan over medium heat for a few minutes, then pour the desired amount of batter into the pan (1/4 cup is a good place to start), quickly swirling it around to spread it evenly (or even better, using a crepe spreader).
- Cook the crepe for 45-60 seconds, until browned on the bottom.
- Flip the crepe, and cook for about 30 more seconds, until brown on the other side. Repeat with the remaining batter.
- Serve the crepes rolled or folded into triangles, and with any garnishes you’d like. I usually do a dusting of confectioner’s sugar and berries, but you can also fill them with whipped cream, lemon curd, and more.
Notes
- Microwave: This is an instance where the microwave actually works really well. Microwave in a closed container (with a lid) until warm. Time will vary depending on the number of crepes and appliance strength, but I’d start with 15 seconds for one, and 45 seconds for a stack.
- Skillet: You can also reheat them in a skillet, but you’d have to do this one-by-one, so it’s not as ideal. Try medium heat for 30 seconds per side.
- Oven: Wrap in foil so moisture is not lost, at 250F for 8-10 minutes.
Nutrition
Nutrition is estimated using a food database and is only intended to be used as a guideline for informational purposes.
Post updated in August 2020. Originally published in December 2010.
29 Comments on “Crepes”
These crepes turned out amazing! Made them Christmas morning for my family and everyone loved them. I was out of vanilla so had to substitute almond extract and it worked as well. Easy, easy, easy……. 5 Stars!
Great but I never tried this. LOL
My crepes turned out perfect. I changed the proportions to 6 people and I got 12 crepes. I am French and I have manby many crepes over the years. I was looking to see if I can improve my own recipe, this one is a winner and my husband agrees!
So happy to hear this!!
SO GOOD! Thanks for the recipe.
I have made these 2 times so far, and as a person who normally hates pancakes of all kinds, I found this recipe absolutely delicious! I also especially love adding yogurt to crepes instead of cream because I find that it has more flavor but less fat. Thank you so much for this tasty recipe!
Thanks for this recipe. I just love it made it several times since I’ve found it and always turns out great.
Dankeschön!
Too eggy
Great tutorial on how to make perfect crepes!