No Bake Graham Cracker Crust
This No Bake Graham Cracker Crust serves as a sturdy and delicious base for all sorts of pies and tarts. You only need 3 simple ingredients to make it!
Knowing how to make a quick graham cracker crust gives you a foundation for tons of different desserts, and today I’m sharing a few tricks for doing it well.
While you can buy pre-made graham crusts at the grocery store, store-bought crusts usually taste old and stale. It’s totally worth making it fresh, and it’s very easy.
Quick Overview of the Method:
- Combine graham crackers and sugar in a food processor.
- Grind it up until no large pieces remain.
- Add melted butter.
- Run the food processor until the crumbs are moistened.
- Press the graham cracker crumbs into your pan.
- Chill for 30 minutes.
See? Simple stuff.
And it’s a general template that’s applicable for all sorts of variations, like no bake pies, a no bake cheesecake, or any other no bake desserts.
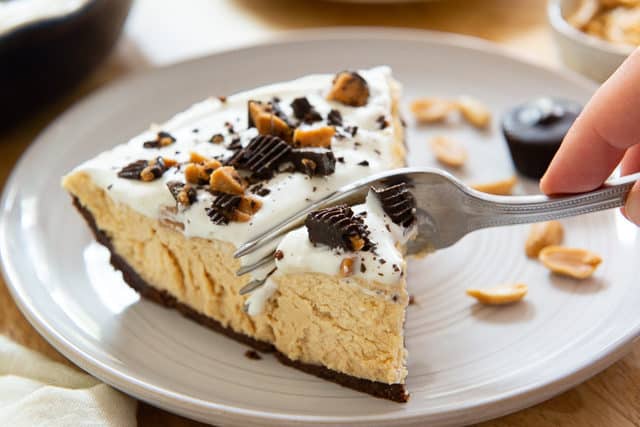
For example, my Peanut Butter Pie uses Chocolate Graham Crackers for the crust, but follows the same method:
You can also use the same method for a Chocolate Wafer Pie Crust, or Gingersnap Crust, or even Pecan Crust.
Step by Step Overview:
For the best graham cracker crust, I recommend using a food processor. If you don’t have one, there are alternate instructions below.
Using your hands, roughly break up two sleeves of graham crackers, just enough so you can fit them into the bowl of a food processor.
I share guidelines for amounts in the recipe box below, but two sleeves is 18 whole graham crackers. If you wish to purchase graham cracker crumbs instead, two sleeves is equivalent to 3 cups of graham cracker crumbs.
Add granulated sugar on top:
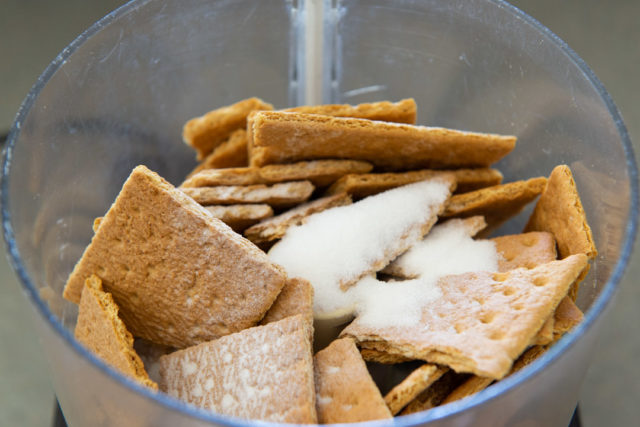
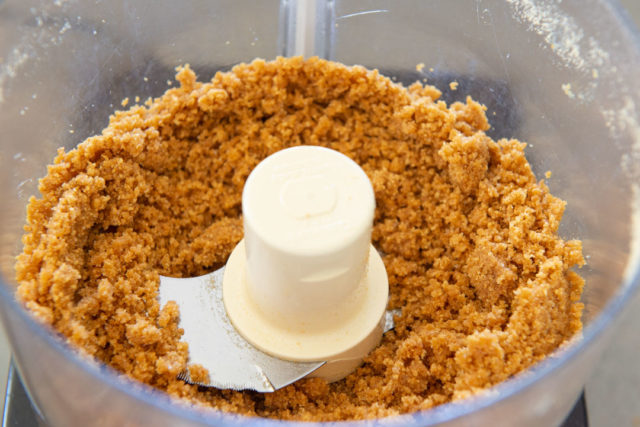
Run the food processor until the graham crackers are ground finely into crumbs, making sure there are no large bits of cracker left.
Then add melted unsalted butter:
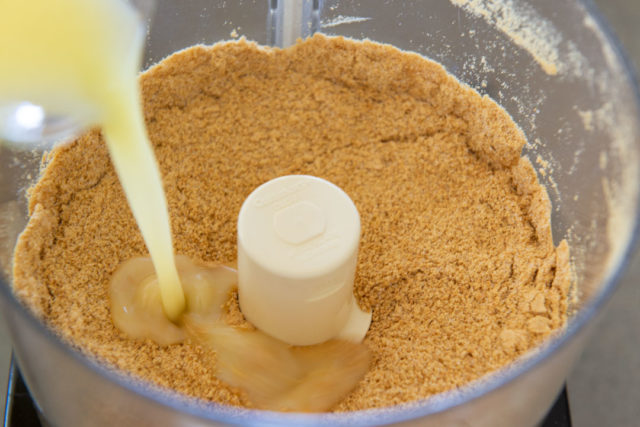
Run the food processor again until the fine crumbs are moistened. The crust mixture should look kind of sandy.
Pour the moistened graham cracker crumbs into whatever pan you’re using, and spread the crumb mixture as evenly as you can with a spatula:
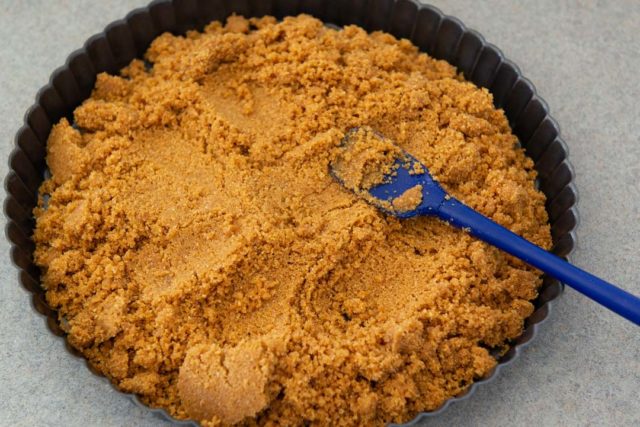
Here I’m using an 11″ tart pan with a removable bottom, but you can put this into a standard 9-inch pie plate, a springform pan, or whatever dish you’d like.
Don’t have a food processor?
Put the graham crackers in a plastic bag and smash them up with a rolling pin. Make sure there are no big pieces so you don’t have an excessively crumbly texture.
Then you can mix in the butter and sugar in a medium bowl, and press firmly into the sides and bottom of the pan.
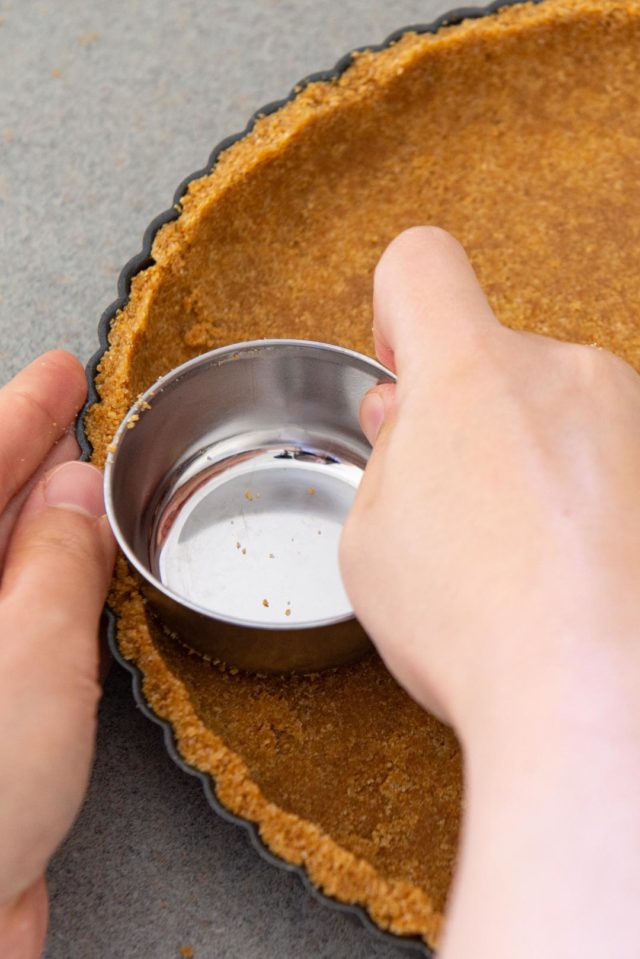
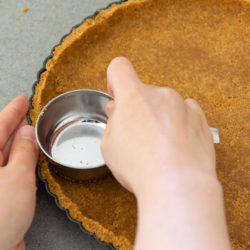
Now for the Important Part: Press firmly!
Press and flatten the crumbs firmly using the bottom of a measuring cup (or the bottom of a glass, ideally one that’s rounded):
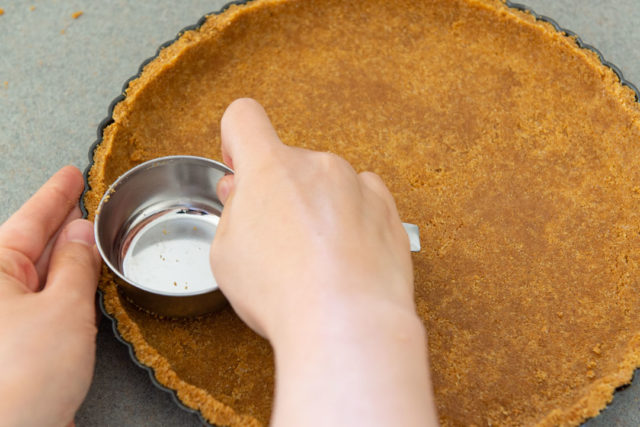
It’s very important to be thorough about evenly compacting the crust against the bottom of the pie plate or pan, as this will help the homemade crust hold together when you go to slice your tart or pie later on.
No Need to Bake, Just Chill It!
Chill the crust for 30 minutes, covered with plastic wrap, then you can go ahead and fill it with whatever you’d like.
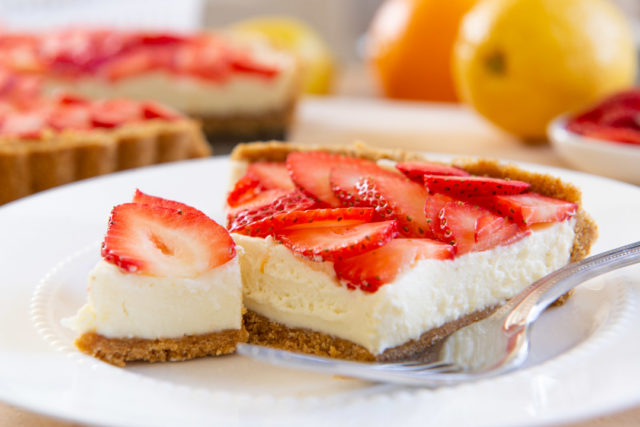
Here I’m doing a mascarpone filling:
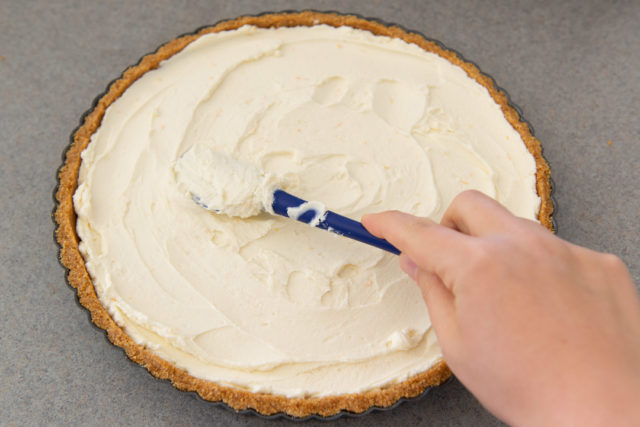
I then top it with strawberry slices for this wonderful Strawberry Tart, which is a completely no bake dessert.
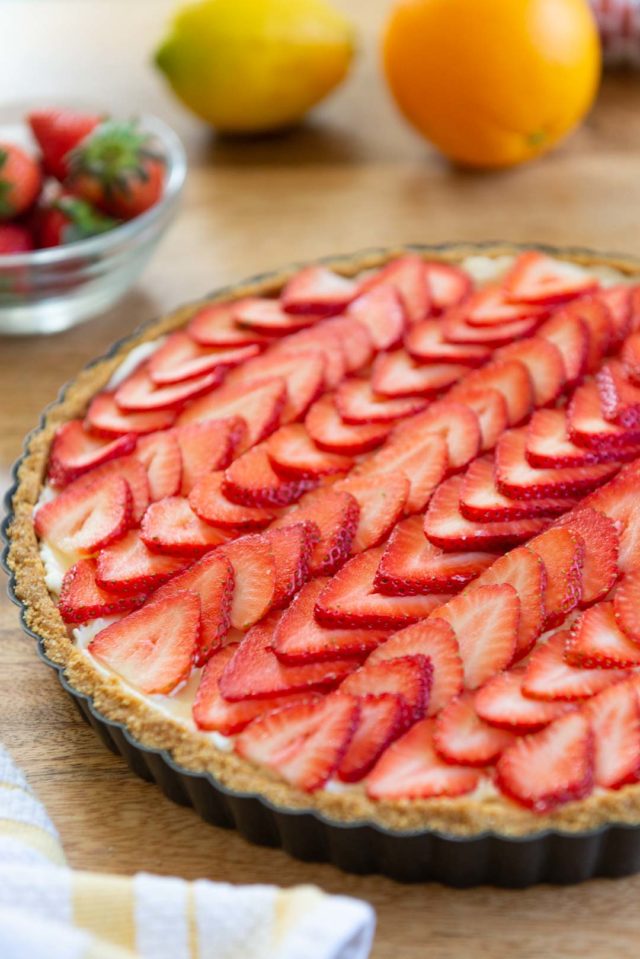
You can see how beautifully the no bake crust holds up, even when completely removed from the tart pan (affiliate):
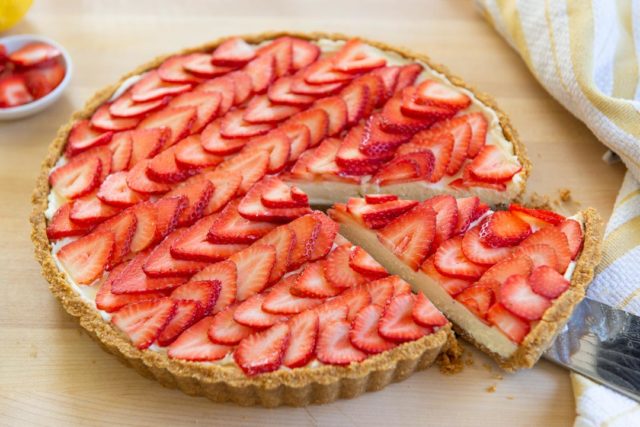
What you want here is enough thickness to hold the base of the filling, but not overpowering for the rest of the dessert:
The amount below is perfect for an 11″ tart pan which is shown with the strawberry tart, or a 1/2 recipe works for a 9″ pie plate if you want something thinner.
Use this homemade graham cracker crust recipe as the perfect base for any of your favorite pies. I also love it for cream pies and key lime pie.
FAQ and Tips:
Substitutions:
- Brown sugar can be substituted for the granulated sugar.
- You can substitute other kinds of cookies here for the graham crackers, like gingersnaps, vanilla or chocolate wafers, Biscoff cookies, or digestive biscuits for my European friends.
How to Make Ahead: The crust can be completely made one day ahead of time and kept in the fridge. Or it can be frozen for up to 1 month, but I feel the flavor gets old and stale, so I don’t recommend it.
Tried this recipe? Leave a rating and comment below — I’d love to hear how it turned out! Or, follow me on Facebook, Instagram or Pinterest!
No Bake Graham Cracker Crust
Ingredients
- 2 sleeves graham crackers (see notes below for equivalent amounts)
- 1/2 cup granulated sugar
- 12 tbsp unsalted butter melted
Instructions
- Break up the graham crackers with your fingers just enough so they can be placed into a food processor.
- Add the granulated sugar and process until the graham crackers are completely ground up.
- Pour in the melted butter and process until the graham crackers are evenly moistened, and hold together when pinched with your fingers.
- Pour the crumbs evenly into your desired pan. You can use this recipe for any standard 9" pie plate, but I also find it to be enough for an 11-inch tart pan.
- Firmly press the crumbs into the pan, flattening the bottom well and pressing firmly against the sides. I like to use a rounded measuring cup for this job.
- Refrigerate the crust for at least 30 minutes, then it is ready to fill. No need to bake it. Enjoy!
Notes
Nutrition
Nutrition is estimated using a food database and is only intended to be used as a guideline for informational purposes.
15 Comments on “No Bake Graham Cracker Crust”
Adding a gram weight or cup amount of the ground crackers would be helpful. I just bought a “Fresh Stacks” package of honey grahams and they’re packaged different. Most if not all recipes have weights or quantities for ingredients. Not just 2 sleeves of crackers. Ughh.
Hi James, I do clarify how many in the notes. Hope that is helpful
Weight, not number of crackers. 🙂
One additional thing I do when making fruit topped desserts is that I heat apple jelly and brush it over the fruit. It makes it glossy, really doesn’t add any discernible taste and makes your “baked” goods look like they came from a fancy bakery.
I don’t have a food processor. Can part/all of this recipe be replicated in a blender?
SO appreciated all the tips. I know graham cracker crust is fairly standard but all the tips and the amounts here were perfect.
Hi Joanne, I love the new layout of your website! Congratulations. The fact that you can see all the comments at once is very helpful. Most likely it was a lot of work but we appreciate it a lot. Love your recipes and your site :).
Thanks, Carolina! It was time for an update 🙂
Hi Joanne, may I have the weight for the amount of Graham crackers please? Thank you!
2 sleeves is 9.6 ounces
Awesome Graham Cracker Crust recipe.
I used to have a complicated recipe but then I found your recipe, less ingredients, so fast to make, absolutely delish, I put banana pudding, with sliced fresh bananas within the graham cracker crust. My pie was a hit and I should have made two for everyone could not stop eating the pie 🙂 Thank you Joanne for this recipe. 🙂
Hi Yo, that is wonderful! The banana pudding theme sounds delicious!
You suggested pecans! What a delicious idea!
Wish you would give butter measurements by weight. Who has time to measure 12 tablespoons accurately. Thanks.JS
Hi Janet, I try to give weights for ingredients like flour, but 12 tablespoons of butter is just a stick and a half. There should be tbsp markings on any standard package, but it’s literally just one stick plus half of another stick. Some butters actually come in half stick measurements too. Hope that helps.