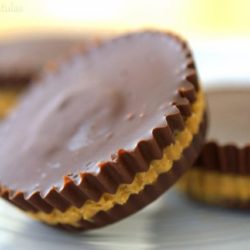
Homemade Peanut Butter Cups
Homemade Peanut Butter Cups are simple to make yourself and only require a handful of ingredients!
Ingredients
- 16 oz semisweet chocolate chopped, or in chip form
- 1/2 cup creamy natural peanut butter
- 2 tbsp butter softened
- 1.75 oz confectioner's sugar, by weight (1/4 cup+2 tbsp, measured), sifted
Instructions
- Line a standard 12 cup muffin tin with paper cupcake liners.
- Melt half the chocolate either in a double boiler (the safer method) or in the microwave (the slightly more dangerous, but easier method). I opt for the latter. Place the chocolate into a microwave-safe bowl, and microwave in 20 second intervals, about 3-4 times, stirring after each interval, until melted. Make absolutely sure not to overcook the chocolate, or it will seize and turn grainy.
- Distribute the melted chocolate into the 12 muffin tins (I use a cookie scoop to portion it out evenly), only barely filling the bottom of each cup. If the chocolate does not lie flat, drop the pan repeatedly on the counter, and it will flatten and smooth itself out. Place the pan in the freezer for 15 minutes, until the layer is firm.
- In the meantime, whip the peanut butter, butter, and confectioner’s sugar together with a hand mixer for about 1 minute until creamy and light. Taste it and make sure the sweetness is to your liking. Place small tablespoons of the peanut butter mixture into each cup, then drop the pan repeatedly on the counter again, so the layer is flattened out. Place in the freezer for 15 minutes, until the second layer is firm.
- Melt the last 1/2lb of chocolate, and portion small spoonfuls into the cups, one cup at a time, immediately dropping the pan repeatedly on the counter to flatten each cup. In my experience of making these, the chill from the peanut butter layer (because it was just in the freezer) will harden up that top layer very quickly, so you must flatten out the tops immediately after you pour the chocolate into each cup. Place the tray in the freezer for 15 minutes to set the top layer of chocolate.
- In order to have the softest bite, I recommend enjoying the peanut butter cups at room temperature. If you store them in the fridge or freezer, the chocolate will be more firm, making the filling more likely to ooze out. See the notes below for more commentary on storage and texture.
Notes
Storing leftovers: Keep at room temperature in an airtight container for up to 2 days, or in the fridge for up to 2 weeks. If storing in the fridge, you will need to allow the peanut butter cups to come back to room temperature again for a softer texture.
Freezing: Store in an airtight container for up to 3 months. To thaw, leave at room temperature for 1 hour.
Softer Texture: If you'd like a softer chocolate to bite into, I recommend using milk or semisweet chocolate, and no darker. However, these options are sweeter. If you prefer to use a darker chocolate while keeping it easy to bite into, you can use a chocolate ganache technique instead. Place the chocolate in a medium bowl, and set aside. Heat 1/2 cup of heavy whipping cream in a saucepan over medium high heat, and bring to a scalding temperature, which is 180ºF. If you don’t have a thermometer, this is when the edges of the cream start to bubble, but it hasn’t reached a full boil yet. Remove the cream from the heat and immediately pour onto the chocolate. Let sit for 2 minutes. Stir the chocolate and cream together with a spoon until the two combine. It’s now ready to be poured for the layers. Keep in mind that a true ganache will be equal parts cream to the weight of chocolate used, but that will yield way too soft of an ending texture. Do not use more than 1/2 cup heavy cream.
Nutrition
Calories: 185kcal, Carbohydrates: 20g, Protein: 3g, Fat: 13g, Saturated Fat: 6g, Cholesterol: 3mg, Sodium: 4mg, Fiber: 2g, Sugar: 17g