Chocolate Peanut Butter Balls
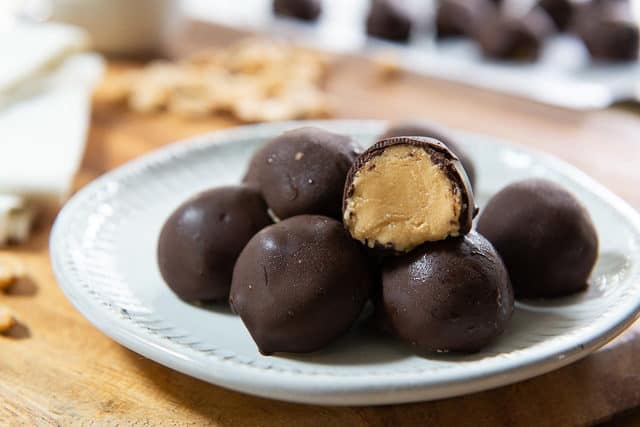
These Chocolate Peanut Butter Balls are a riff on buckeyes, with a creamy center coated in a dark chocolate shell. If you like peanut butter cups, you’ll love these no-bake treats too. You’ll only need 6 ingredients to make them!

The first time I went to Ohio and tried a proper buckeye, I totally got the hype. There is something so magical about the combination, and how humble but delicious it is.
Since then, I’ve dabbled in a few homemade versions, and have wound up with something that I think is even better. You can think of these as buckeye balls, still made with simple ingredients, but here’s what’s different:
The Merits Of This Recipe
Better proportions – The focus here is more on the gloriousness of peanut butter, with simply a thin coating of chocolate on the outside. It’s well-balanced.
Not sickeningly sweet – I like buckeyes, but I’ve always found them to be a bit too sweet. We’ll use less sugar than usual here, for a more balanced taste.
Not gritty – The other downside to too much confectioner’s sugar in the standard buckeye is it makes the texture really gritty. These have much less confectioner’s sugar in them, which makes them a little trickier to work with, but only requires a little fridge time to firm them up.
Super creamy texture – The filling has a richly creamy texture that is a delight to eat. It’s similar to the indulgence of a Chocolate Truffle.
These easy peanut butter balls are the kind of dessert where you can keep it stashed in the freezer for whenever you need a little treat, or you can make it ahead for holidays like Christmas.
I like starting my holiday baking right after Thanksgiving and storing items like this in the freezer, so I can focus on the stuff that has to be freshly baked for the holidays, like Molasses Cookies and Chocolate Crinkle Cookies.
It’s also a great recipe for a no bake treat in hot summer months.
Tips for Best Results
Use the right peanut butter – I do not recommend natural peanut butter here, because it’s quite loose and doesn’t have a consistent texture.
Use a flavorful butter – Because there are so few ingredients here, it’s worth it to purchase a premium and flavorful butter. I like Kerrygold.
Mind the chocolate – Do NOT buy chocolate bars from the candy section that are meant for eating and snacking. You will need to use a chocolate that is intended for melting. I recommend going to the baking section and picking baking chips or bars. Guittard is my favorite brand, but Callebaut, Vahlrona, Scharrfen Berger, and Ghirardelli are all great too.
Step by Step Guide:
In a large bowl, combine room temperature creamy peanut butter, confectioner’s sugar, vanilla extract, and butter:
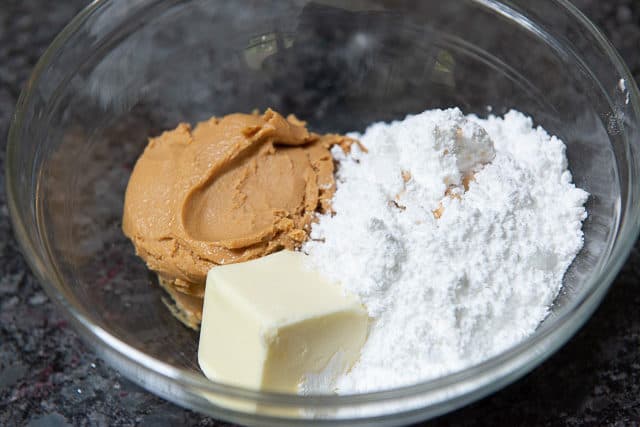
I use salted butter here, but you may use unsalted butter and add 1/8 tsp salt to the bowl instead.
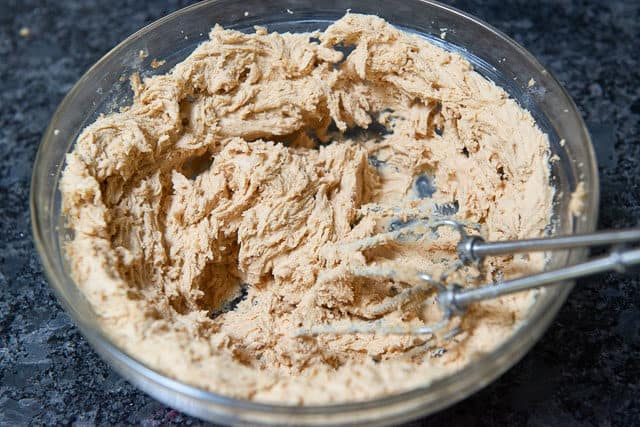
Whip that all together using a hand mixer until you get a very fluffy texture. The peanut butter mixture will almost look like frosting:
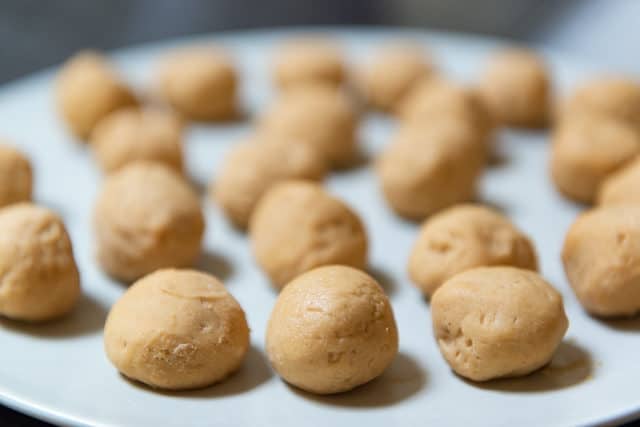
Use a 1T cookie scoop to portion out the filling into small scoops:
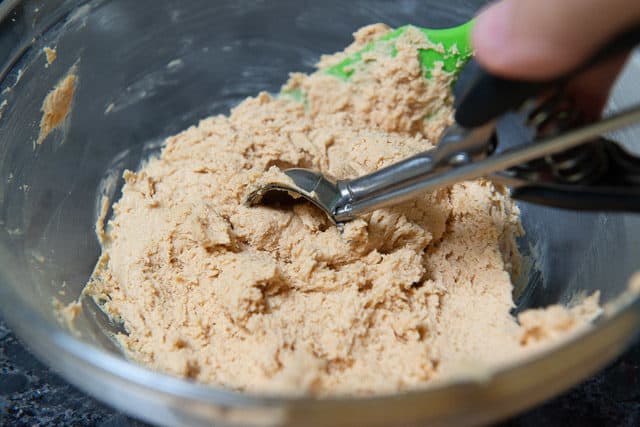
This size scoop will give you 1 to 1.5 inch balls, which is ideal.
Then dollop them directly onto a wax paper (or parchment paper) lined plate in a single layer.
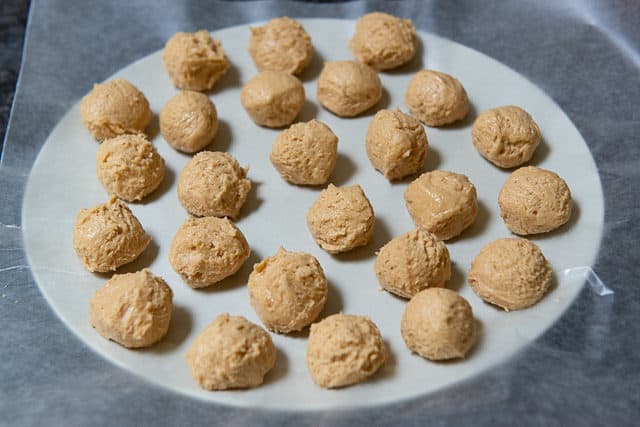
Because all of the ingredients are warm, they will be too loose to roll right now.
Refrigerate the peanut butter balls until they are firm enough to roll into a smoother shape:
You can really do any shape you want here. I like to shape them into eggs for Easter!
Chill them further, then it’s time to coat them in chocolate.
What kind of chocolate to use
As I discuss in my Chocolate Bark post, it is important to use a chocolate designed for melting, and also to melt it properly.
Do NOT buy chocolate bars from the candy section that are meant for eating and snacking.
I recommend going to the baking section and picking baking chips or bars that are meant to be melted. Guittard is my favorite brand, but Callebaut, Vahlrona, Scharrfen Berger, and Ghirardelli are all great too.
As far as the darkness, I use a 60% cacao bittersweet chocolate here, but you may also use semi-sweet chocolate, or even sweeter options like milk chocolate or white chocolate.
How to melt the chocolate
There are two options for melting:
1. For the most foolproof and safest way to melt chocolate, set up a double boiler, which is a heatproof bowl over a saucepan with an inch of simmering water. Once the water is simmering, add the chocolate chips to the bowl, turn off the heat, and let the residual steam melt it all. Do not use a wooden spoon to stir, which may have moisture in it. Use a spatula.
2. An easier and more convenient way to melt chocolate is to place chocolate chips into a microwave-safe bowl, and microwave at 70% power in 30 second intervals, about 3-4 times, stirring after each interval, until melted.
The only thing is you have to be very careful not to overheat the chocolate, or it may seize and turn grainy.
I stop microwaving when there are still a few unmelted chunks left, as usually there’s enough residual heat to melt the rest, and you don’t want to risk overheating.
Place the balls on a rack set over a sheet pan and spoon the melted chocolate over, letting the excess chocolate drip off:
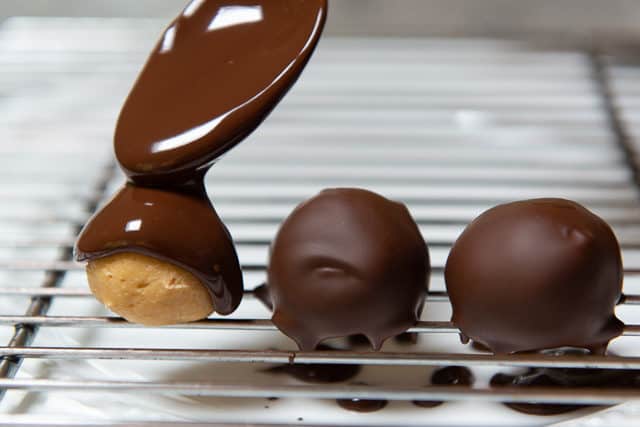
You can retrieve the dripped chocolate coating below on the prepared baking sheet, and use it again to pour over the tops of any uncoated peanut butter balls. You just may need to pop it into the microwave for a few seconds to melt again.
You may also insert toothpicks into each piece and swirl it into the chocolate, but I like the pouring method better for a smoother top.
Place the balls into the fridge or freezer once again, until the chocolate sets.
These Peanut Butter Bon Bons are very similar to this recipe, but use crispy rice cereal, if you want to try a different texture. The rice krispies make for more crispy peanut butter balls, whereas this is very smooth inside.
How to Serve These
Some people enjoy these at room temperature, and some enjoy them chilled in the fridge. The room temperature version will have a creamier, softer texture, while the chilled version will be more firm. The choice is yours.
Whenever I make these for a party, I like to plate them with other bite-sized desserts like Homemade Chocolate Truffles, Oreo Truffles, and Chocolate Covered Strawberries.
You can also serve them with Cream Puffs or Shortbread Cookies.
FAQ and Tips
Yes, in an airtight container for up to 2 months.
I recommend keeping them in the fridge for up to 2 weeks.
Absolutely. They keep in the fridge for up to 2 weeks, though I recommend making them on the earlier side so they taste more fresh.
Absolutely, if you want little flecks of peanut in the middle. Substitute an equal amount for the smooth peanut butter.
Yes, using the paddle attachment. Make sure to scrape down the sides of the bowl as needed.
Did you enjoy the recipe? Please leave a 5-star rating in the recipe card below and/or a review in the comments section further down the page. Or, follow me on Facebook, Instagram or Pinterest!
Chocolate Peanut Butter Balls
Ingredients
- 3/4 cup peanut butter (I recommend creamy)
- 1 cup confectioner’s sugar (4 ounces by weight)
- 1/2 tsp vanilla extract
- 1/4 cup butter* softened
- 4 ounces dark chocolate** chopped
- 1/2 tsp oil (olive, coconut, avocado, etc)
Instructions
- In a large bowl, whip together the peanut butter, confectioner's sugar, vanilla, and butter, using a hand mixer. It will be light and fluffy, like frosting.
- Use a cookie scoop to portion out the mixture onto a wax paper or parchment lined tray. I do 1-tbsp scoops, though you may vary the size as desired. FYI the mixture will be very soft right now.
- Chill the scoops in the fridge for about 20-30 minutes, until cold enough to roll into a more spherical shape, then place back into the refrigerator or freezer for another 30 minutes, to chill completely.
- Melt the chocolate in a double boiler or in the microwave in 30-second intervals, then stir in the oil to thin the chocolate slightly.
- Place the peanut butter balls on a wire rack, and pour the melted chocolate over them, scooping up the fallen chocolate as needed to recoat. Because the balls are cold, you'll notice that they will harden up the chocolate fairly quickly.
- Chill the balls in the fridge for 10-15 minutes, to completely set the chocolate shell, then enjoy!
- Store leftovers in the fridge or freezer.
Notes
Nutrition
Nutrition is estimated using a food database and is only intended to be used as a guideline for informational purposes.
Post updated in November 2018. Originally published May 2011.
10 Comments on “Chocolate Peanut Butter Balls”
I plan to make these this weekend. How many Buckeyes does this recipe yield?
Hi Valerie! This will make you 24! Enjoy!
are you using real butter or margarine? If real is it salted or unsalted? Is the chocolate bakers choc. or something like choc. chips? Thanks for the help, I’m going to try to make these with my grandson this year. He’s just old enough to be interested in baking.
Real butter. Salted is better here, but if using unsalted, add a pinch of salt to taste (start with 1/8 tsp). Use a melting chocolate that you enjoy. I like Ghirardelli’s Dark Chocolate 60% disks.
I have TONS of regular Creamy Jif Peanut Butter, will this recipe still work with that kind?
Any creamy peanut butter works i used this recipe.
PEANUT butter is the bomb diggedy!
two of my favorites! I make variations of pb balls and bites all the time
Being from Ohio, I can’t believe you’d never had Buckeyes before! They are delicious, but yours look even better 🙂
Those look amazing!