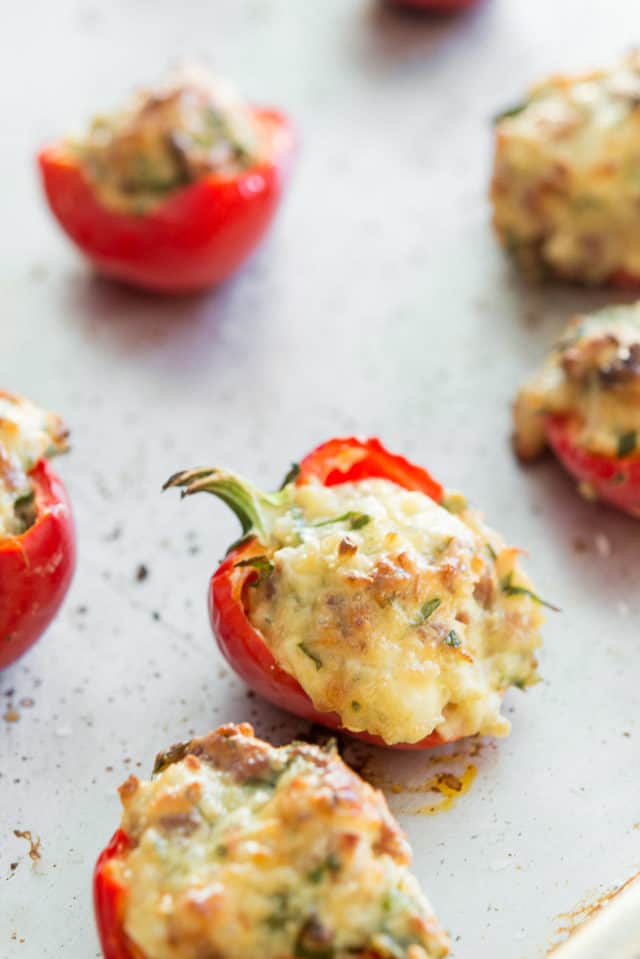
Stuffed Cherry Peppers
Hot Cherry Peppers are stuffed with a delicious herb & garlic cheese filling with sausage, then baked until bubbling and golden. This recipe makes for a great appetizer or hors d’ouerves for parties and entertaining, and the whole tray always disappears in a flash!
You can think of these Stuffed Cherry Peppers as like a stuffed mushroom, but with a spicy and flavorful pepper in place of the usual mushroom cap. They’re SO tasty!
This recipe is a recreation of a dish I had on a recent trip to Miami, where I had cherry peppers stuffed with chorizo and cheese. I’ve eaten Stuffed Mushroom Caps plenty of times, and I don’t know why I had never thought of doing something similar with peppers.
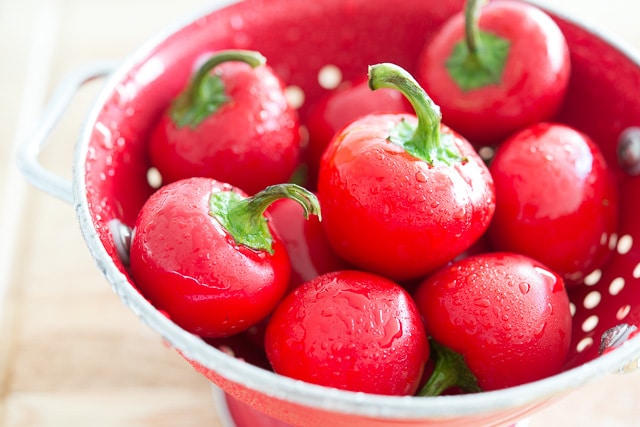
First, a little warning about cherry peppers…they are HOT! And they’re kind of like jalapeños, where sometimes they are not that spicy, but then you randomly get a REALLY spicy one, and there’s absolutely no way to tell until you put one in your mouth. So if you like spicy, proceed, but if you don’t enjoy heat, this might be too spicy for your tastes, and I’d recommend these Stuffed Mini Peppers instead.
Tips for Best Results
Leave the stems on, and cut directly through the stem – If you’d like to remove the stems altogether during prep, you may, but I personally love to leave the stems on, cutting the cherry pepper through the middle so that each stuffed cherry pepper half has a little “handle” for easy grabbing. I also think it looks better aesthetically.
Wear gloves – This is more of a safety/comfort tip, but because the cherry peppers are pretty spicy and you’ll be removing the seeds, I recommend wearing food gloves when handling the peppers.
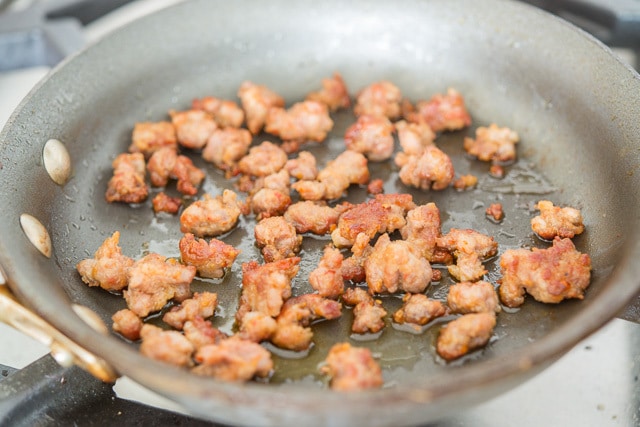
Brown the sausage well – We’ll be including one link of Italian sausage that we’ll cook and crumble to be mixed in with the stuffing. I can’t tell you how much flavor this adds, so don’t skip it, and take the time to brown the crumbles well for the best flavor.
Step by Step Overview:
Start by browning one link of Italian sausage in a skillet, breaking it up into small bits with your spatula, until cooked through and almost crispy like bacon:
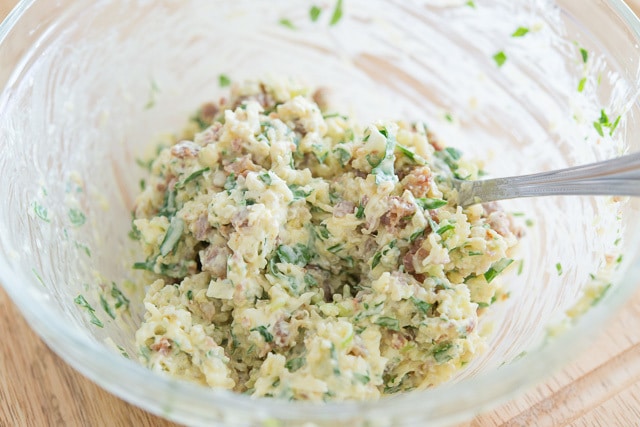
Move the cooked sausage and any drippings to a big mixing bowl, and combine with cream cheese, fresh garlic, parsley, egg, bread crumbs, scallions, and grated parmesan cheese:
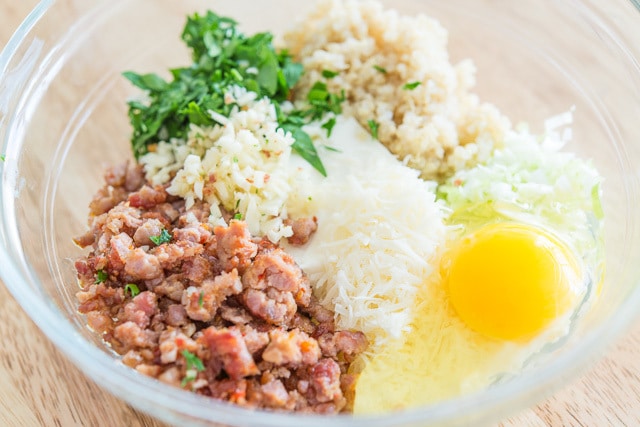
Mix this up until all the ingredients are evenly distributed:
Cut the cherry peppers in half, and remove all the seeds and as much of the ribs as possible, to cut down on the heat:
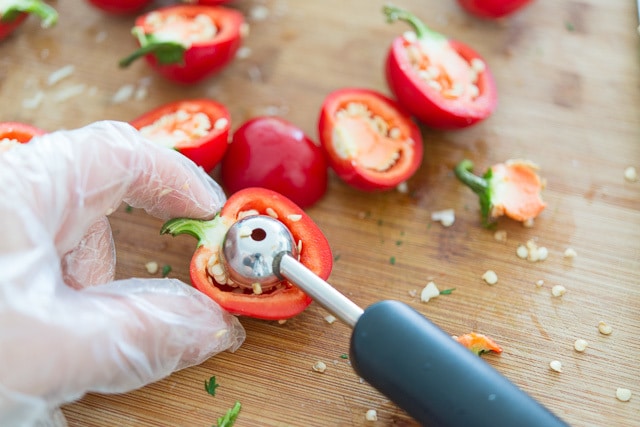
(And yes I’m wearing gloves. I always wear them when working with chilies and they help SO much. This is the kind I buy, it’s $6.50 for 500 gloves so they are worth it)!
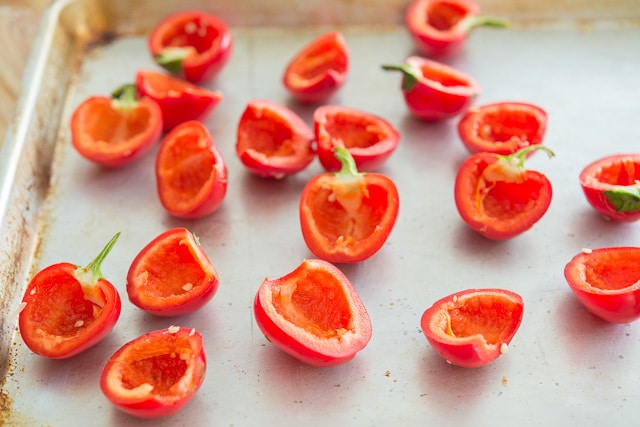
Lay the hot peppers out on a pan:
Then stuff each one with a scoop of the filling:
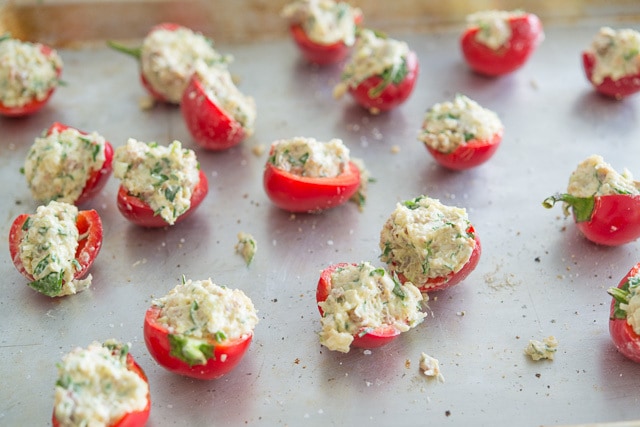
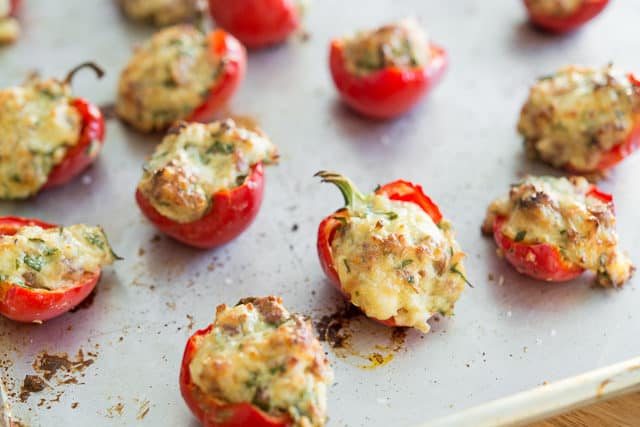
Roast until the peppers soften and the stuffing browns:
How to Serve Them
These Stuffed Cherry Peppers are best enjoyed when they are hot out of the oven. They’ll need at least 2 minutes to cool enough to start eating, but you want to make sure you don’t let them cool too much. The gooey and creamy cheese filling is an essential part of the experience.
I like to serve these alongside other finger foods like Potato Croquettes, Smoked Salmon Deviled Eggs, and Bacon Wrapped Jalapenos. These also pair nicely with Zucchini Fritters and Chicken Salad in Endive Cups.
Recipe Tips and FAQ
Keep in an airtight container in the fridge for up to 5 days.
Yes, store in an airtight container in the freezer for up to 3 months.
For best results, I recommend reheating in a 300F oven for about 10 minutes, until warmed through. Add an extra 5 minutes if reheating straight from frozen. You may also use the microwave, heating in 30 second intervals until warmed through.
Did you enjoy the recipe? Please leave a 5-star rating in the recipe card below and/or a review in the comments section further down the page. Or, follow me on Facebook, Instagram or Pinterest!

Stuffed Cherry Peppers
Ingredients
- 1/3 lb Italian sausage (one link)
- 4 oz cream cheese softened to room temperature
- 1/4 cup breadcrumbs *
- 1/4 cup packed grated parmesan cheese
- 2 tbsp minced scallion
- 3 tbsp minced parsley
- 1 tbsp minced garlic
- salt
- freshly ground black pepper
- 1 large egg
- 10 oz fresh hot cherry peppers (you can also use the pickled peppers that come in a jar)
Instructions
- Preheat the oven to 425 degrees F.
- Heat a skillet over medium high heat. Remove the meat from the sausage casing and crumble the sausage into the pan.
- Brown for about 5 minutes, breaking the meat up with a spatula, until cooked through and crispy. Let cool slightly, then chop into smaller pieces if needed (you don't want huge chunks of sausage in the filling).
- In a large bowl mix to combine the sausage (and any drippings from the pan), the cream cheese, breadcrumbs, grated parmesan, scallion, parsley, and garlic. Season to taste with salt and pepper (I start with 1/2 tsp salt and 1/4 tsp pepper), then stir in the egg.
- Halve the cherry peppers and remove the seeds and ribs with a melon baller.
- Stuff each cherry pepper with a scoop of the filling.
- Place on a sheet pan and roast for 20 minutes, until the peppers look softened and the filling is golden brown on top. Enjoy!
Notes
Nutrition
Nutrition is estimated using a food database and is only intended to be used as a guideline for informational purposes.
Post originally published in August 2014, and updated in May 2018 with more photos and writing. This post contains an affiliate link.