English Style Scones
These English Style Scones bake up light, soft, and fluffy, and are a wonderful treat for breakfast or afternoon tea. Spread them with jam, clotted cream, butter, or simply eat them plain. They’re incredibly delicious and are made in 25 minutes. No chilling required!

To this day, if you go to my childhood home and open up the refrigerator, you will find bags of scones in there, made by a bakery called Sconehenge. Located in Berkeley, California, I devoured these absurdly delicious scones all throughout my childhood.
My dad still has access to these scones since he lives in the Bay Area, but it has been 15 years since I lived in California. Translation: my enjoyment of these scones, the best scones (!), has been limited to brief Christmas and summer visits.
I remember a few years ago I tried to recreate these scones, and searched the internet endlessly with phrases like “Sconehenge recipe,” “Sconehenge copycat recipe” and “how to make Sconehenge scones.” Nothing came up. It made me crazy!!! I couldn’t figure out how these scones were so different from American scones like Maple Scones and Cheddar Chive Scones. These tender scones weren’t hard or dry. Rather, they were soft, fluffy, pillows of wonder.
The mystery was finally solved when I went to England and tasted an English Style Scone. I took one bite and thought, THIS TASTES LIKE SCONEHENGE! Then the “duh” moments poured in. Sconehenge…a riff on Stonehenge…which is in England…oh. The things you realize AFTER the dots have been connected.
Well, the good news is now I know how to make these delightful scones. They’re English style!
English scones are made differently from American scones, and instead of being stiff and dry, they’re fluffy and soft. A lot of people think these look like American biscuits, and they kind of do, but they’re prepared quite differently.
Tips for Best Results
Work quickly, and resist the urge to add excess flour – I paired these two tips together, because they really go hand in hand. You’ll want to have all your ingredients ready to go so that you can carry the recipe out quickly, because the butter will only get warmer and the dough stickier if you take too long.
Push the cutter straight down – When you go to cut your circles of scone dough, make sure to push the cutter straight down. Do not twist the cutter. This will ensure the scones rise as high as possible.
Use the best quality butter – It’s incredible how different brands make wildly different tasting butters. Some don’t taste like much of anything, while others have incredibly rich flavor, that slightly sweet dairy fat flavor all humans love. My favorite butter is Kerrygold. Plugra and Vermont Creamery also make great butter. If you look up butter taste tests online, you’ll see that they are definitely not all equal.
Step by Step Overview:
To get started, combine all-purpose flour, salt, baking powder, and sugar in a food processor, then add softened butter:
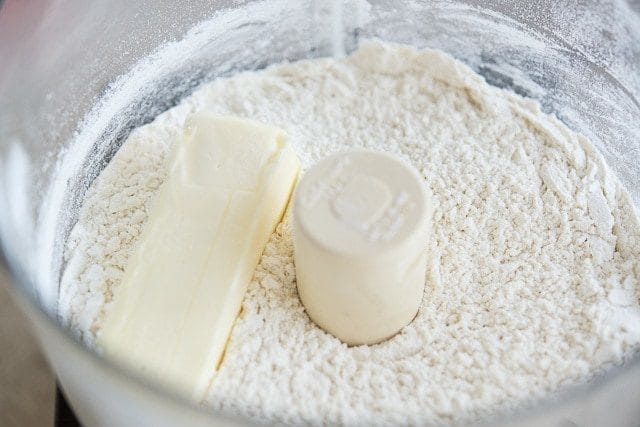
Why not cold butter?
Using softened or room-temperature butter instead of cold butter is one of the major differences between English style scones and both biscuits and American-style scones. Biscuits and American scones both use cold butter that’s rubbed or “cut” into the dry ingredients, and left in chunks. Here we want more of a sandy texture.
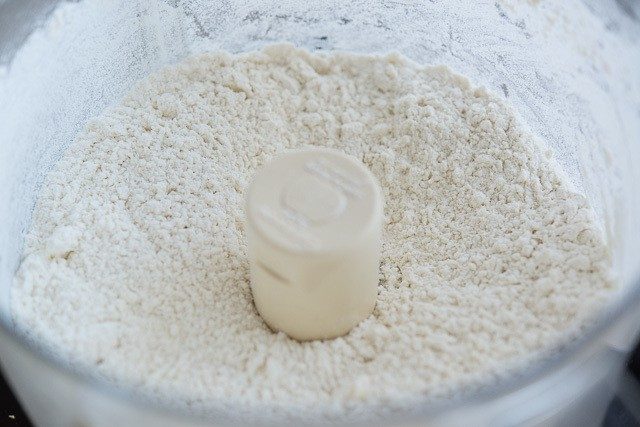
Pulse the food processor ingredients until the softened butter is well incorporated into the flour.
Note: If you don’t have a food processor and are using a pastry cutter, you’ll need to work it through quite a bit to get the texture right.
You can see that unlike a pie crust, we don’t have big pieces of butter in the flour. Rather, it has a sandy, soft texture:
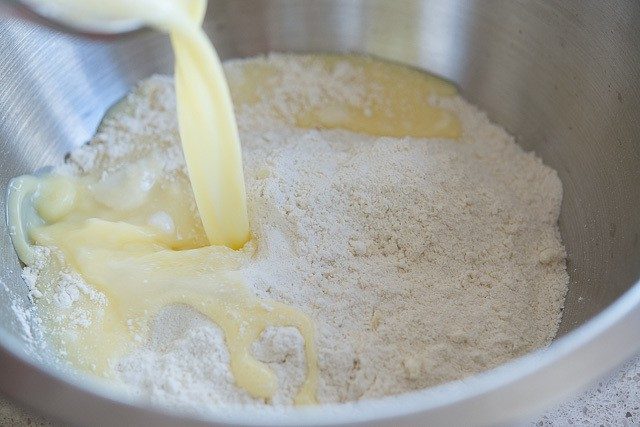
Dump this mixture into a large bowl.
Whisk together milk and an egg, saving 2 tablespoons of this egg wash in a small bowl for later. Then add the rest to the flour mixture:
Stir together with a spatula, then when it’s roughly combined, dump it onto a lightly floured surface:
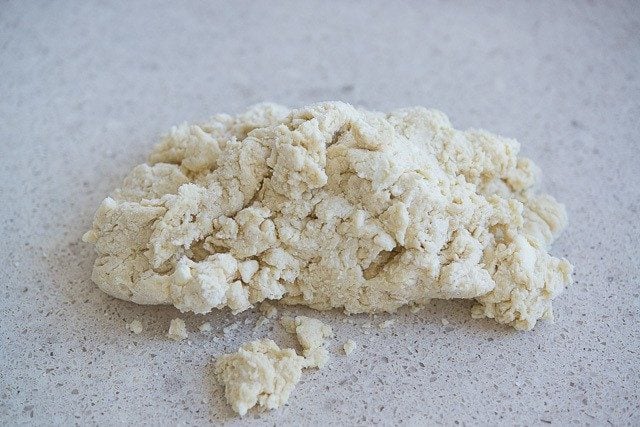
The mixture will be wet, but resist the urge to add too much excess flour, since this will make your English scones drier.
Lightly flour the dough, then knead it until it smooths out a bit, just a few times:
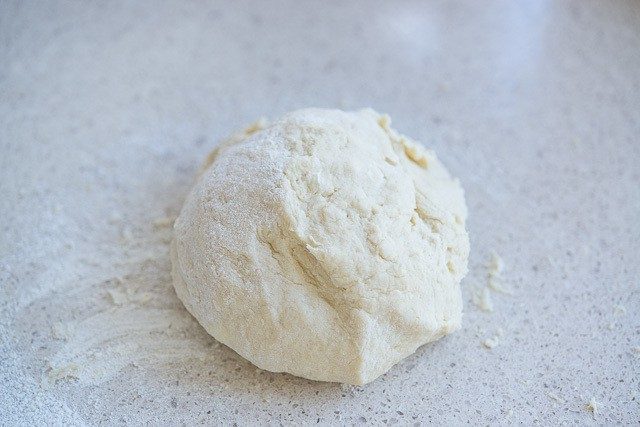
You can see that it’s still sticky, and there are bits sticking to my counter. Again, this is important for a hydrated dough, a soft texture, and good rise.
As with anything where you combine flour with liquid, try not to knead too much, or excess gluten will develop and make the scones tough, and also prevent them from rising as high.
Roll the dough about an inch thick:
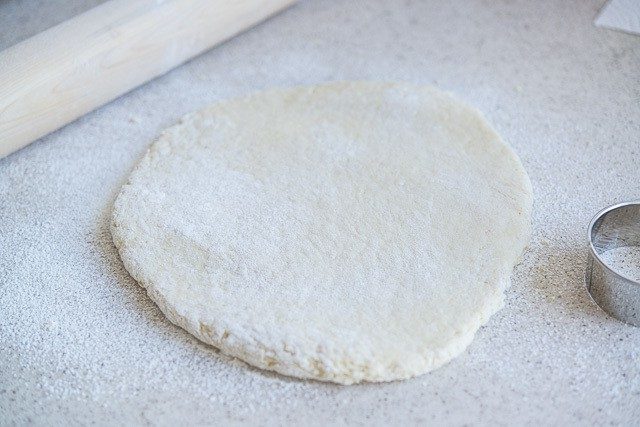
Use a 2.5″ cutter to cut circles, or, use a sharp knife to cut square pieces. Then place them on a silicone mat or parchment paper lined baking sheet.
Make sure not to twist the cutter at all when cutting the circles. Push straight down toward your work surface, otherwise they won’t rise as tall.
How to freeze these, if you’d like:
At this point you may freeze the unbaked scone circles, then when you’re ready to eat, bake them from frozen at the same temperature for about 5 extra minutes.
You can also freeze completely baked scones, and let them thaw to room temperature when you’d like to eat them. Bread and baked goods tend to freeze beautifully.
Before baking, brush each scone circle with the reserved egg milk wash:
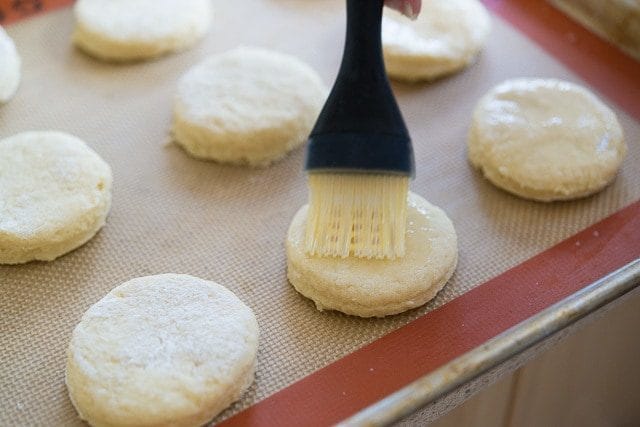
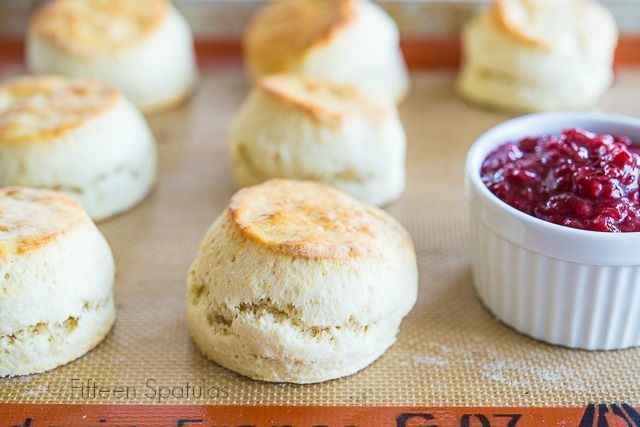
After a quick trip into a hot oven, about 15 minutes, they’ll be puffed and golden brown, with a slightly crisp exterior:

I like to enjoy them fresh and warm from the oven, but if you plan to store leftovers, make sure to cool completely on a wire rack before storing in an airtight container.
How to Serve
Serve the scones while they’re warm with your favorite jam (I love this strawberry jam) and clotted heavy cream for extra bonus points. My grocery store sells this in the fancy cheese section. Butter is of course lovely too, especially Homemade Orange Honey Butter.
You can certainly enjoy these after they’ve cooled as well, but like many baked goods, they are always at their peak when they’re fresh and warm out of the oven. I love these for Mother’s day, baby showers, and weekend brunches.
For your next homemade baking projects, I also suggest these Homemade English Muffins, my favorite Banana Bread, and Pumpkin Muffins.
Flavor Additions and Substitutions
Here are a few easy ways to experiment with different flavor combinations. This is a great recipe for playing around with variations, and can be looked at as a master scone recipe of sorts.
Citrus zest: If you’d like to add orange zest or lemon zest, those additions work beautifully. Add up to 1 tablespoon of zest to the flour mixture.
Dried fruits: Add up to 1 cup of your favorite dried fruit after you’ve combined the wet and dry ingredients, but before all the flour has moistened. Blueberry scones made with dried blueberries are one of my favorites. Dried cherries are also wonderful.
Crunchy sugar: For an exterior crunch, sprinkle on a little sugar to the tops of each scone after brushing with egg wash. Turbinado sugar has great texture.
Chocolate chips: Add up to 1 cup of your favorite chocolate chips after you’ve combined the wet and dry ingredients, but before all the flour has moistened.
What about fresh fruit? This is possible, but I issue a caution. Add up to 1 cup, but know that fresh fruits are trickier because they tend to be wet, and this is already a fairly wet dough. Adding fresh fruit makes the scone dough more challenging to work with.
Recipe Tips and FAQ
At room temperature, for a few days. In the fridge, for a couple weeks. In the freezer, a few months. Because there are only simple ingredients here and no preservatives, the scones will mold if left out for more than a few days.
You can either freeze scones baked or unbaked. To freeze baked scones, let them cool to room temperature, then freeze in an airtight bag for up to 3 months. To freeze unbaked scones, make the recipe up to cutting the dough circles, then bake the circles straight from frozen for 5 extra minutes, or until cooked through.
Bake in a 300F oven for 5-10 minutes, until warmed through. You can also cut them in half and toast them. Add a few extra minutes if reheating from frozen.
Yes. Like any baked good, these are best fresh, but they’re still fantastic the next day. Reheat them per the instructions above, or bake from frozen (instructions are in the post).
As noted above, it’s normal for the dough to be a little bit sticky, but it should still be workable. If it’s not workable, this is probably either because there’s not enough flour, or the butter got too warm. So first, try to weigh the flour if possible. There is already so much variation between cup measuring and brands, and weighing the flour will help ensure proper proportions. Next, try to assess if the dough needs more flour, or if it’s too warm. For example, if the butter you used is softened above 70 degrees F (or if you used the microwave softening feature for a bit too long), the butter may be too warm by the time you’re working with it. Popping the dough into the fridge will firm the butter slightly, and may help you roll it out. Or, you can add just enough flour to the outside to roll it out, then cut the pieces.
First, make sure you’re using fresh baking powder, one that has been opened less than 6 months ago. Also, if you knead the dough too much, the scones won’t rise as tall. Knead gently, and just enough to bring the dough together. Adding more flour also prevents the dough from rising as high, so only dust lightly.
Did you enjoy the recipe? Please leave a 5-star rating in the recipe card below and/or a review in the comments section further down the page. Or, follow me on Facebook, Instagram or Pinterest!
Here’s a video I made for the scones, if you’d like some more visuals on the process:

English Style Scones
Ingredients
For the Scones:
- 2 cups all-purpose flour (10 ounces by weight)
- 4 tsp baking powder
- 1/2 tsp salt
- 1/4 cup sugar
- 6 tbsp unsalted butter at room temperature
- 2/3 cup whole milk
- 1 large egg
Instructions
- Preheat the oven to 425 degrees F.
- In a food processor, pulse the flour, baking powder, salt, and sugar a couple times to combine.
- Add the butter and pulse 7-10 times until the butter is completely distributed. You shouldn’t see any chunks of butter, and the mixture should have a sandy texture to it. Transfer to a large mixing bowl.
- In a small bowl, whisk to combine the milk and egg. Save 2 tbsp of it for the egg wash later, and pour the rest into the mixing bowl with the dry ingredients.
- Stir to combine with a spatula, until a rough dough forms.
- Transfer to a lightly floured countertop and knead about 10 times until the dough comes together into a relatively smooth ball. Take care not to knead too much, or the dough will be tougher and not rise as high.
- Roll the dough about an inch thick and use a 2.5″ cutter to cut about 7 circles. Re-roll the scraps and cut out another 2.
- Place the scones onto a parchment or silicone mat lined baking sheet and brush the tops with the reserved egg wash.
- Bake the scones for 13-15 minutes, until about tripled in height, and golden brown on the tops and bottoms. Enjoy!
Notes
Nutrition
Nutrition is estimated using a food database and is only intended to be used as a guideline for informational purposes.
548 Comments on “English Style Scones”
I just made these, the scones are very tender and rise beautifully.
Thanks for this recipe! I lived in Edinburgh for a year and I really miss scones. These turned out perfectly!
Is there a technique for adding fruit ? Blueberries for example. Or would you have another nice easy recipe to do that?
Delicious! Texture more like a biscuit than traditional scone.
These came out super wet and not at all able to form into a dough. I tried adding slightly more flour, nope. I’m so disappointed! Maybe shouldn’t pour all the milk and egg into the flour mixture but bit by bit til a dough forms.
Anyone try adding orange zest to this? Did it work okay?
After visiting England last year, I have tried out several different scone recipes to recreate an English Cream Tea. These ones were SUPER AMAZING! I followed the recipe as written. They rose beautifully, were pillowy and soft and tasted wonderful. I’ve found my scone recipe…hurray!
Love these… So easy…and quick to prepare…for someone who tends to mess up quite often…this recipe comes out perfect evey time
My scones did not rise enough. But we liked them anyway. I was hoping for a little higher, lighter scone.
Loved it! Just as I remember when I lived in Australia. Thank you
I have to wonder if anyone had the same issue as me–dough was so wet I could not salvage it. I practically came out as cake batter. I followed instructions to the tee, butter was room temp (about 68 degrees) and all measurements were precise. How could this be?
I had the same problem! Wish I read your review first. It was just too wet. I wonder how others got theirs to form a dough?
I added a lot more flour. Almost a cup.
Thank you for this wonderful recipe! It’s hard to find a class English scone recipe in the USA, but this one fit the bill! My only issue: While the scones tasted delicious and were light and fluffy, they did not bake up tall. Instead, the stayed flatter and disc-like. I’m wondering what I did wrong. The only tweak I made was to use White Flour instead of regular, but I weighed it to the 10oz. specifications. Any ideas? Otherwise, they were amazing!
Hi,
It’s probably because 10 ounces is not equivalent to 2 cups; 2 cups means 240-250 grams and 10 ounces means 285 grams, so much more, almost 1/2 cup more.
It’s not clear if we should follow the cups measurement or the ounces, because they are not equivalent (in many of her recipes) ?
Maybe Joanne could clarify. Thanks!
Ingrid
If you look at this article from Cook’s Illustrated (https://www.cooksillustrated.com/how_tos/6573-measuring-flour) you’ll see they also take the standard of 5 ounces for one cup. I typically bake by weight but my cups typically measure about 5 ounces like the article says. Hope that helps explain.
So i followed as ordered and put 4tsp of baking soda… Now they have a weird sour after taste. This has to be the wrong measurements. ?
Hi, the recipe calls for baking powder, not baking soda. Big difference between the two. Hope that helps.
damn I was just reading the recipe again, I didn’t pulse the food processor. so I probably beet it too much.
Hi Chris,,,,I am English and we always make scones by hand. Sieve your flour, baking powder into a bowl, add salt. Cut up your butter really small and add to the flour,,,then ‘crumb’ the butter into your flour using only your fingertips until you have a fine crumb look. Add you whisked milk/egg to the flour and using only a knife combine until your dough comes together. Pop onto a floured board and gently knead only once or twice so you have a soft ball of mixture. Lightly pat the mixture to about an inch high, DO NOT USE A ROLLING PIN cut out whatever shapes you prefer and cook as stated in recipe,,,tap the bottom of scones when time is up,,,if they sound hollow they are done
forgot to add the sugar with the flour,,,oooops
‘said’, not sad, I was very careful not to twist the cutter
Ok i don’t know what I did wrong. other than the fact that I didn’t flour the baking paper. but my scones while the right texture came out of the oven looking like biscuits. And my partner said “LOOK DEAR, YOU DID WELL.’ holding out scones with salad on them. I sad they have sugar in them and laughed.