Baklava
This heavenly top-rated Baklava recipe combines honey-soaked layers of flaky phyllo pastry with spiced walnuts. It’s a great make-ahead dessert perfect for the holidays or special occasions. If this is your first time making this sweet treat, prepare to be blown away. This delicious dessert is easily in my top 10 favorites of all time.
If I had to name some of the best desserts of all time, Baklava would be on the list for sure, along with Peanut Butter Pie, Millionaire’s Shortbread, and Creme Brulee.
Anyone who’s tasted this Middle Eastern dessert knows why. The flavors and textures are so unique and so delicious!
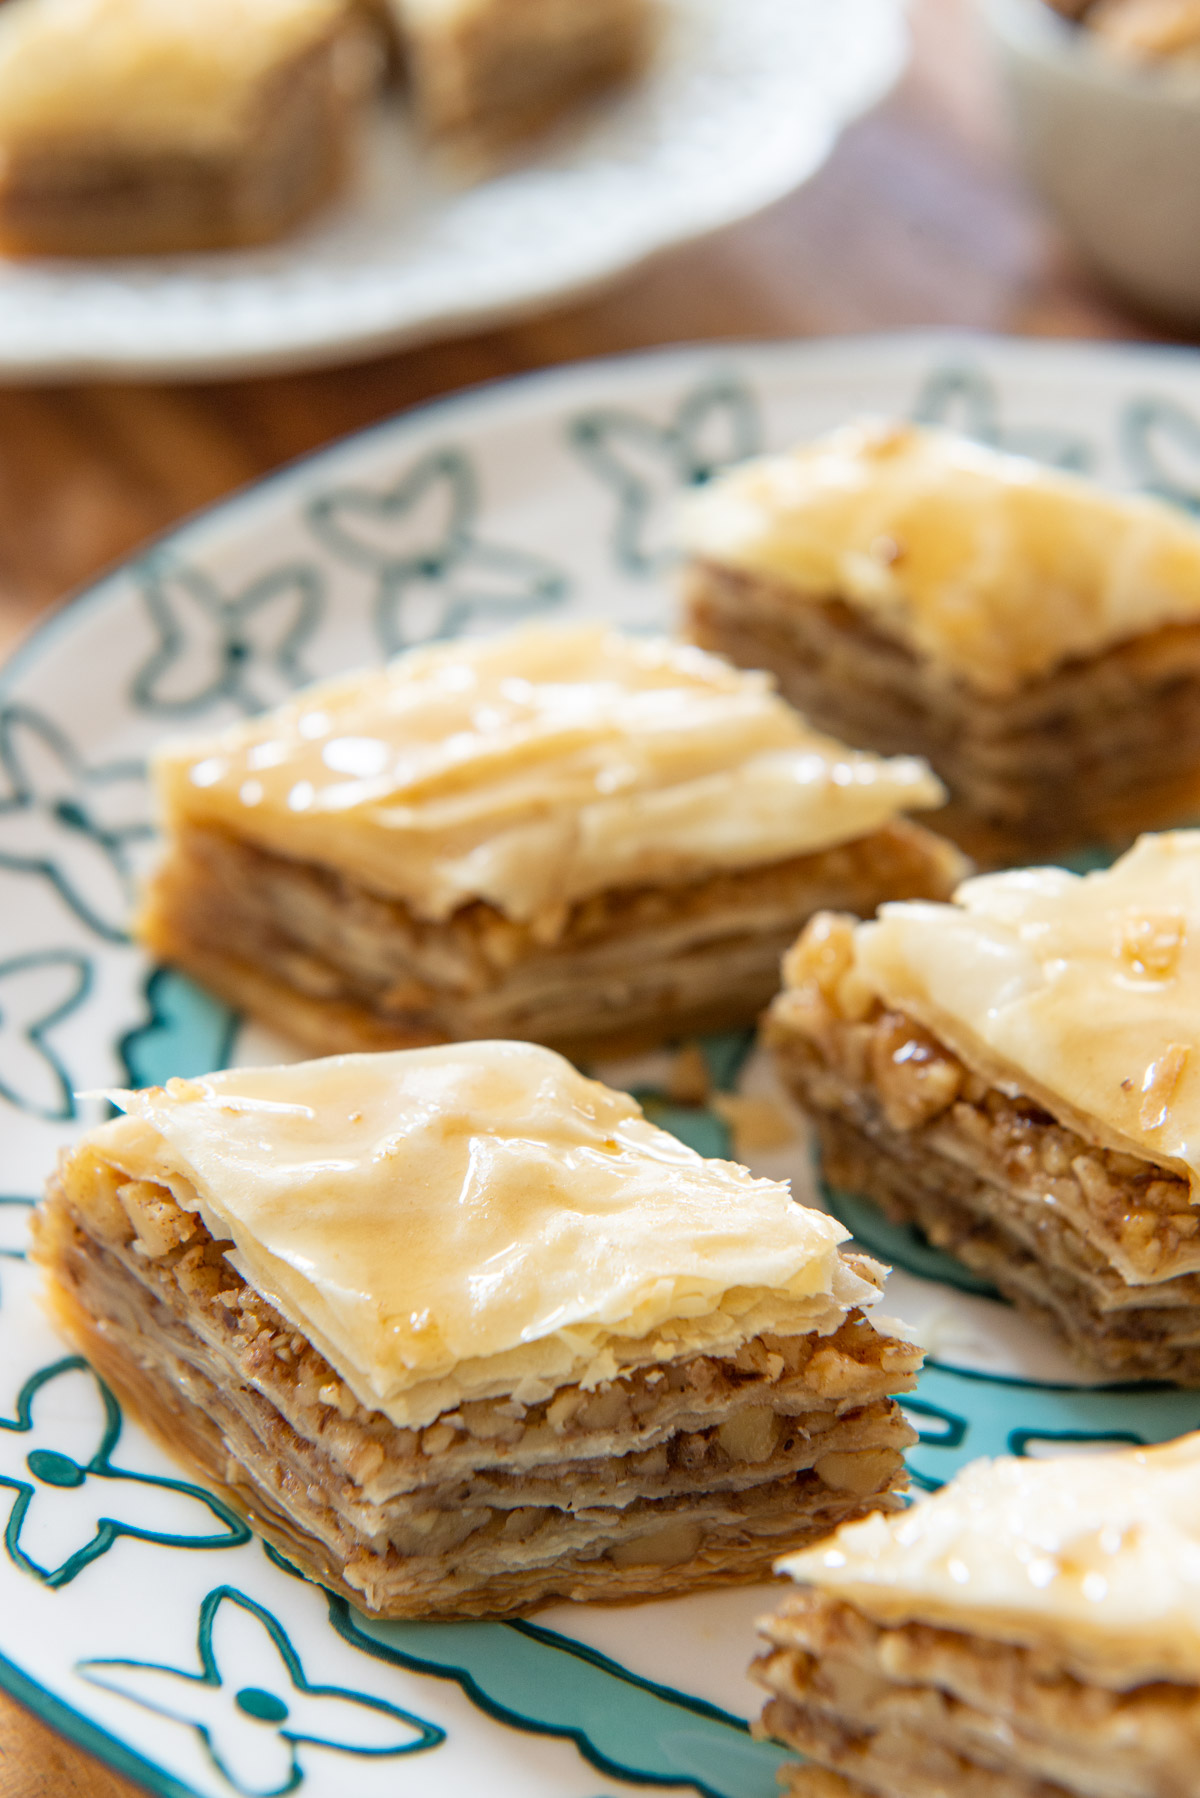
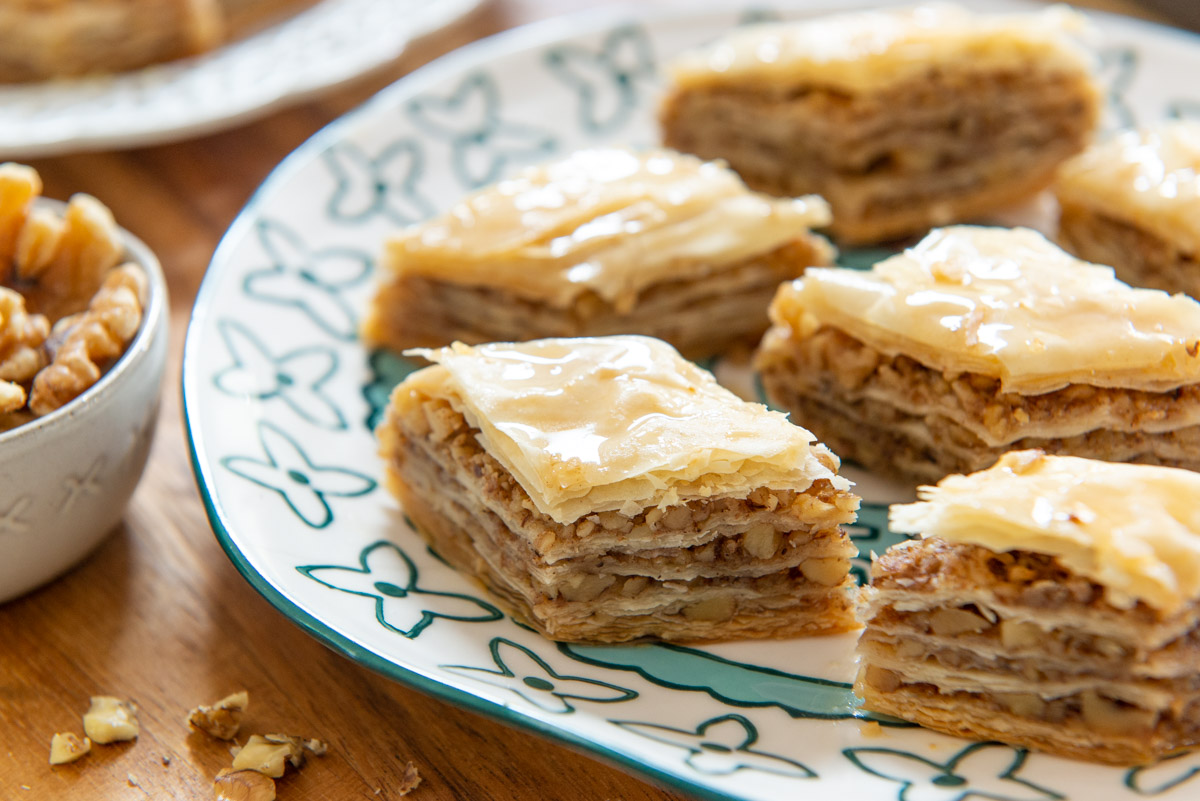
If you haven’t had it before, baklava is a dessert made with layers upon layers of butter brushed phyllo dough with cinnamon scented walnuts in the middle. After you bake it, you pour a citrus honey syrup all over it for each layered sheet of phyllo to soak up.
This dessert is quite sweet, but provided you use a good quality honey, you can really taste those nuances, and the texture has the most pleasing crunch and bite.
Why This Recipe Is The Best
Perfected proportions – I’ve done many rounds of recipe testing and I truly think the proportions here are absolute perfection. Not too many nuts, enough pastry to hold it together well, and while this dessert is sweet, it’s not over the top.
Make-ahead friendly – This is one of the best options for make ahead desserts, since it actually does need to sit for a while after it’s made.
Stores well and freezer friendly – Baklava keeps exceptionally well. It’s fine at room temperature for up to a week, or you can freeze it. If you want to ship some to a loved one, baklava handles travel wonderfully.
Minimal ingredients required – If you take a look at the shopping list in the recipe card, it’s not too long. This dessert is mostly about honey, walnuts and layers of phyllo dough, with some citrus and spices to enhance the flavor.
How to Make It Step by Step:
Baklava is mostly all about layering and assembly. It’s not really a difficult dessert, but just takes some time to put together. For best results, scroll through the following visual guide and read the recipe in its entirety to understand how it’s assembled.
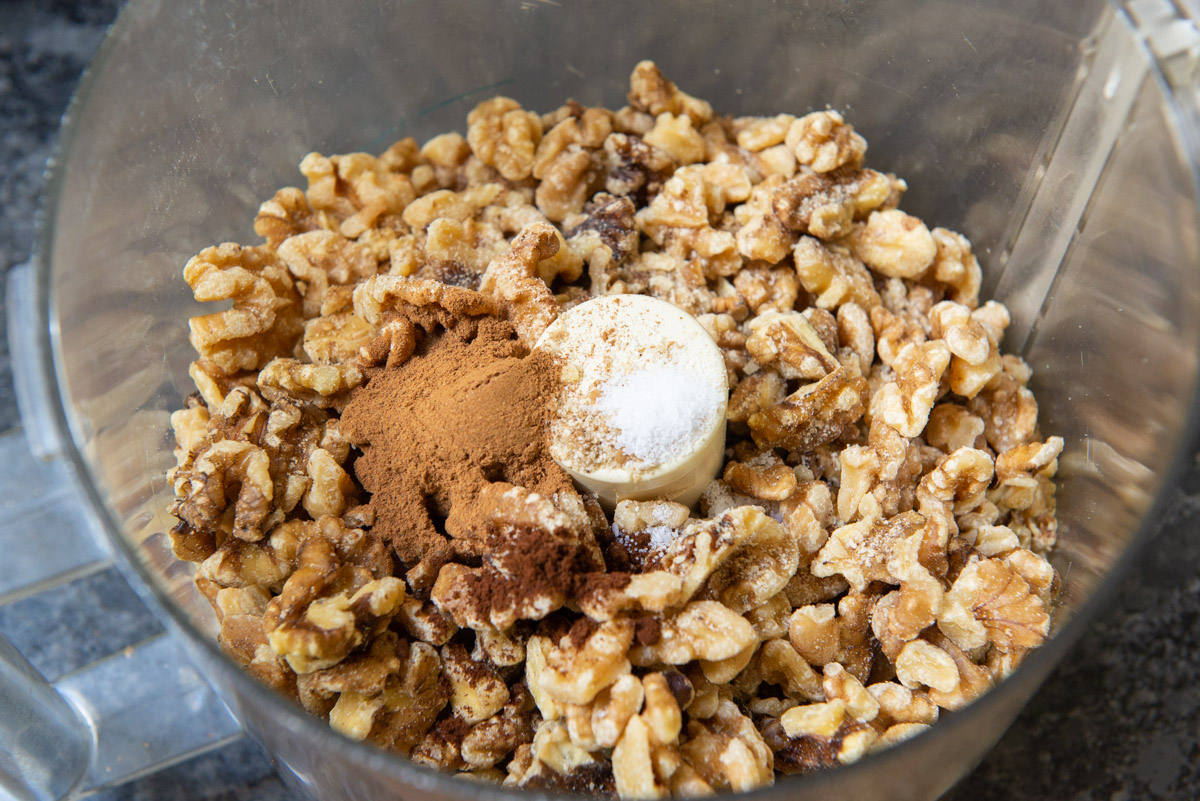
Prepare the Spiced Nut Filling
Place walnuts, cinnamon, cloves, and salt in a food processor:
Pulse about 10 times, until the walnuts are well chopped:
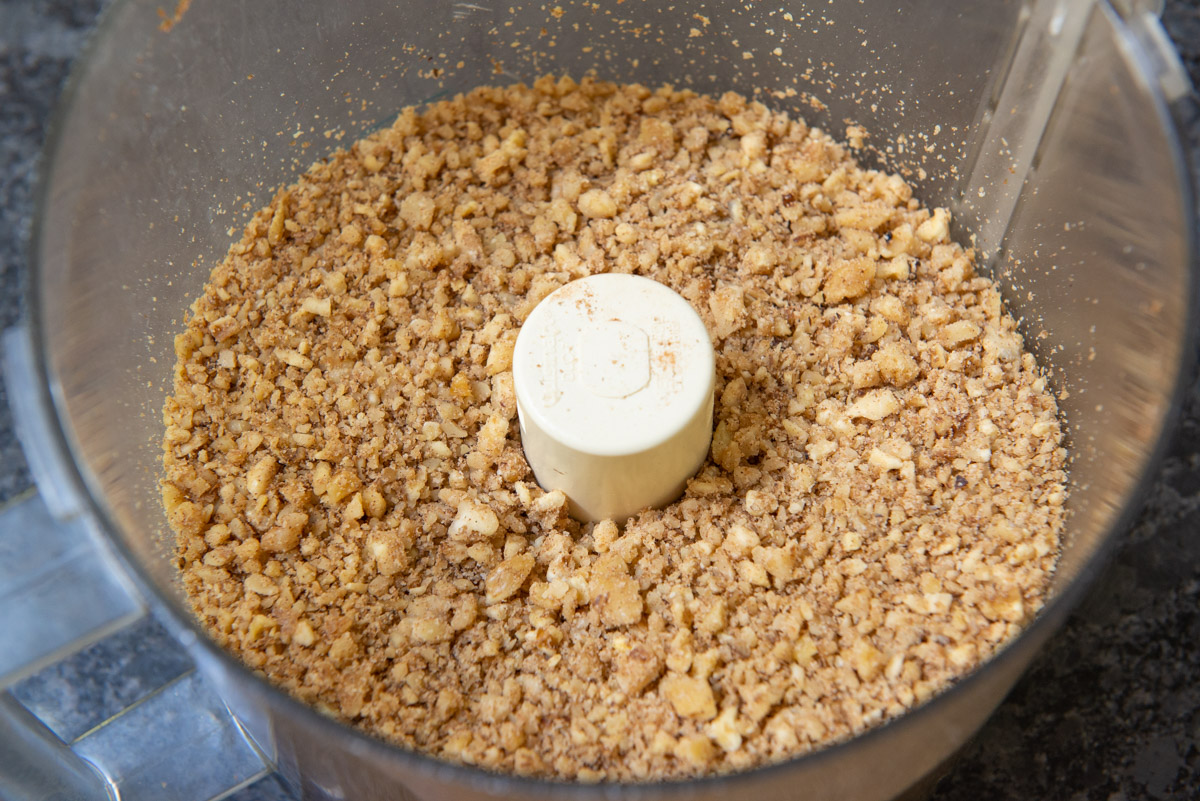
That’s the filling. It’s so easy!
Begin building the layers
Place layers of thawed phyllo dough down into a 9×13 metal pan or baking dish, brushing each one with melted butter:
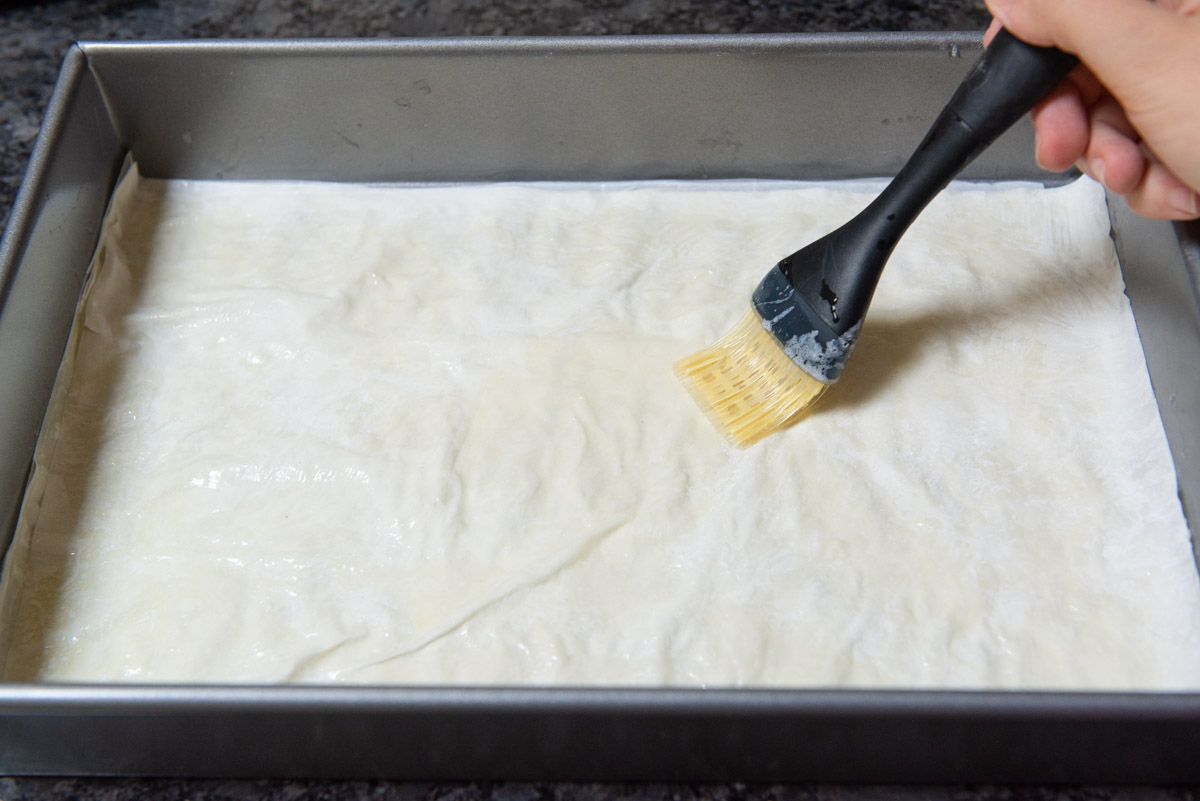
You don’t need to brush each layer thoroughly. Just a quick swish across several times, to cover most of it.
Assembling the baklava, you want to move relatively quickly, to prevent the sheets of phyllo dough from drying out, so no need to be meticulous with the butter. If the phyllo starts to seem dry while you’re working, cover it with plastic wrap or a damp towel.
Once you have 8 layers of phyllo in the bottom of the pan, add about 1/5 of the nut mixture to the pan, spreading it evenly:
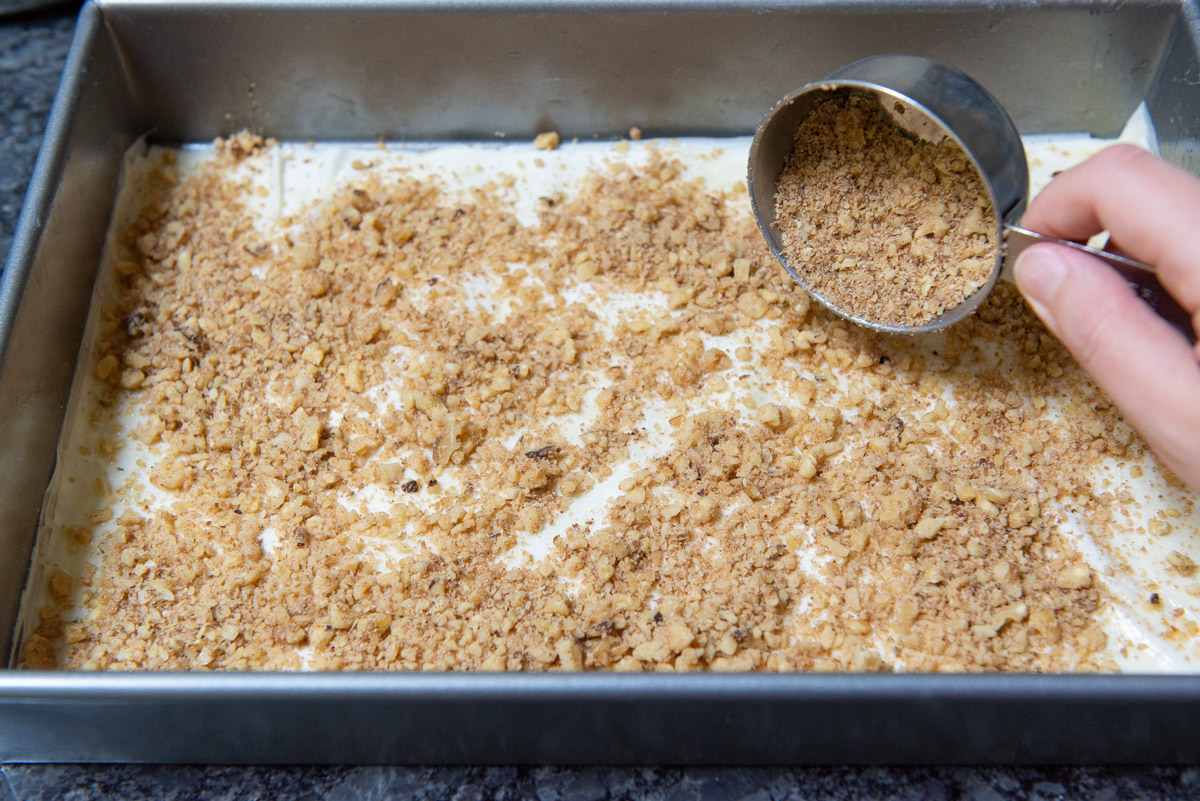
You’ll need about 2/3 cup of the ground nuts for each layer.
How to Make It Perfectly Even:
If you’re keen on making your homemade baklava really even, here’s how I did mine.
I bought a 1-lb box of phyllo sheets, which stated on the box that there were 18 13×18″ sheets.
Using a 9×13 pan, you should cut the sheets in half, which gives you 36 total sheets.
So for the phyllo dough, I did the layers like this: 8, 5, 5, 5, 5, 8, with nut layers in between each of those sets. Note that the top layer and the bottom layer have 3 more sheets of phyllo than the middle layers.
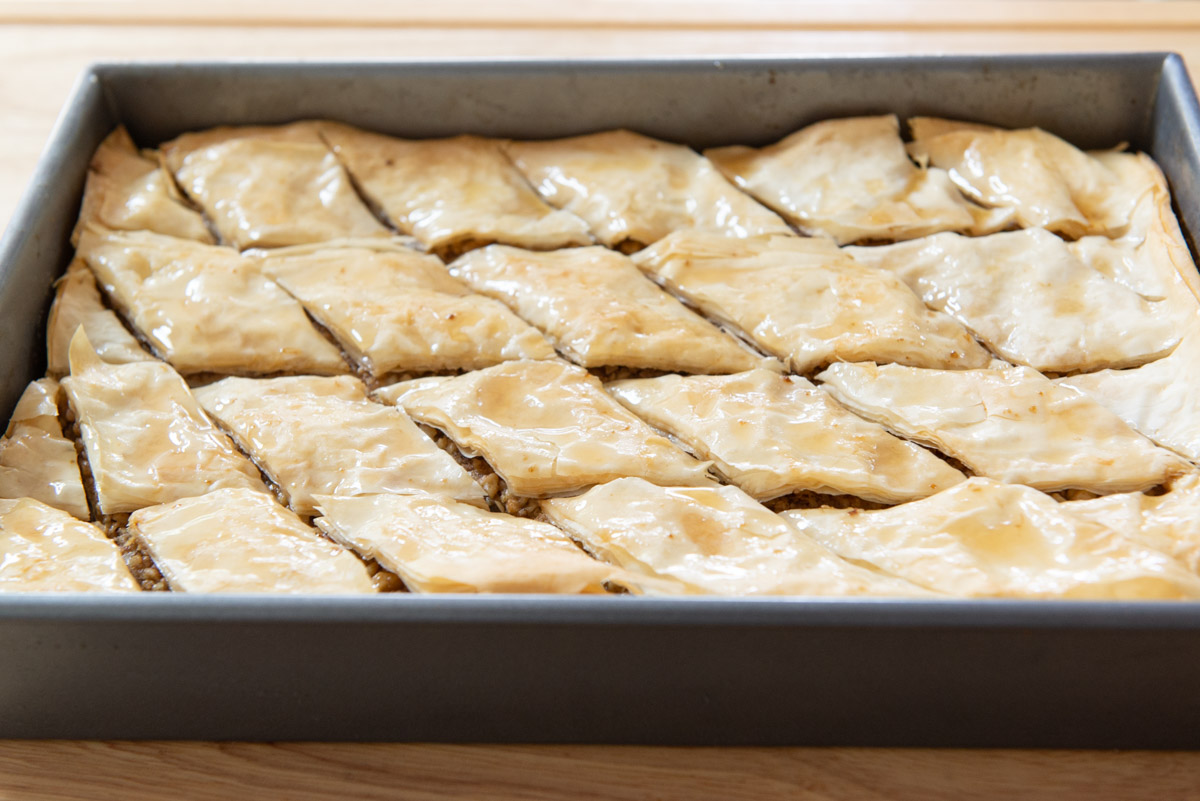
Once the baklava is layered, cut it into pieces using a very sharp knife:
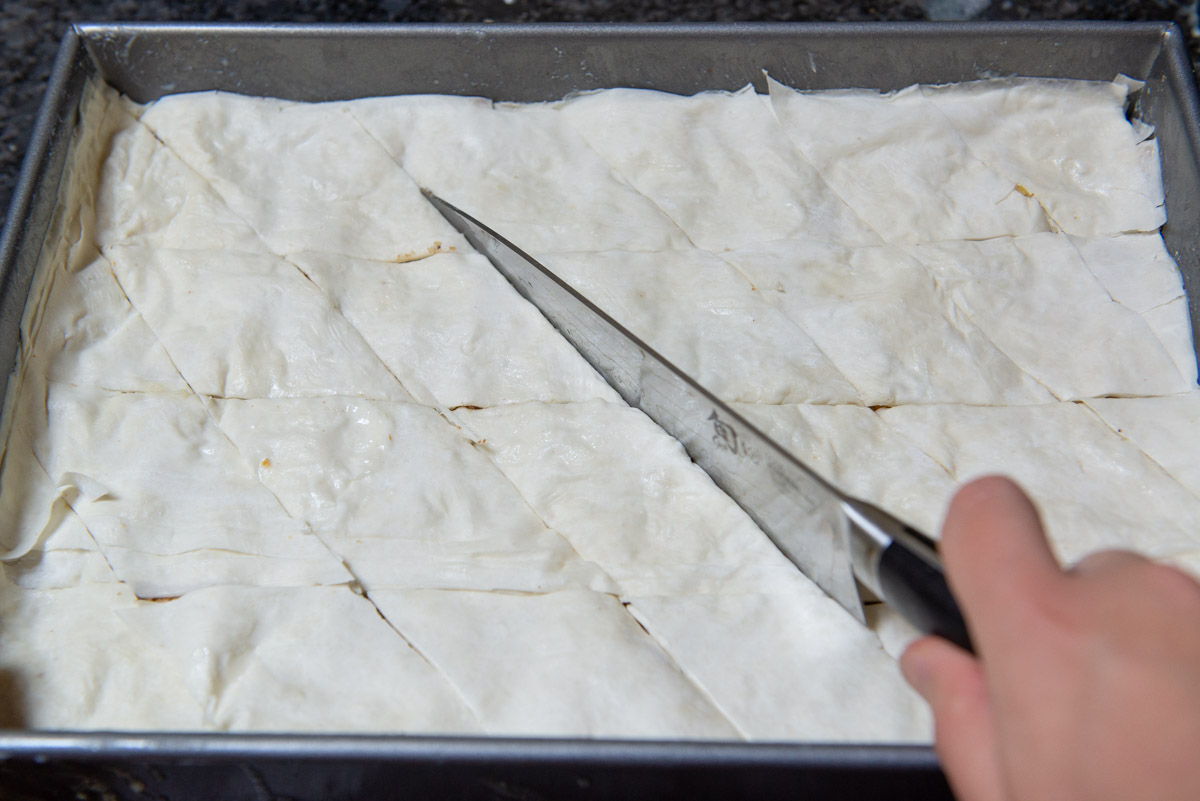
You can do squares, diamond shapes, triangles, or whatever shape you want.
Bake!
Bake the baklava in the oven for 50 minutes, until it looks golden brown on the tops and edges:
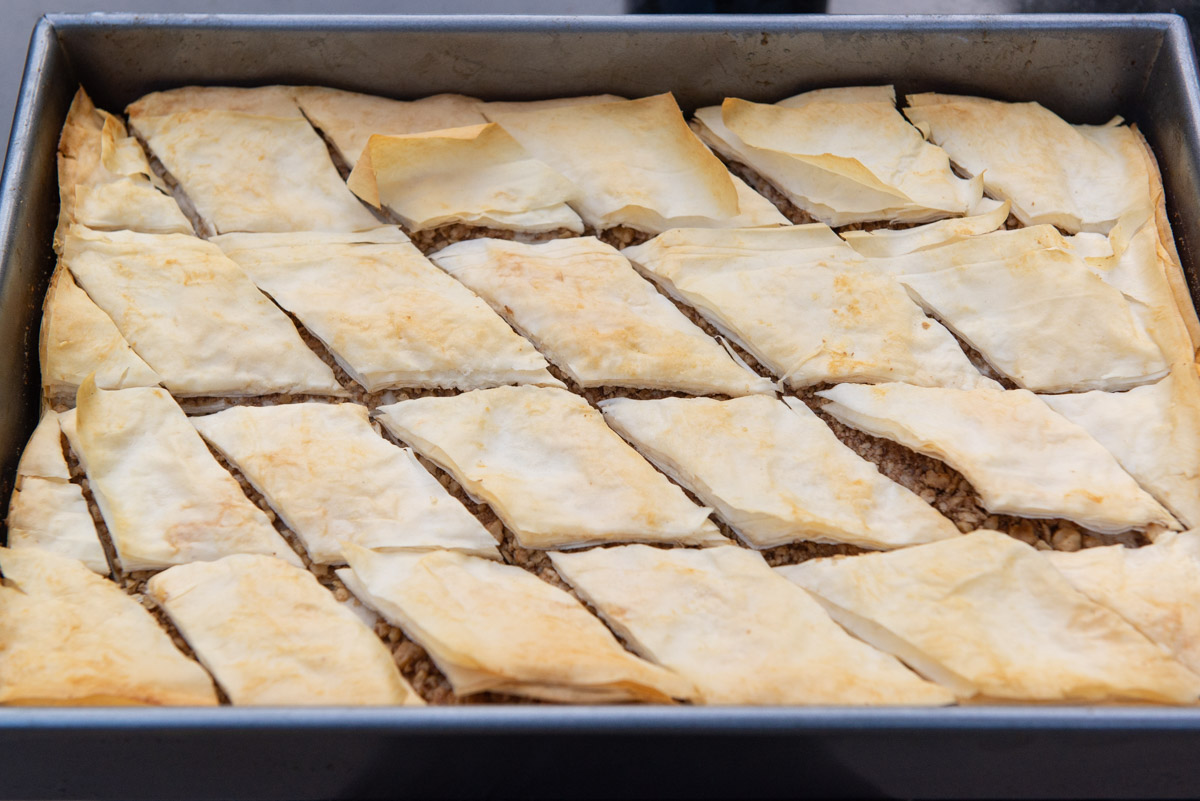
Then let the baklava cool for at least 15 minutes. In my experience, pouring the hot sweet syrup over hot baklava can make the bottom layers soggy. It’s best to let the baklava cool a bit before adding the syrup.
Prepare the Syrup
In the meantime, start the syrup. Combine honey, water, sugar, cinnamon, orange peel, and lemon peel in a small saucepan:
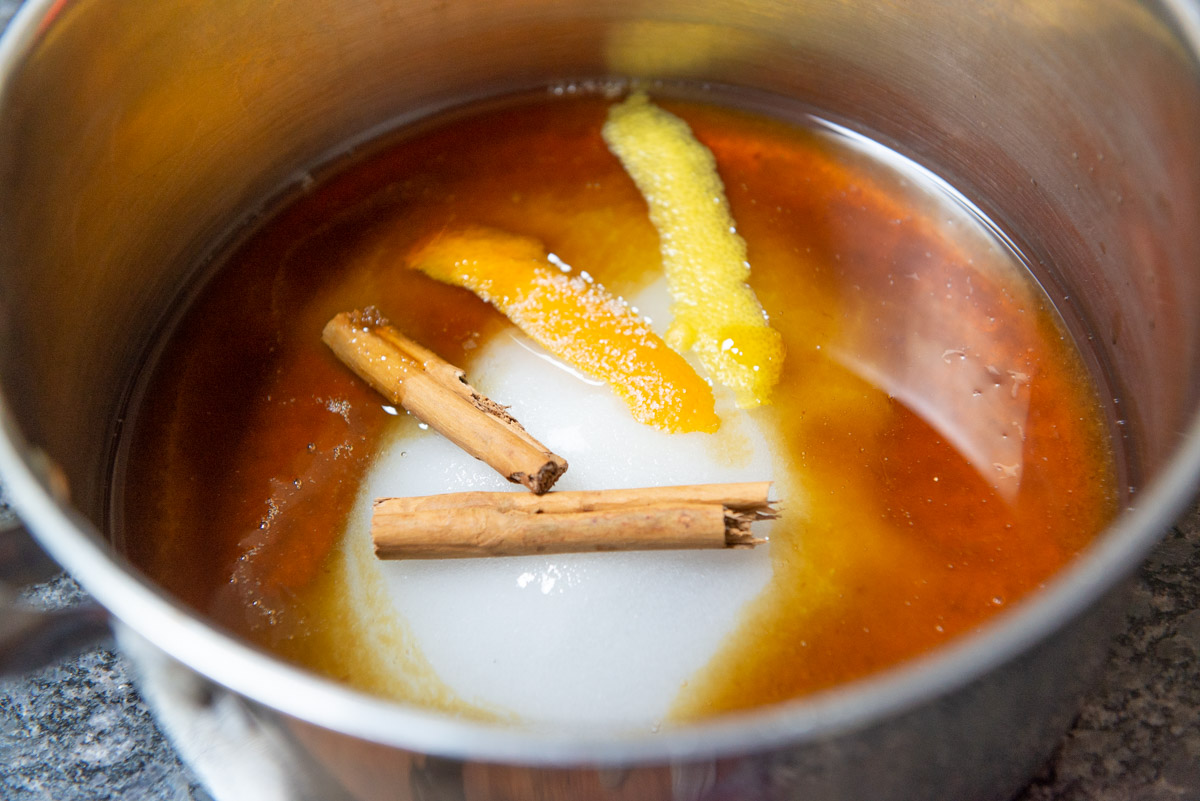
I prefer to use the citrus peels and not any actual orange or lemon juice in the syrup, because the juices can get bitter during boiling. You may also wish to try adding 1 tablespoon of orange blossom water for flavoring, if you enjoy it.
Bring the sweet honey syrup to a boil, then cook for 5 minutes, until the sugar dissolves, and also to allow the cinnamon and citrus to flavor the syrup.
While the sugar syrup is still hot, pour it all over the baklava, which should soak it right up.
It is SO important that the syrup is hot when you pour it over, otherwise it won’t soak properly. Yes, I have tested this.
Let it rest
Now here’s the hard part….leave the baklava at room temperature for 8 hours, uncovered, to let the syrup properly absorb, and allow the flavors and layers to meld together.
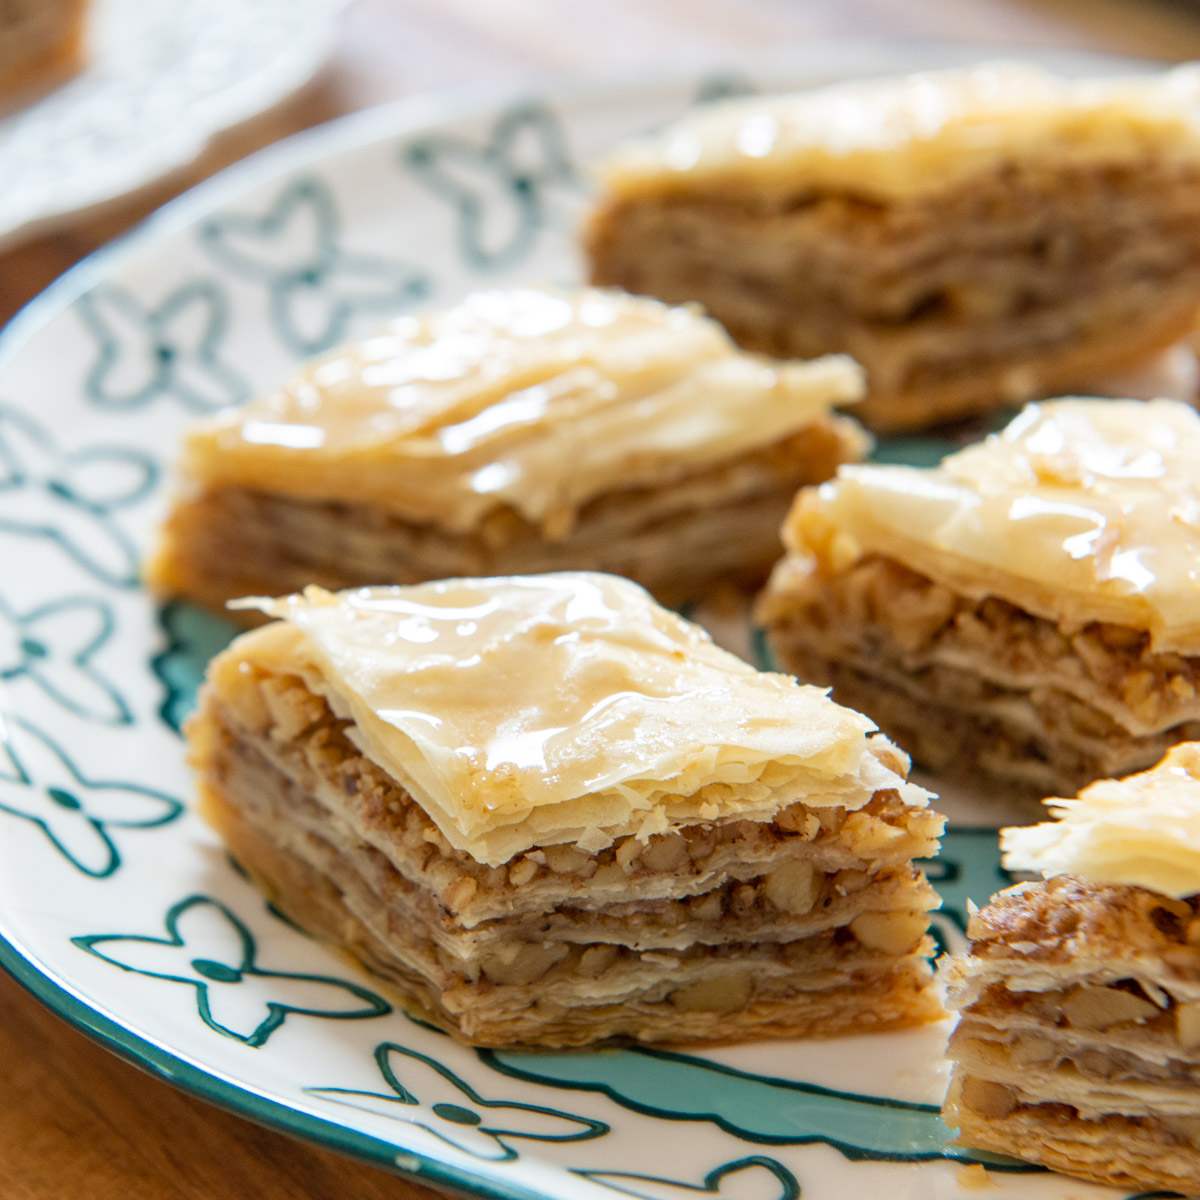
You want to leave it without a cover, to prevent sogginess. Then your homemade baklava is ready to enjoy!
Next try my Rice Pudding or butter swirl Shortbread Cookies. Happy baking!
Recipe FAQ:
Yes, it freezes beautifully. Store for up to 3 months in an airtight container, to prevent absorption of off odors.
Yes, baklava can be stored for one week at room temp. If you want to store it longer, refrigerate for up to 3 weeks, or in the freezer for 3 months.
Yes, and since it needs 8 hours of standing time before serving, it’s the perfect make ahead dessert.
Absolutely. Pistachios are also very popular, and you can do a blend of any nut you wish. However, I really think walnuts have the best taste and texture.
Did you enjoy the recipe? Please leave a 5-star rating in the recipe card below and/or a review in the comments section further down the page. Or, follow me on Facebook, Instagram or Pinterest!

Baklava
Ingredients
For the Baklava:
- 16 oz walnuts
- 1.5 tsp ground cinnamon
- 1/4 tsp ground cardamom (or ground cloves)
- 1/4 tsp salt
- 16 oz phyllo dough* thawed
- 1 cup butter melted
For the Syrup:
- 1 cup water
- 1 cup sugar
- 1 cup good quality honey**
- 1 cinnamon stick
- 1 strip orange peel
- 1 strip lemon peel
Instructions
- Preheat the oven to 350 degrees F.
- Pulse the walnuts in a food processor with the cinnamon, cardamom, and salt until well chopped.
- To assemble the baklava, place 8 layers of phyllo dough one-by-one on the bottom of a 9×13 baking pan, brushing each lightly with butter.
- Spread 1/5 of the walnut mixture evenly on top (about 2/3 cup).
- Add another 5 layers of phyllo one-by-one, brushing each with butter, then add another layer of nuts. The total sequence should be phyllo layers of 8,5,5,5,5,8, with nuts in between those layers.
- Using a sharp knife, cut the baklava into whatever shape you desire (diamonds, squares, triangles, etc). See blog post for picture.
- Bake the baklava for 50 minutes, until golden on the edges and tops. Then let cool for at least 15 minutes.
- In the meantime, bring all the syrup ingredients to a boil in a saucepan, then reduce to a simmer for 5 minutes.
- Remove the citrus peels and cinnamon stick, and pour the hot syrup evenly over the baklava.
- Let the baklava cool completely at room temperature for 8 hours (uncovered, to prevent sogginess). Then it’s ready to enjoy!
Notes
Nutrition
Nutrition is estimated using a food database and is only intended to be used as a guideline for informational purposes.
Post updated in December 2020. Originally published March 2012.
100 Comments on “Baklava”
This recipe was so easy to make. Thanks for the simple instructions (so good!)
Wow, so beautiful! I have to give this a try!
Perfect recipe for Baklava. That sweet syrup is key!
Best tutorial EVER for baklava!
its looks like delicious!! im from Turkey and usually Baklava made with walnuts and pistachio,try it. i know you will like it. I hope so, you can try it in Turkey! 🙂
It looks very nice! We usually liberally butter each layer of phyllo, cut before baking, and use cloves in the syrup, but pretty much the same! I love my yiayia’s family recipe.
No you didn’t! It’s one of my favourite indulgences and although it may sound weird, I’ve recently added some pork to it and it was delicious too!
I suddenly missed my Jordanian colleague, he used to bring a lot of these at office. Yummy sweet treats
Baklava is something I have never tried to make myself…but this looks heavenly!
For some reason I always find homemade baklava more appealing that anything bought from the store..I think because I know it’s fresh.
A superb way to cook. I have never had Bakhlava before, but your recipe and the tips are so helpful that I am surely going to make it and try.
I have never had Baklava! The way you described this recipe makes me want some right now! It sounds fabulous 🙂
ohhhh…baklava…even it’s so sweet I enjoy eating it. Never make at home because my husband doesn’t like nuts, no when a dessert has too much, like this one…ok, I have a very big list of what he doesnt’ like, sometimes I don’t mind of that list.
The first time I’ve seen baklava was from the one of the British cooking show on location to Turkey . I found myself drooling when the man cut up this flaky baklava hahahha Your gorgeous creation deserves some serious drooling , too ! 😉
Looks wonderful. I have only had Baklava once in my life!
These look so delicious!