Crispy Baked Chicken Wings
If you’re looking for the absolute best Crispy Baked Chicken Wings, these are it! I have tested several competing methods against this one, and these reign king, with hundreds of rave reviews in the comments. These turn out extra crispy thanks to parboiling away the excess fat, then cooking in a super hot oven. Less fat, less calories, and healthier than deep-fried!
This recipe is one of the oldest and most popular on my site, and for good reason. A crackly skinned chicken wing is SO good!
I have long been enamored with wings (as evidenced by the many variations of chicken wing recipes on my site, like these Garlic Parmesan Wings, Korean Chicken Wings, and Honey Garlic Chicken Wings), and I’ll use any sports event that comes up on TV as an excuse to make them.
Why This Recipe Is The Absolute Best:
The crispiest crackliest skin, without deep frying – In the 9 years since this recipe has been posted, I have repeatedly revisited this to see if newer methods were better than this one. But I’ve found that this two-part cooking method of parboiling, then baking, gives the crispiest skin.
Easy to scale – Because we don’t have to worry about overcrowding a fryer, it’s easy to make a ton of these at once, and get several trays in the oven. Of course, you can also just make a few.
The healthiest option – I try not to fry in vegetable oil at all anymore, since the evidence is pretty clear that it’s bad news on the health front. I love that these are still wonderfully crispy, but not deep fried in bad oils.
Can be mostly made ahead – You can parboil the chicken ahead of time, then keep in the fridge for up to 24 hours. Then just toss in the oven before you’re ready to serve!
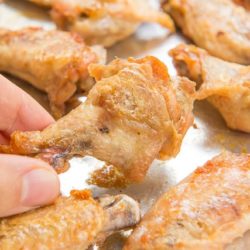
I have done a ton of recipe testing on oven baked crispy chicken wings (and have done many deep fryer renditions as well), and have seen some people using baking powder. The skin felt leathery to me, which you can sort of see in the photo below. I wasn’t a fan.

After lots of testing, the original parboil and bake method from 2012 has always remained king, and you can see in the comments people saying things like, “This was the best ever… did it for Super Bowl, and hubby and I emptied the bowl of wings in minutes!” and “The best crispy baked chicken wing recipe ever!”
Tips for the Best Results
Dry the skin well – Water and moisture are the enemies of crispy, so you will need to make sure to dry the chicken skin thoroughly so they can get supremely crispy.
Flip once during cooking – It’s a little more work to flip the pieces over during cooking, but it really is essential. They won’t get as crispy all over unless you flip them over and give the other side a chance to brown.
Buy “party” cut pieces – It’s true that you can sometimes save a tiny bit of money by cutting the whole wings yourself into wingettes and drumettes (and discarding the wing tips), but pre-cut pieces tend to be more consistent. This consistency in size is essential for even cooking and browning. If you have some larger pieces and some smaller, you’ll have a mix of over and underdone chicken.
How to Make It Step by Step:
Here’s an overview of the game plan.
- Cut the chicken wings into drumettes and wingettes, if needed. If you buy “party wings” at the store instead of whole, they are already prepped for you. I recommend this to save time and hassle.
- Simmer the chicken in salted water for about 7 minutes, to render excess fat.
- Dry them thoroughly.
- Place them face down on a sheet pan and bake, flipping once while cooking.
- Coat in sauce, and serve.
Let’s look at some step by step photos.
Parboil first to render some fat
Parboiling is one of the secrets for superior crispy skin. All parboiling means is we’re going to partially cook the chicken in simmering water before baking in the oven.
Boiling meat feels very strange, but I’ve done test batches comparing parboiling to straight baking, and parboiling is the way to go. It helps get rid of some of the excess fat so they turn out crispier.
It’s kind of like when you have to render out the fat on a duck breast in order to get it crispy. Parboiling boils away some of the excess fat so we can get a thin layer that crisps more easily than a thick and flabby layer.
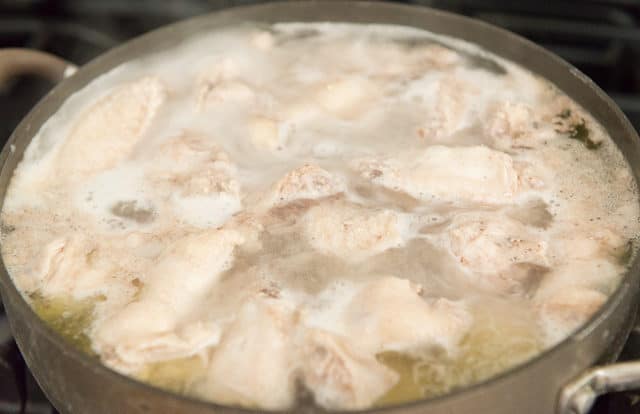
Make sure to bring the water to a boil over high heat, then reduce the heat slightly to a simmer.
Drain in a colander
After parboiling for 7 minutes, drain the chicken in a colander or on a wire rack:
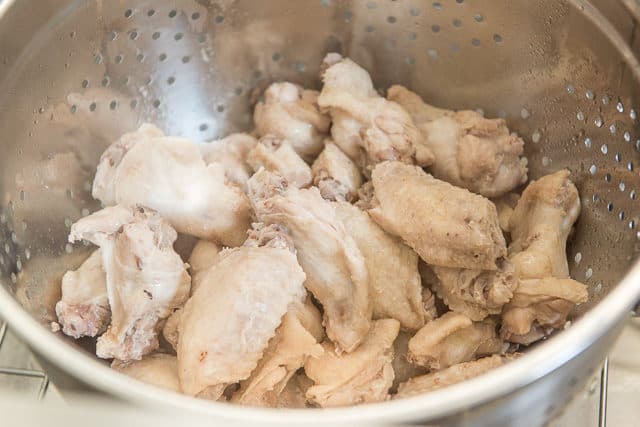
Really let it sit for a few minutes so the steam can finish burning off.
Dry the pieces even more
Lay the chicken pieces out on paper towels and dry very well, giving each one a squeeze.
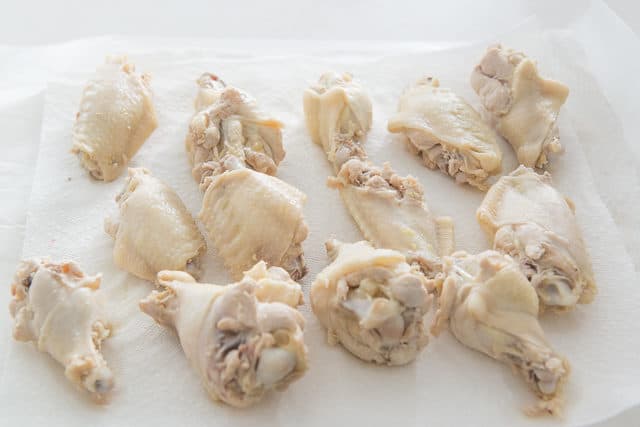
If you want crispy results, you have to dry thoroughly
It’s REALLY important to dry the pieces well with the towels, because it has a big impact on how crispy they will end up later. In order for the skin to get crispy, all the surface water must evaporate and cook off first, so you want as little there as possible from the start.
Want to add seasoning?
If you’d like to add some sort of seasonings or a dry rub, now is the time to rub it onto the chicken. Popular choices are garlic powder, onion powder, chili powder, and of course, black pepper and kosher salt. However, because I like to add the flavorings via the sauce, I do not add any spices to the meat here.
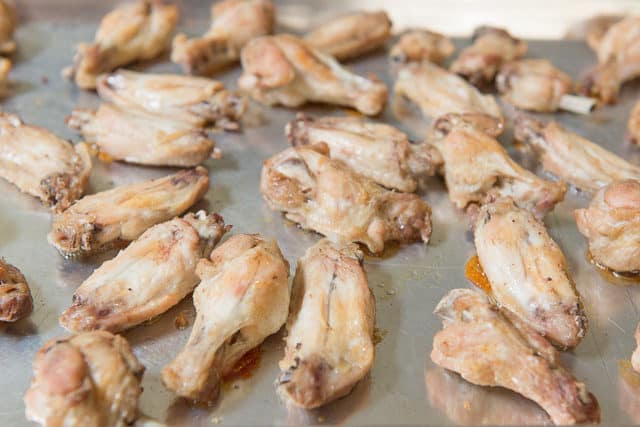
Get them in the oven!
Lay the wings in a single layer on a rimmed baking sheet, and bake in a 450F oven for about 25 minutes, until you start to see golden brown bits on the bottom of the wings.
Look closely, and you can see golden bits peeking out from the sides here:
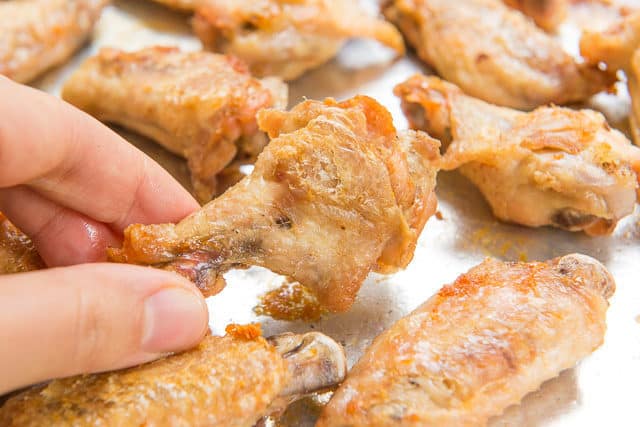
Flip them over
Flip all the pieces over, and you can see those caramelized parts starting to develop:
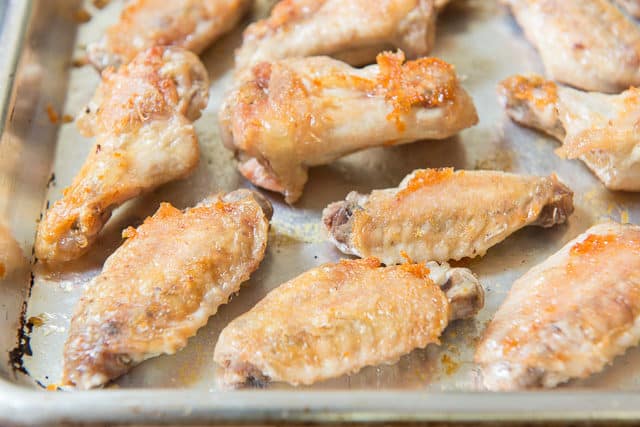
This is what we want! But, we need to cook it more. Most of it is still isn’t crispy yet.
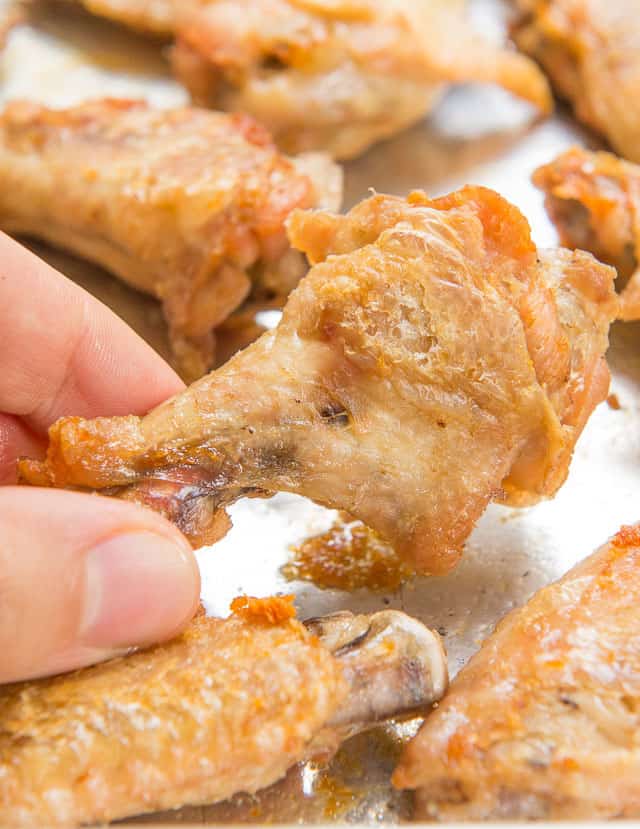
Continue baking for another 5-10 minutes, until much more of the skin has crisped:
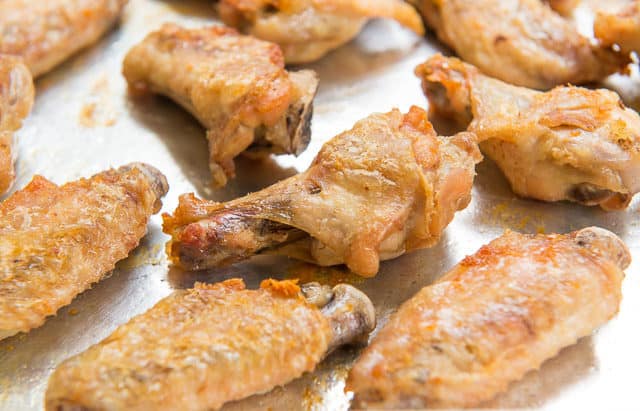
Variations on Baking Time: Size Matters
The sizes of chicken wings at grocery stores vary hugely, so the visual cues are incredibly important! Make sure to look at the photos above, and to use the baking times as estimates, but go more by visual cues. If the wings turn out dry, this means they were overcooked. They definitely shouldn’t be dry on the inside.
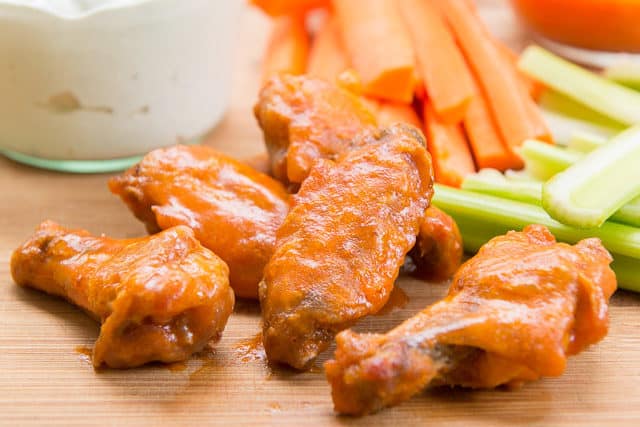
Now you should have the crispy wings that you desire, ready to be paired with a cayenne hot sauce, blue cheese dressing, celery sticks, or whatever your heart desires.
Toss in your preferred sauce
At this point your crispy baked wings are ready to be tossed in a large bowl with Buffalo Sauce (assuming you want to enjoy these as the classic buffalo wings, but oven baked), and devoured.
Don’t like spicy sauce?
If you prefer something that isn’t spicy, you may like Garlic Parmesan Wings better. I also have sweet and spicy Korean Chicken Wings, Honey Garlic Chicken Wings, or you can toss in BBQ Sauce. Feel free to try out your personal favorite sauces, as this cut of chicken is like a blank canvas that works well with most flavors.
What to Serve with This Recipe:
Serve your delicious wings with a side of Blue Cheese Dip if you’re doing classic Buffalo Sauce, along with celery sticks and carrot sticks. This is one of the most popular and favorite dips on the blog.
You can also do a side of Buffalo Garlic Knots and Buffalo Chicken Dip (or the Crockpot version, Crockpot Buffalo Chicken Dip) to round out a full spread of tasty appetizers for football or game day snacks!
I also love making Homemade Guacamole and a pot of Ground Turkey Chili.
How to Make Sure The Meat Doesn’t Stick to the Pan
A few people have reported issues with the wings sticking to the pan. This means they were too wet when they went into the oven.
Make sure to:
- Dry the wings very thoroughly after parboiling. As stated in the recipe, let them air dry for a few minutes (you will literally see steam evaporating off the wings as they cool). Then dry them very well with towels, squeezing well.
- If you want extra insurance, you may grease the pan with a high smoke point oil, like ghee, tallow, avocado, vegetable, canola, etc. Just make sure you don’t put parchment paper or a silicone mat underneath the wings, because they won’t crisp up the same.
- Bake on an uncoated sheet pan (affiliate) for best results, and use a turner like this (affiliate) to really get under the wings and scoop the crispy bits off.
Tips and FAQs:
I only recommend you bake these fresh. They won’t stay crispy later.
Yes, go through all the steps of parboiling the wings and drying well with a paper towel, then place the chicken pieces on a sheet pan and refrigerate UNCOVERED for up to 24 hours. Then all you have to do is pop them into the hot oven and bake them. Because they will be cold, they will likely need to bake a little longer.
Never cook meat from a frozen state, always thaw first. Because you will be parboiling these anyway, you can thaw them quickly in cold water, then parboil them.
Yes, definitely! Parboiling renders out some of the fat, and the remaining fat is used to crisp the wing naturally. Plus, the vegetable oils most people use for frying are very unhealthy.
Absolutely. Unfortunately, frozen meats lose moisture in the freezing process. This is true not just for chicken but also beef, pork, etc.
Yes, these are made without baking powder, without flour, without breading of any kind. They are also Paleo, Whole30, and friendly to other kinds of eating styles. You can add the sauce of your choice or eat them as is.
In a 450F oven, bake for 25 minutes, then flip and bake for about 10 more minutes, until crispy on both sides.
Did you enjoy the recipe? Please leave a 5-star rating in the recipe card below and/or a review in the comments section further down the page. Or, follow me on Facebook, Instagram or Pinterest!
Crispy Baked Chicken Wings
Ingredients
For the Chicken Wings:
- 2 lbs chicken wings "party style" (pre-cut into wingettes and drumettes)
- salt
What to Serve With Them:
- Blue Cheese Dip
- Cut celery and carrot sticks
- Buffalo Sauce
- Buffalo Garlic Knots
Instructions
- Preheat the oven to 450 degrees F.
- Heat up a big pot of boiling water. Season the water like you would for cooking pasta (taste the water, it should taste a little repulsively salty, like sea water).
- Add the chicken wings to the pot, and reduce the heat slightly to keep them at a simmer for 7 minutes.
- Drain the chicken pieces in a colander, then place them on a wire rack for a couple minutes, letting the steam evaporate from the cooling wings and also letting any excess moisture drip down. Then dry them very well with paper towels or highly absorbent kitchen towels.
- Place the chicken wings directly on a metal sheet pan, with the fattier top side down.
- Bake for 25 minutes on the first side, then flip the pieces over and bake for another 5-10 minutes on the other side, until the skin looks golden and crisp. Make sure to keep your eye on them, particularly if you have smaller wings, to check for doneness. Overcooking risks drying the inside out.
- If serving the wings with sauce, coat them while they're hot out of the oven. Enjoy!
Notes
- Dry the wings very thoroughly after parboiling. As stated in the recipe, let them air dry for a few minutes (you will literally see steam evaporating off the wings as they cool). Then dry them very well with towels, squeezing well.
- If you want extra insurance, you may grease the pan with a high smoke point oil, like ghee, tallow, avocado, vegetable, canola, etc. Just make sure you don’t put parchment paper or a silicone mat underneath the chicken, because the skin won’t crisp up the same.
- Bake on an uncoated sheet pan (affiliate) for best results, and use a turner like this (affiliate) to really get under the pieces and scoop the crispy bits off.
Nutrition
Nutrition is estimated using a food database and is only intended to be used as a guideline for informational purposes.
Post updated in August 2020. Originally published in 2012.
817 Comments on “Crispy Baked Chicken Wings”
We made your wings for Superbowl (Go Ravens!) and they were AMAZING!!!!!!! Who would have thought that parboiling was the way to go??? They were crispy AND tasty. And we didn’t feel gross after eating nearly a dozen each!!! Cooked on foil, but a few stuck. We made half in a basic hot sauce (butter and Franks Red Hot) and half in this amazing sauce;
1/2 cup Sriracha
1/2 cup unseasoned rice vinegar
1/4 cup mirin (sweet Japanese rice wine)
1/4 cup red currant or strawberry jelly
12 chicken drumettes
Bon Apetit, 3/2012
Delicious. Thanks for this wonderful recipe, Joanne. We will make it again!!!
These were awesome! I made half with the hot sauce, and half subsituting the hot sauce for bbq sauce. They came out great 🙂 The only thing I’ll do differently next time is to turn them the last 10 minutes of the 30 instead of baking them for an additional 10. Mine came out a little dryer than I would have liked, but my husband and I still scarfed these down!
Thank you so much for sharing! I love your website SO much!!! I have saved a ton of your recipes, and they’ve all become staples in my kitchen 🙂
I made these for dinner tonight. I did half buffalo and half BBQ and they were AMAZING! They were so crispy. Will make these again.
These wings are a family go to meal. I make my own rub and the young kids and I eat those and then I make the buffalo with my own buffalo sauce. The cookng method is what makes them so good.
Another favorite on this site is the 40 garlic chicken. I have made it following the recipe exactly and varying it with 120 cloves, just wine and or strawberry meade and chicken thighs. Anyway you make it the chicken is moist and mouth watering. My 8 yr old requests it on his night to choose what is for dinner.
Thanks so much for your nice comment Lisa!
To anyone that leaves a negative review obviously made some mistake along the way.. Ultra crispy! More affordable alternative than ordering from ANY wing restaurant, and just as good. Two thumbs up
Thanks Corey =) So glad you liked the wings!
I made these yesterday for Super Bowl and got rave reviews, best wings anyone has ever had! So crispy. Thank you for posting this recipe!
These wings were AWESOME !!! We did hot and garlic parm. The first batch did stick, so we used Pam on the second batch and they were perfect !! Will definetly be using this recipient all the time now.
These turned out awesome. Definitely a keeper !
tried these tonight, really yummy!
Betsy
I was very, very suspicious about boiling my wings, but I followed you instructions and they turned out great! Much better than deep friend because they had all the crispiness without all the greasiness, thanks for sharing. I will be telling everyone!
I was beyond disappointed with this recipe!! I was really looking forward to these, and they stuck to the pan like crazy. Thankfully, I made them for just my husband and myself, as I would not serve these to guests when they were missing half the skin.
Cooking them as I type, they are boiling now….we always order wings, this is my first time doing them myself! I will let you know how they turn out 🙂
OMGosh! Definitely taste fried….amazing! Thank you for the recipe!
I have had this pinned for like 6 months and FINALLY made them….5-stars! These were perfect! If I hadn’t made them myself I would have swore they were fried. I’m smitten! Thank you for sharing this. I hate slimy rubbery homemade chicken wings. Now I just have to find the perfect sauce =) Thanks!
YAY!!! I’m so glad you loved them. Thanks for stopping by to let me know how they turned out =)
Parboiling !!! Yes, that makes total sense! THANK YOU for putting this recipe up!
I’m gonna try your recipe this year for the Super Bowl.
(Since the Giants aren’t playing, I have time to pay attention to the cooking this year! LOL)
Im sure someone else asked this but I didn’t read all the comments, but do these work well with the flat wing pieces & if so, do I bake them on a metal rack on a cookie sheet or do I just lay them on a cookie sheet (also did you use Pam?)
Yes, it works well for both the drumsticks and the flat pieces (wingettes). Place them directly on the cookie sheet, they will get brown against that hot flat surface. I don’t suggest spraying with Pam, there should be enough fat there from the skin. Enjoy!
I’m addicted to hotwings but they are so expensive at the restaurant and I hate frying anything (it stinks up the house). I’ve tried baked ones before but they were meh. Can’t wait to give these a try! My smoke detector will go off, it always does when I bake at high temps, but it looks like the noise will be worth it=)
Made this tonight~and got a Great response~will definately do again.Thanx